SCION xA/xB Light Enhancement 2006 - INTERIOR LIGHT UPGRADE
Section II – Installation Procedure
Page 7 of 11 pages
PPO
Rev: A 05/10/05
2. Pilot drill the center mark using the #20 drill
bit.
3. Using a 1/2” drill bit (Uni-bit or step drill is
highly recommended), drill the switch hole.
4. Clean the console surface to remove grease
and wax.
i. Wipe the application area clean with 3M
Prep Solvent – 70 and a clean no-scratch
cloth.
ii. Rinse the application area clean with
distilled water and a clean no-scratch
cloth.
iii. Dry the installation area using a clean, dry,
lint free cloth.
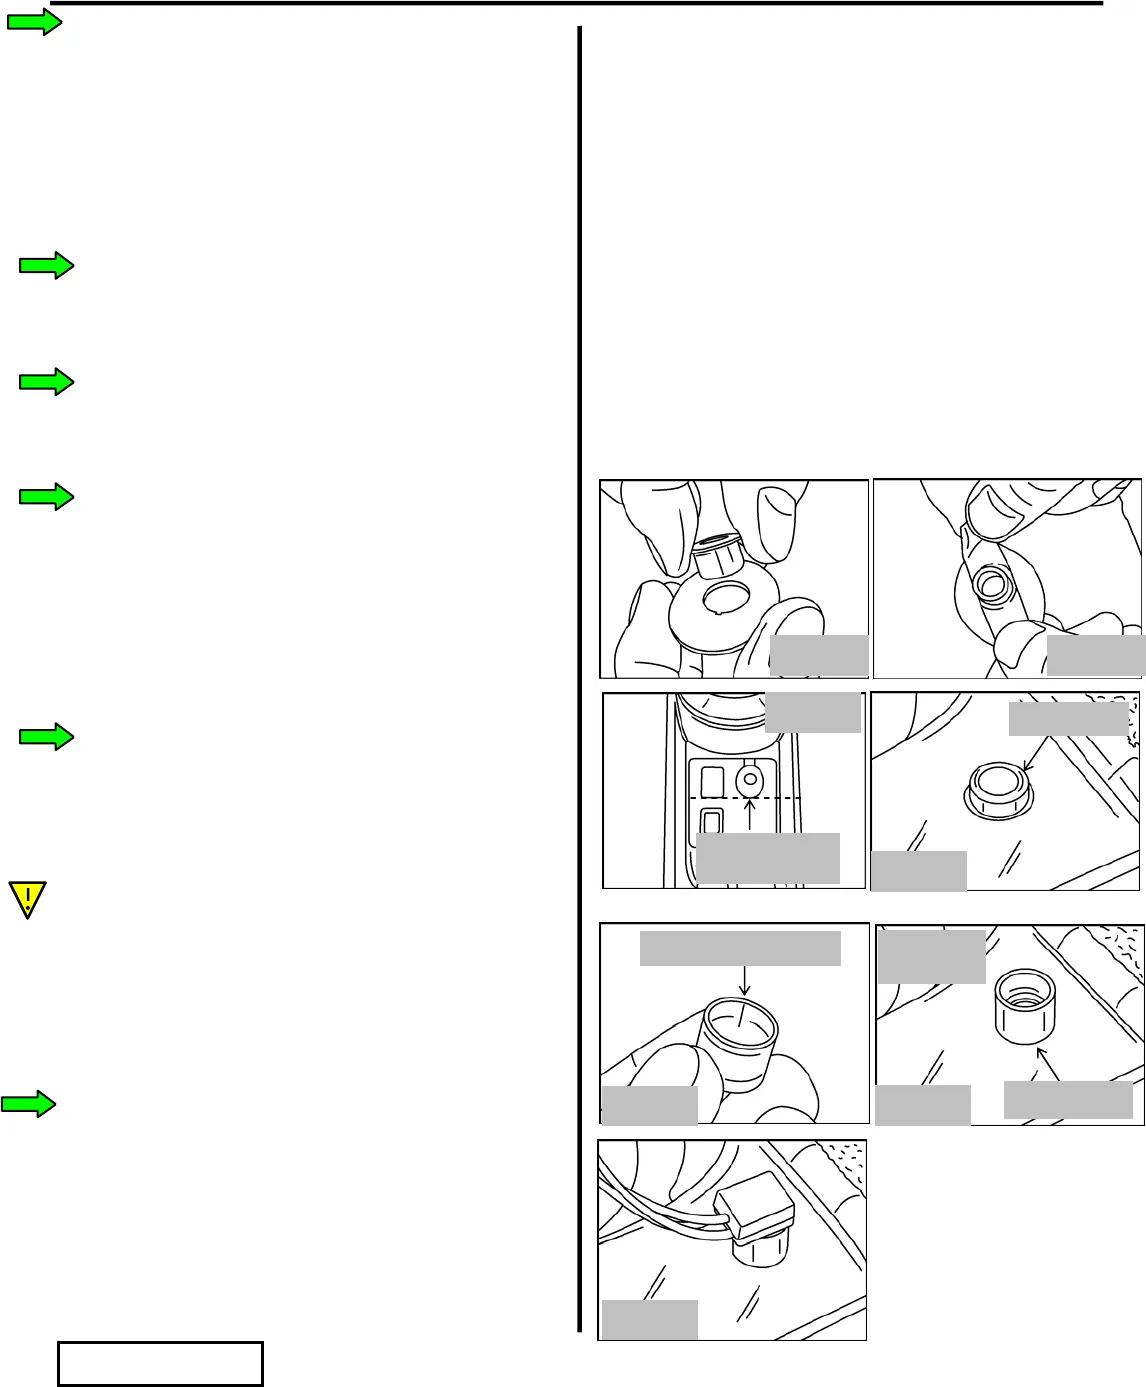
5. Insert switch bezel into the switch plate.
(Fig. H2)
6. Using the pull-tab, remove the tape liner from
back of switch plate. (Fig. H3)
i. Avoid finger contact with the adhesive
surface.
7. Using the bezel as a guide, install switch
plate/bezel into the previously drilled ½” hole.
i. Align the printing “ILLUMINATION”
square to the console. (Fig. H4)
ii. Once aligned, press down firmly to adhere
tape.
8. Install sleeve to bezel.
i. The “white” ink end of the sleeve must be
installed against the console.
(Fig. H5, H6&H7)
9. Install switch to bezel as shown. (Fig. H8)
i. Turn switch clockwise to tighten.
Fig. H8
Fig. H2 Fig. H3
This side against console
Fig. H6
Fig. H7
Press sleeve
onto bezel
White ink here
Fig. H4
Align printing
square to console
Switch bezel
Fig. H5


