SCION xA/xB Light Enhancement 2006 - INTERIOR LIGHT UPGRADE
Section II – Installation Procedure
Page 5 of 11 pages
PPO
Rev: A 05/10/05
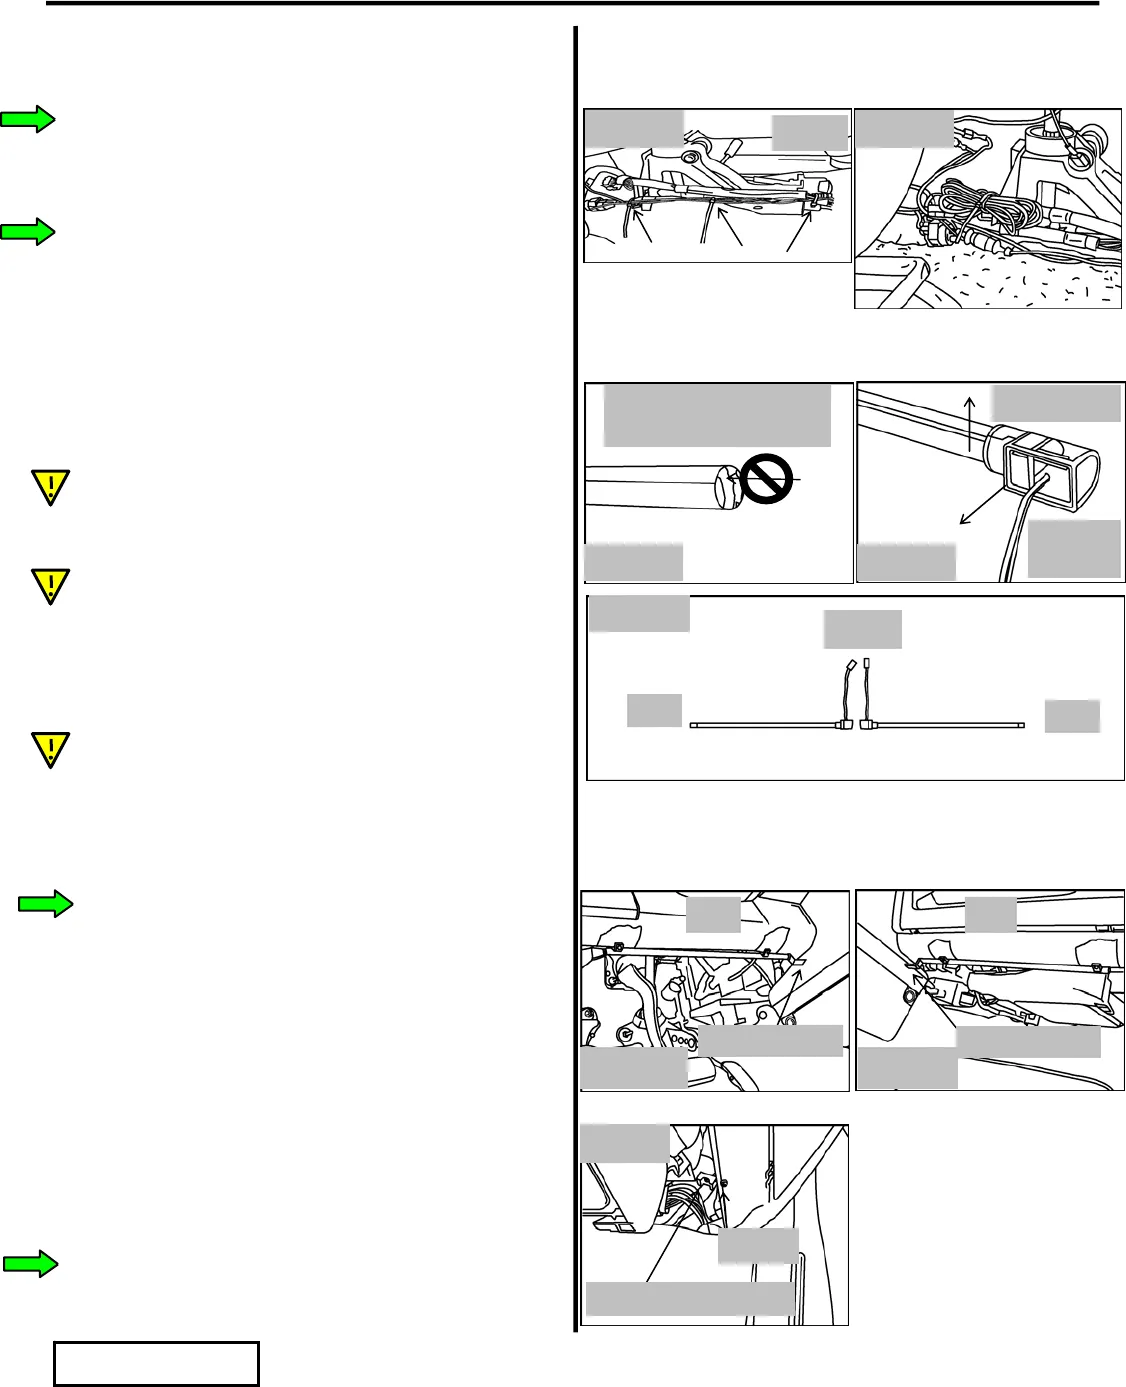
12. Feed the harness rearward.
i. Wire tie the harness as shown. Wire tie the
fuse holder on top of the factory harness.
(Fig. E14)
ii. Wire tie the unused, bundled, rear light
guide harness to the vehicle harness as
shown. (Fig. E15)
F. Install the LED Modules to the Light Guides
1. Push the LED Module (L/M) firmly onto the
Light Guide (L/G).
i. The L/M is installed on the “clear” end of
the L/G. Do not install the “reflector end”
of the L/G into the L/M. (Fig. F1)
ii. The L/G should be oriented with the white
“reflector” at the top with the wires of the
L/M directed forward. (Fig. F2)
2. Assemble the (2) L/G assemblies.
i. The L/M are oriented toward the center of
the vehicle with the wires directed
forward. (Fig. H3)
G. Install Light Guide Assembly, Front
1. Apply masking tape to the areas where the
drill fixture will come into contact with the
lower dash.
2. Install the lower dash drilling fixture.
i. Driver Side (Fig. G1)
ii. Passenger Side (Fig. G2)
3. Drill the holes with a #20 drill bit.
4. Remove the masking tape.
5. Install the metal bracket/plastic mount
assemblies to the lower dash holes. (Fig G3)
Fig. F1
Do not install “reflector
end” into Light Module
Wires
forward
Fig. F2
Reflector up
Screw
Metal brkt/
lastic mn
Fig. G3
Fron
Fig. E14 Fig. E15
LF
RF
Front
Fig. F3
Fig. G1
Ali
n fixture here
DS
Fig. G2
PS
Ali
n fixture here


