SCION xA/xB Light Enhancement 2006 - INTERIOR LIGHT UPGRADE
Section II – Installation Procedure
Page 4 of 11 pages
PPO
Rev: A 05/10/05
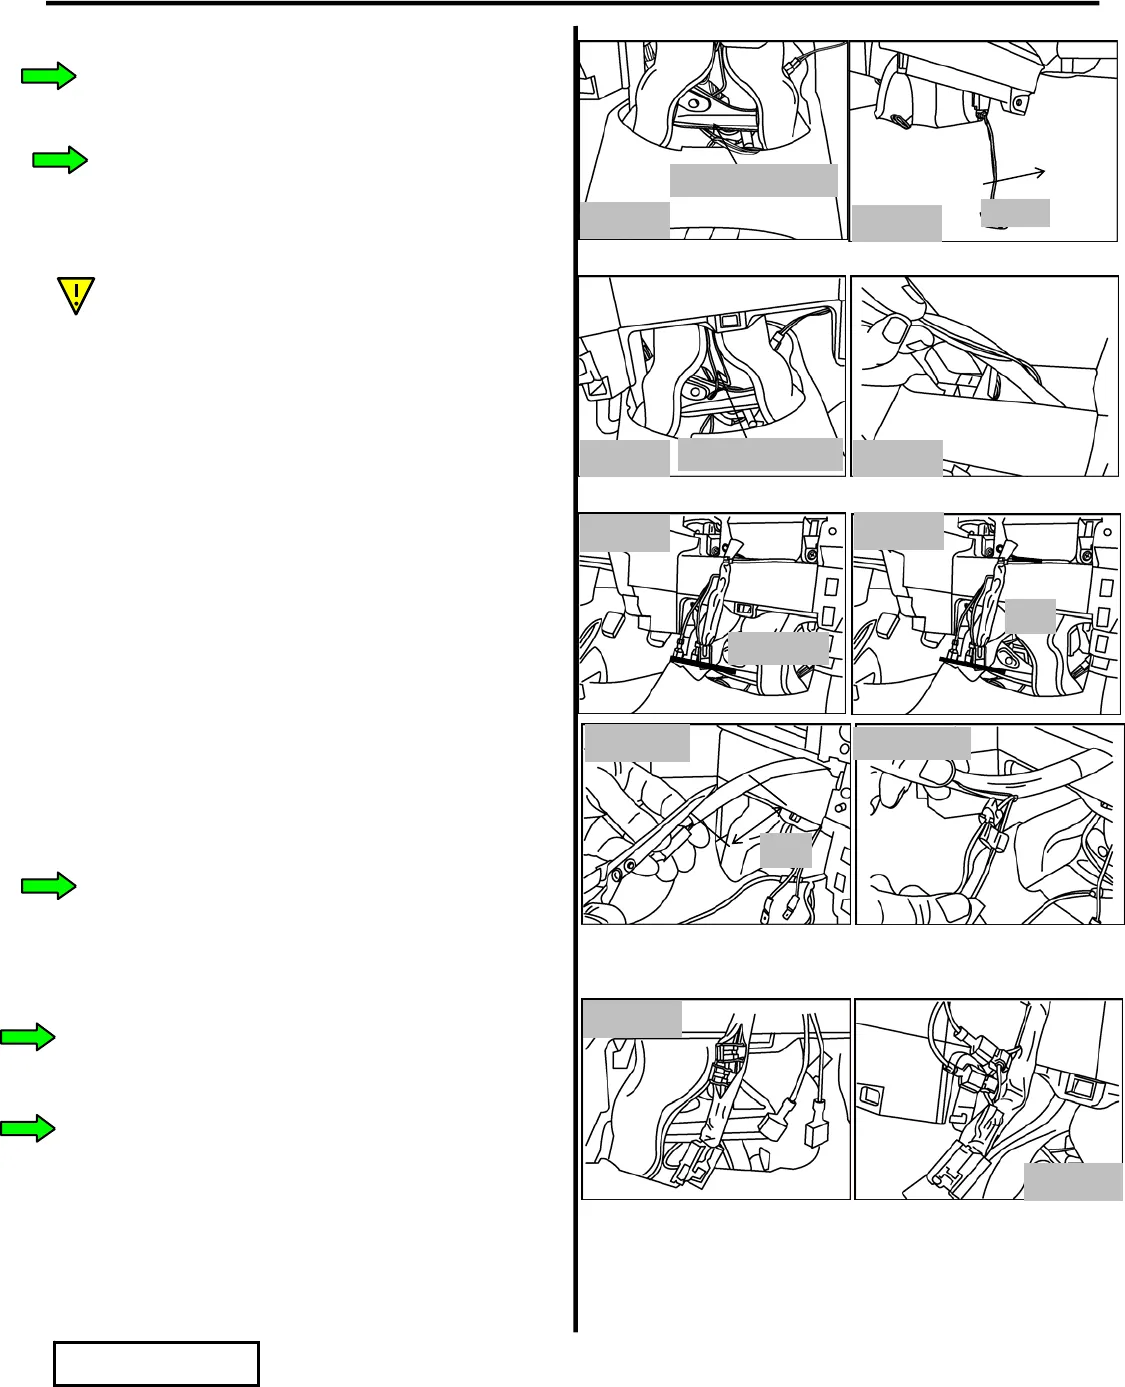
3. Front LED Pigtail Routing
4. Feed the (2) front LED pigtails connectors
under the metal bracket. (Fig. E4)
i. Feed the pigtails out in front of the heater
ducts and to the sides. (Fig. E5)
5. Power Supply and Ground Routing
i. Feed the wires up and behind the metal
bracket, between the heater ducts and
follow the routing of the cigarette lighter
(C/L) wire harness. (Fig.E6) Continue
following the routing of the C/L harness
(Fig. E7) and feed the wires until the end
of the spade terminals are even with the
end of the C/L connector. (Fig. E8)
6. Wire tie the Red and Black wires to the C/L
harness about 5” from the connector. (Fig. E9)
7. Using scissors, slit the black plastic sleeve
covering the C/L harness about 2” from the
end of the sleeve. (Fig. E10)
8. Pull back the covering and apply the T-Tap
connectors to the C/L wires near the end of
the slit in the covering.
i. Stagger the locations of the T-Taps, DO
NOT line them up. (Fig. E11)
9. Close the sleeve and tape it closed just ahead
of the T-Taps. (Fig. E12)
10. Insert spade connector of the Red wire into the
T-Tap of the Black wire. (Fig. E13)
11. Insert spade connector of the Black wire into
the T-Tap of the White/Blk wire. (Fig. E13)
5”
Fig. E9
All
n
Fig. E8
Fig. E12
Fig. E13
Fig. E7 Fig. E6
Wires between ducts
Fig. E4
Wires behind bracket
Fig. E5
2”
Fig. E10


