SCION xA/xB Light Enhancement 2006 - INTERIOR LIGHT UPGRADE
Section II – Installation Procedure
Page 8 of 11 pages
PPO
Rev: A 05/10/05
ii. Be careful not to over tighten as this will
“over ride” the threads on the switch. If
this happens simply retighten being careful
not to over tighten.
iii. It is preferable that the wires face toward
the center of the console but the orientation
of the wires is not critical. (Fig. H9)
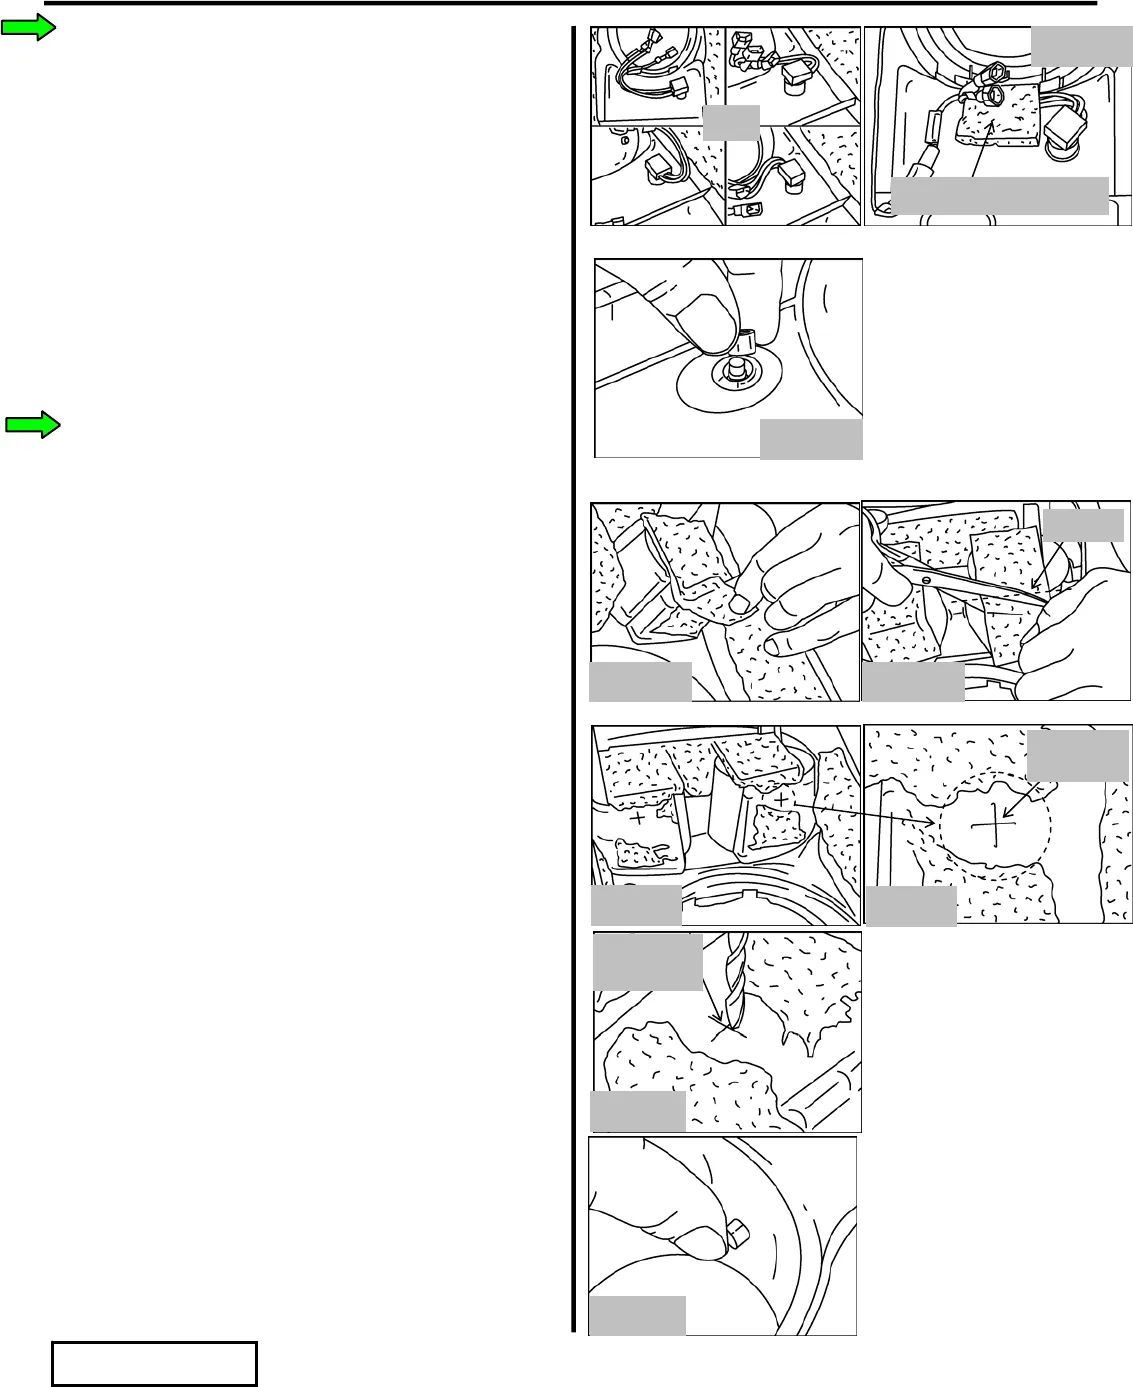
10. Affix the switch wires to the back of the
console as shown.
i. Clean the area as described in Section H,
steps 4i-4iii
ii. Tape the wires to the back of the console
as shown. Fig. H-10
11. Install button onto switch by inserting button
into bezel and pressing to engage. (Fig. H11)
I. Cup Holder Light Installation
1. From back of cup holders, remove as much
felt/adhesive as possible. (Fig. I1)
i. Using scissors, cut felt close to cup holder
as shown. (Fig. I2)
ii. Using adhesive remover, remove
remaining felt/adhesive.
iii. Remove just enough felt/adhesive to
expose the two “targets” for drilling.
(Figs. I3&I4))
2. Drill the Cup Holders
i. Pilot drill the centers of the two “targets”
using the #20 drill bit. (Fig. I5)
ii. Enlarge the holes using the Letter “J” drill
bit.
3. Install the Cup Holder LEDS.
i. From inside the cup holders, insert the
lenses into the previously drilled holes.
Press firmly to ensure the lenses are fully
seated. (Fig. I6)
Fig. I6
Tape switch wires to console
Fig. H10
Fig. H11
Preferred
OK OK
OK
H9
Fig. I1
Fig. I2
Cut felt
Fig. I4
“Target”
for drilling
Fig. I3
Fig. I5
Drill center
of target


