SCION xA/xB Light Enhancement 2006 - INTERIOR LIGHT UPGRADE
Section II – Installation Procedure
Page 9 of 11 pages
PPO
Rev: A 05/10/05
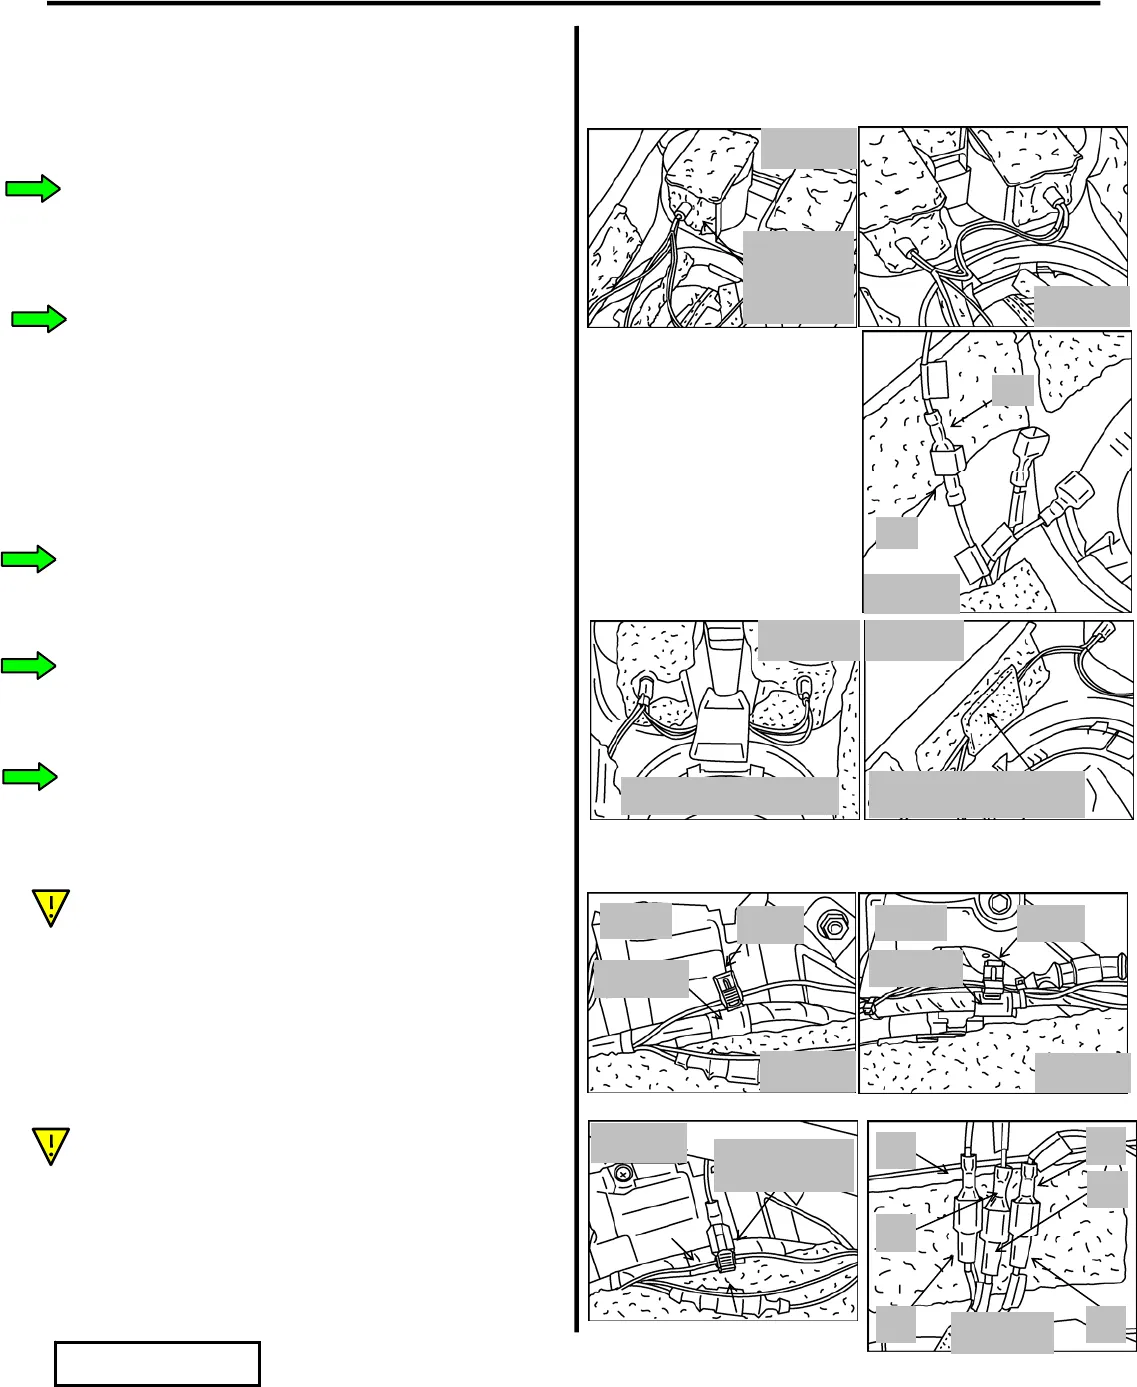
ii. From the back of the cup holders, install
the LEDs onto the lenses. Press firmly to
ensure the LEDs and lenses are fully
engaged. Hold the lenses from inside the
cup holder while pressing.
iii. Install the LED with the long extension
wires in the passenger side cup holder. The
remaining LED is installed in the driver
side cup holder. (Figs. I7 & I8)
4. Connect the LED (White) “B” extension wire
to the (Black) “B” switch wire. (Fig. I9)
5. Affix the LED wires to the back of the
console.
i. Clean the area as described in Section H,
steps 4i-4iii.
ii. Using the foam tape, tape the wire to the
backside of the console between the cup
holders as shown. (Fig. I10)
6. Bundle the excess white wire and foam tape
the black and white wires to the inside PS of
the console as shown.
i. The foam tape can be applied directly to
the felt. (Fig. I11)
J. Install Console
1. Install the T-tap onto the Interior Light
Upgrade wire harness Black wire at the blue
tape on shifter tower as shown.
(Figs. J1 & J2)
2. Place console over location
3. Connect all wires.
i. Connect the Console Black LED wire to
the previously installed Black wire T-tap.
(Fig. J1)
ii. The wires are all marked. Simply connect a
console switch wire connector to the
corresponding wire harness connector.
(Fig. J3, console lifted for clarity)
Install LED
with long
wires on this
side (PS).
Fig. I7
Fig. I8
Fig. J2
Blue tape
T- tap
M/T
Fig. J1
Blue tape
T- tap
A/T
Tape LED wires to console
Fig. I10
Fig. I11
Bundle excess white wire
Fig. J2
Cup holder LED
Black wire
Harness Black wire with T-tap
Blue ta
e
B
B
C
C
A
A
Fig. J3
Fig. I9
B
B


