FIGURE 5
15. Using a power drill and a 29mm (1-1/8”) Hole Saw,
cut out the harness pass-through in the Pickup Box
Sill. Figure 6.
FIGURE 6
16. Clean rough edges using a Deburring Tool.
17. Apply supplied Anti-Corrosion Coating to the two cut
outs.
18. Locate the supplied Camera Bezel Assembly. Figure
7.
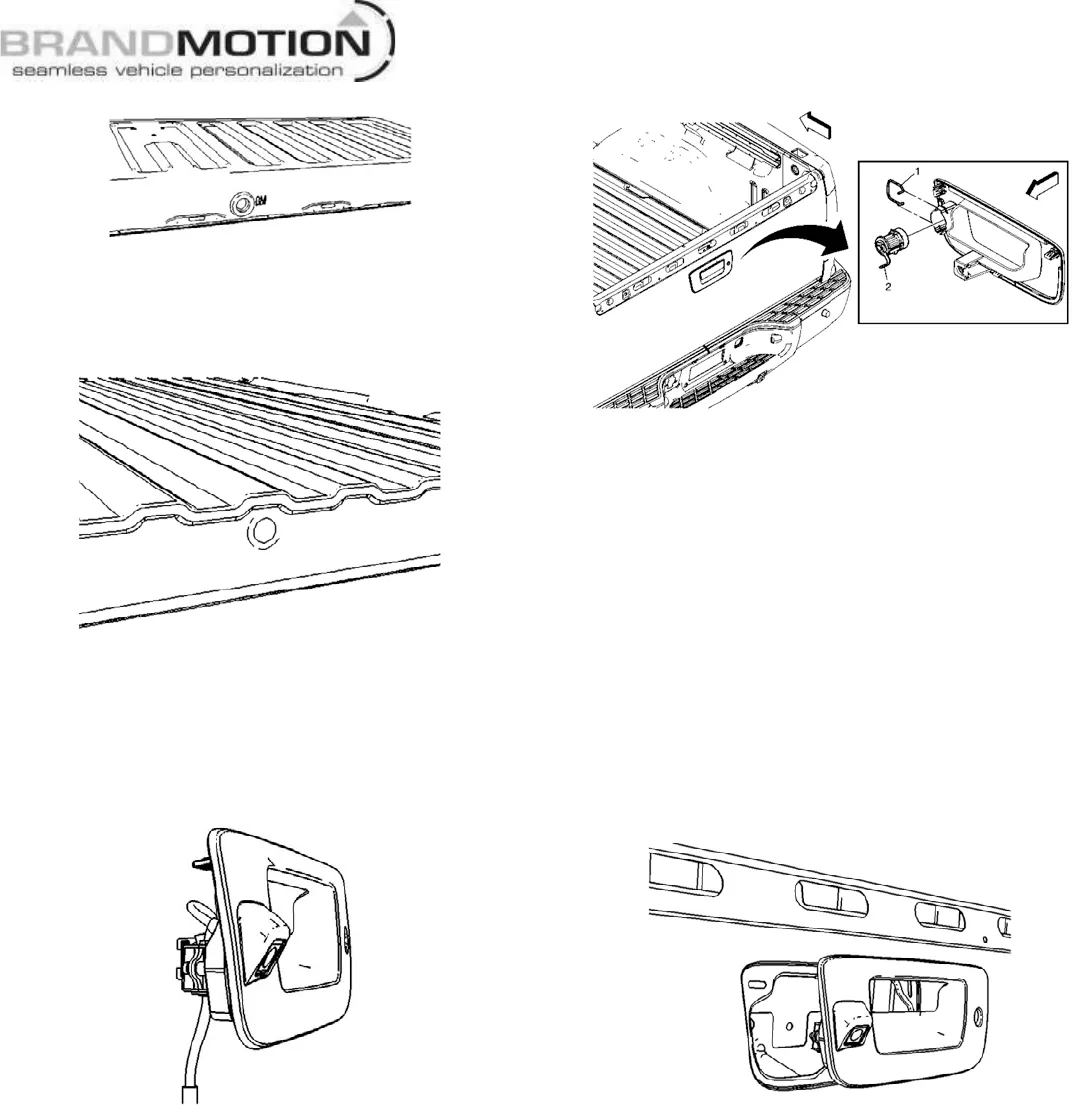
FIGURE 7
19. If the Truck is equipped with a factory Tailgate Lock,
remove the lock cylinder from the original Tailgate
Bezel. Remove the Tailgate Lock Cylinder Retaining
Clip (1) and then the Tailgate Lock Cylinder (2).
Figure 8.
FIGURE 8
20. If equipped, insert the Tailgate Lock Cylinder (2)
into the new Tailgate Bezel and re-attach the
Tailgate Lock Cylinder Retaining Clip (1). Figure 8.
a. If the Truck is not equipped with factory
Tailgate Lock, install supplied Lock Plug.
b. If locking features are desired, a Tailgate Latch
Handle (part number 25775280) and a Tailgate
Lock Cylinder (part number 25775278) are
available through GM dealers.
21. Install the new Tailgate Bezel Assembly, by first
routing the Camera Assembly harness pigtail
through the Tailgate Bezel opening down through
the Tailgate to the 29mm hole at the bottom of the
Tailgate. Figure 9.
FIGURE 9
22. Pull connector (2), first grommet (3), and second
grommet (4) through new Tailgate (1) pass-through.
Figure 10.