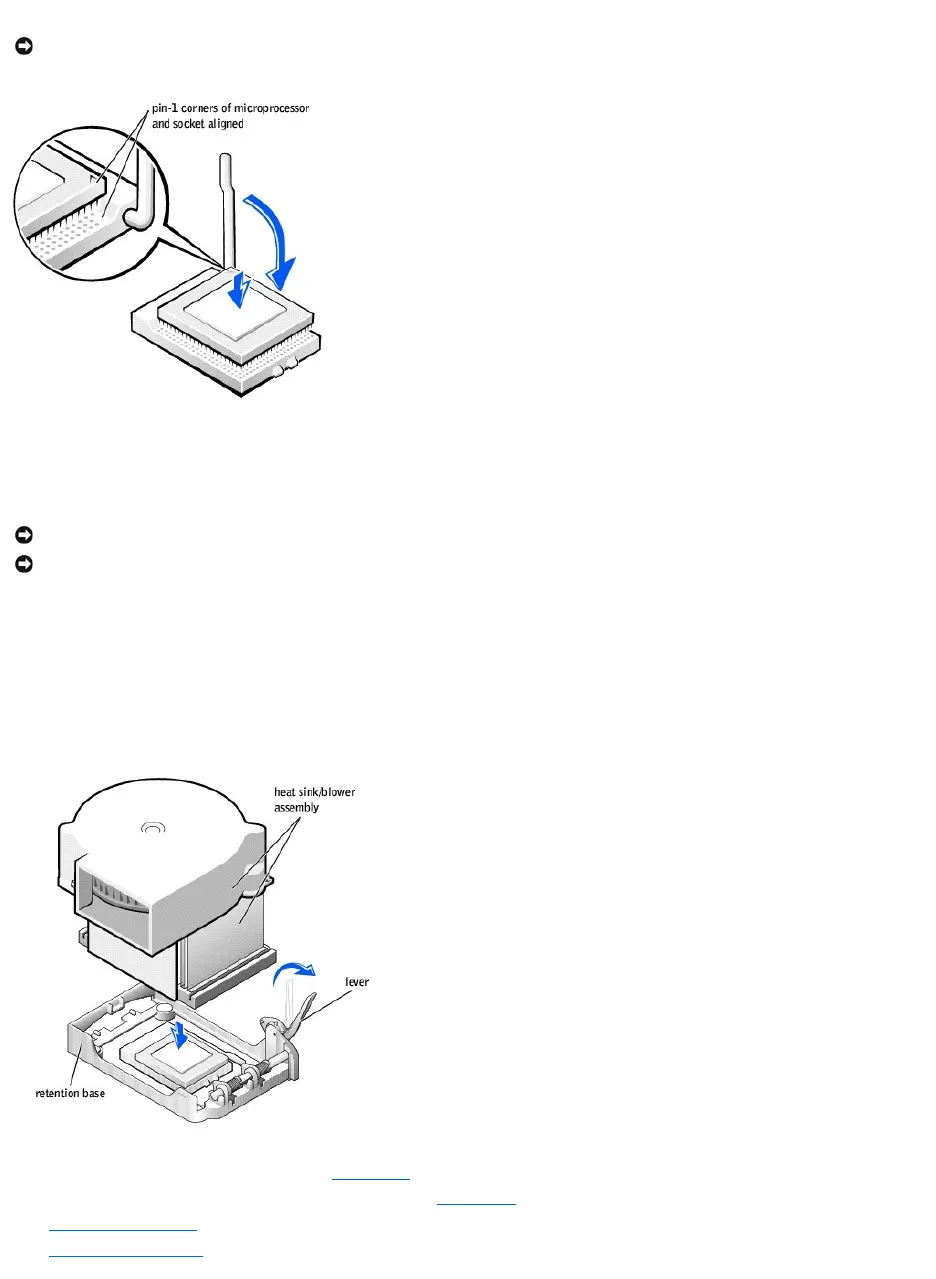
14. Align the pin-1 corners of the microprocessor and socket.
15. Set the microprocessor lightly in the socket and make sure that all pins are headed into the correct holes. Do not use force, which could bend the pins if
the microprocessor is misaligned. When the microprocessor is positioned correctly, press it with minimal pressure to seat it.
16. When the microprocessor is fully seated in the socket, pivot the release lever back toward the socket until it snaps into place to secure the
microprocessor.
If you are installing a microprocessor replacement kit from Dell, return the microprocessor to Dell in the same package in which your replacement kit was
sent.
17. Reinstall the two screws that attach the blower to the heat sink.
18. Lower the heat sink/blower assembly to the microprocessor so that the heat sink fits in the retention base.
19. Raise the retention lever and press until the heat sink is secured. You will feel the lever pause once it is at a 90-degree angle. Keep pressing the lever
another 30 degrees, ensuring that it is in the locked position.
20. Plug the fan cable into the FAN connector on the system board.
21. Plug the 12-volt power cable into the 12VPOWER connector on the system board.
22. Close the computer cover.
23. Attach the computer stand (optional).