6. Disconnect the cooling fan power cable from the FAN connector on the system board.
7. Disconnect the 12-volt power cable from the 12-V POWER connector on the system board.
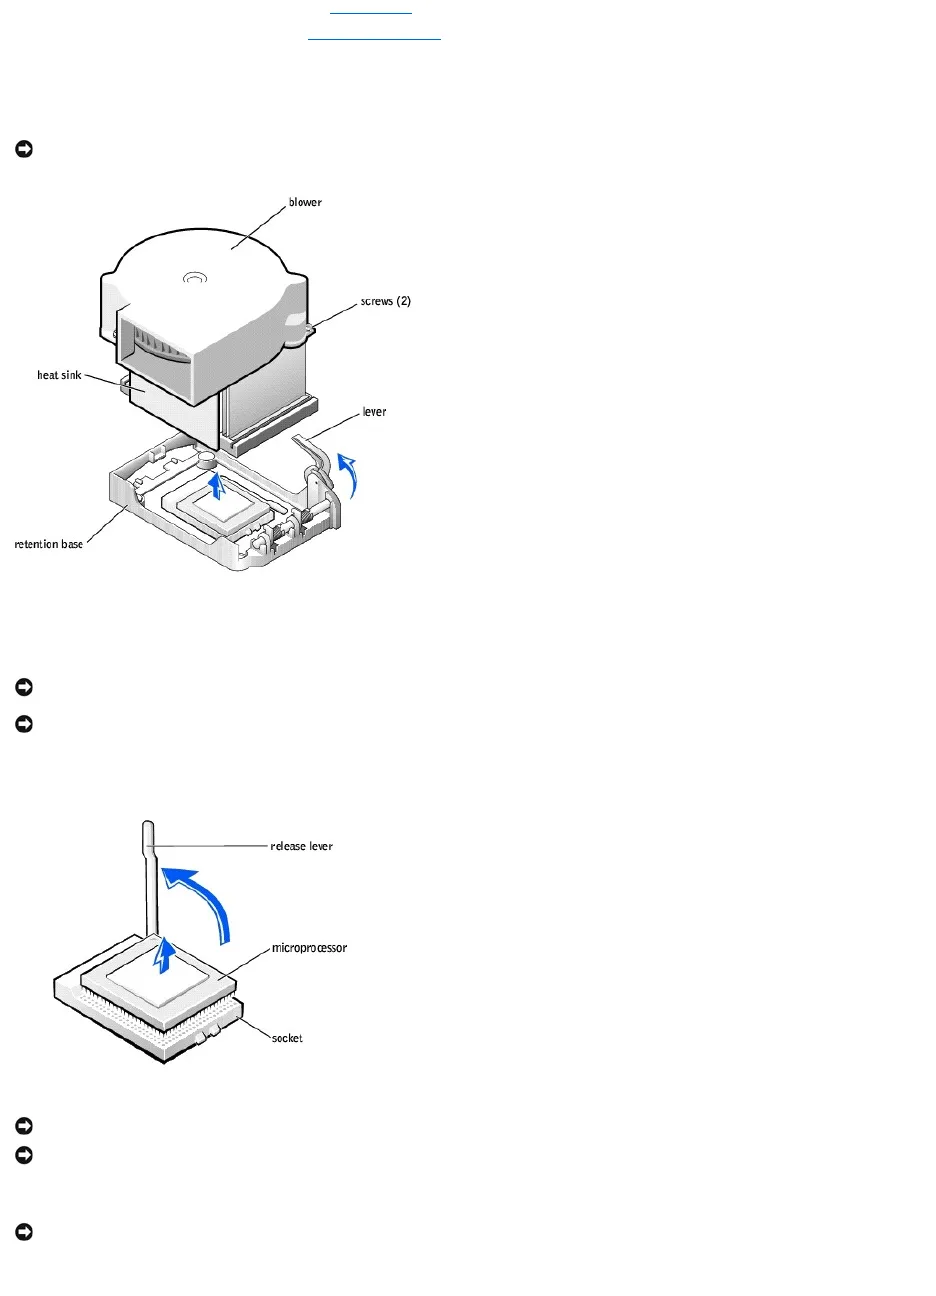
8. Remove the heat sink/blower assembly.
a. The heat sink is attached to the blower. Press and lower the green lever on the retention mechanism until it is parallel to the system board.
b. Gently rock the heat sink, and then slightly twist it as you lift it from the microprocessor.
9. Lift the heat sink/blower assembly away from the microprocessor.
10. Remove the two screws on the blower to remove it from the heat sink.
11. Pull the release lever straight up until the microprocessor is released, and then remove the microprocessor from the socket.
12. Unpack the new microprocessor.
13. If the release lever on the socket is not fully extended, move it to that position.
NOTICE: Do not discard the original heat sink and securing clips unless you are installing a microprocessor upgrade kit from Dell. If you are not installing
a microprocessor upgrade kit from Dell, reuse the original heat sink, blower, and securing clips when installing your new microprocessor.