16
2.2 Using the Avitech PacificConfig Utility
This utility can only be used with the Windows operating system.
The Pacific C-A / C-AG comes with a windows based user interface called PacificConfig. Avitech’s
PacificConfig utility is easy to use and hosts several powerful tools including:
Input port selection
Easy adjustment of the output resolution and timing
The ability to control up to 153 Pacific converters through a network connection
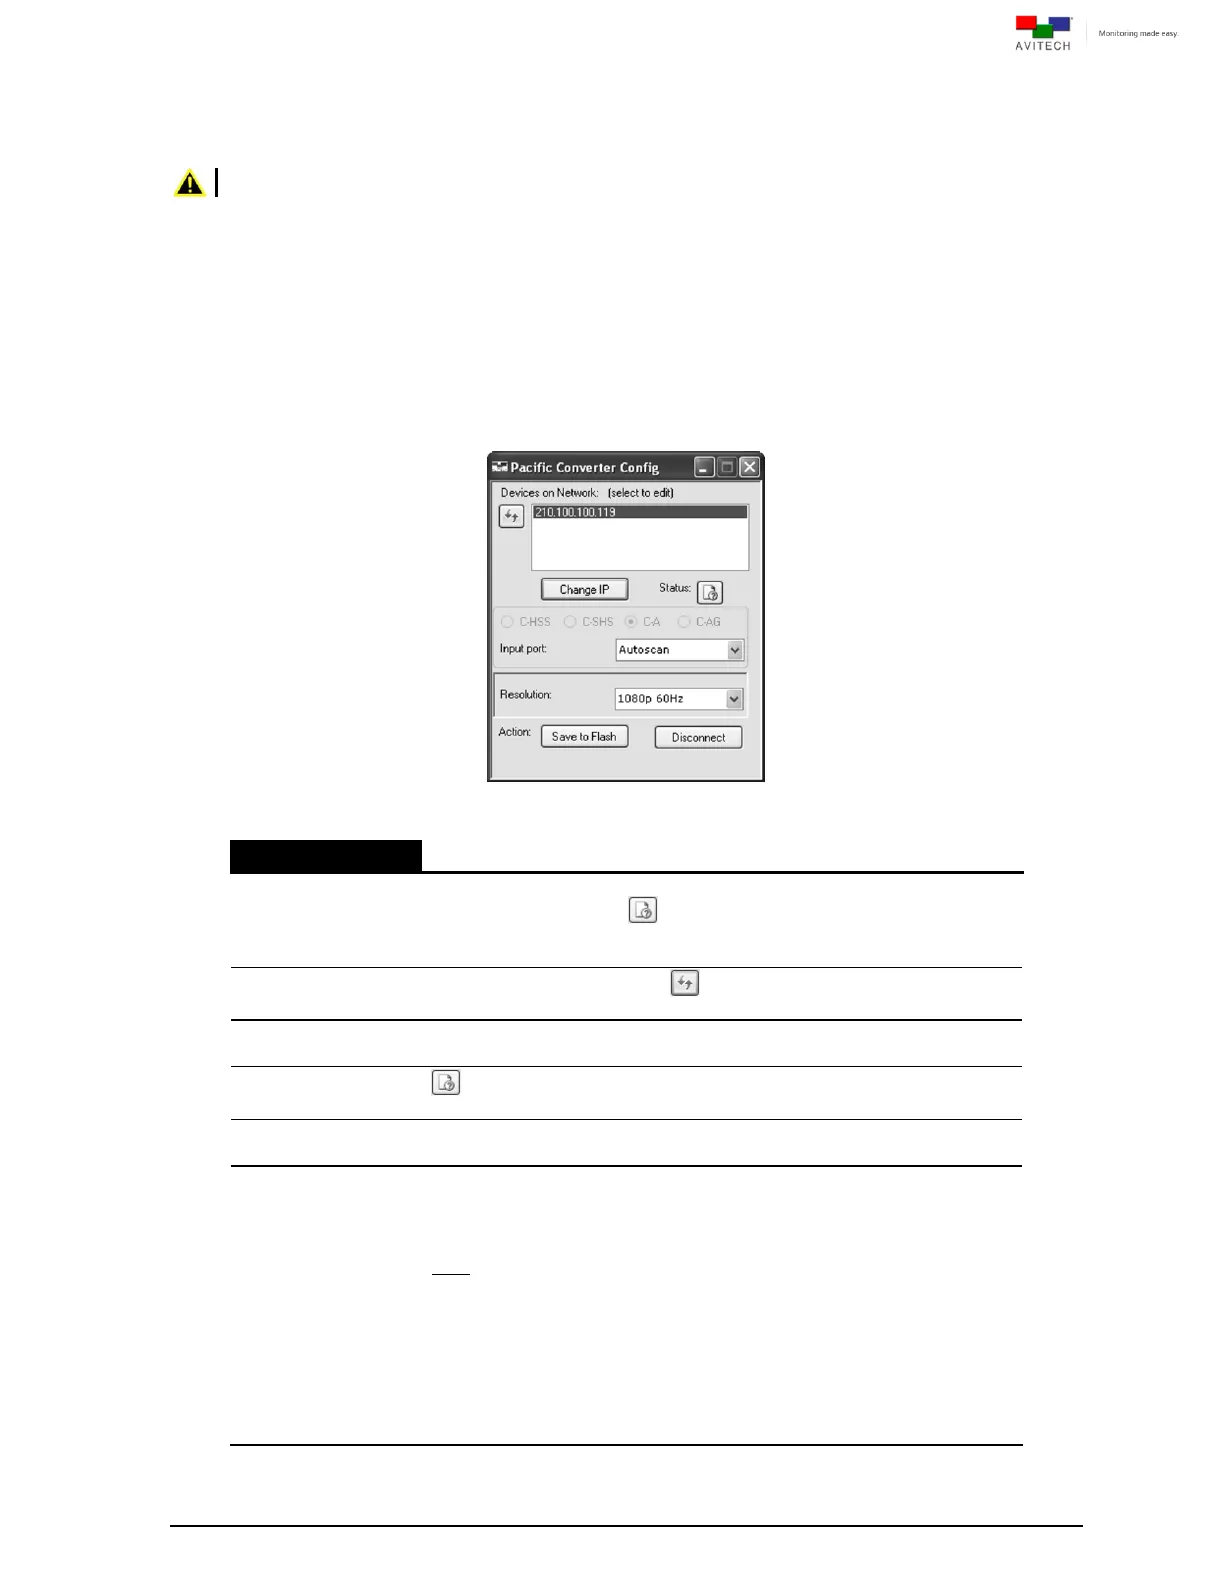
2.2.1 PacificConfig Utility Control Panel
Figure 2-4 PacificConfig Utility Control Panel
Displays all detected Avitech Pacific Converters in the same network
mask. The status button will become active (not grayed-out) when
Pacific C-A / C-AG / C-HSS / C-SHS is selected from the Devices on
Network window.
Click the IP list refresh button to update the connected Avitech
devices’ IP addresses in the same network mask.
Changes the IP address of the selected Pacific C-A / C-AG / C-HSS /
C-SHS.
View the operational status of the selected Pacific C-A / C-AG /
C-HSS / C-SHS.
C-A / C-AG / C-HSS
/ C-SHS
Displays what type of Pacific converter is currently connected.
Specifies the input signal source (HDMI/DVI/VGA/YPbPr/SDI) or
Autoscan (automatically selects the input signal in the following order
(firstly CVBS, SDI, YPbPr, VGA, DVI, and lastly HDMI) when more than
one signal type is detected).
Note: Make sure to select the correct signal type based on the actual input
signal to the Pacific C-A / C-AG to avoid image display problems (e.g.,
noise, flicker, etc.).
Upon quitting PacificConfig utility, the last selected input signal source
which was stored through “Saved to Flash” button will be automatically
shown upon next start-up of the utility.
If input signal source of the last saved selection is not available upon
restarting PacificConfig utility, then the input port will need to be reset.
(refer to section 2.1.2, “SETUP” item to “RESET”).


