but in the same room. An interior wall is recommend-
ed for thermostat installation.
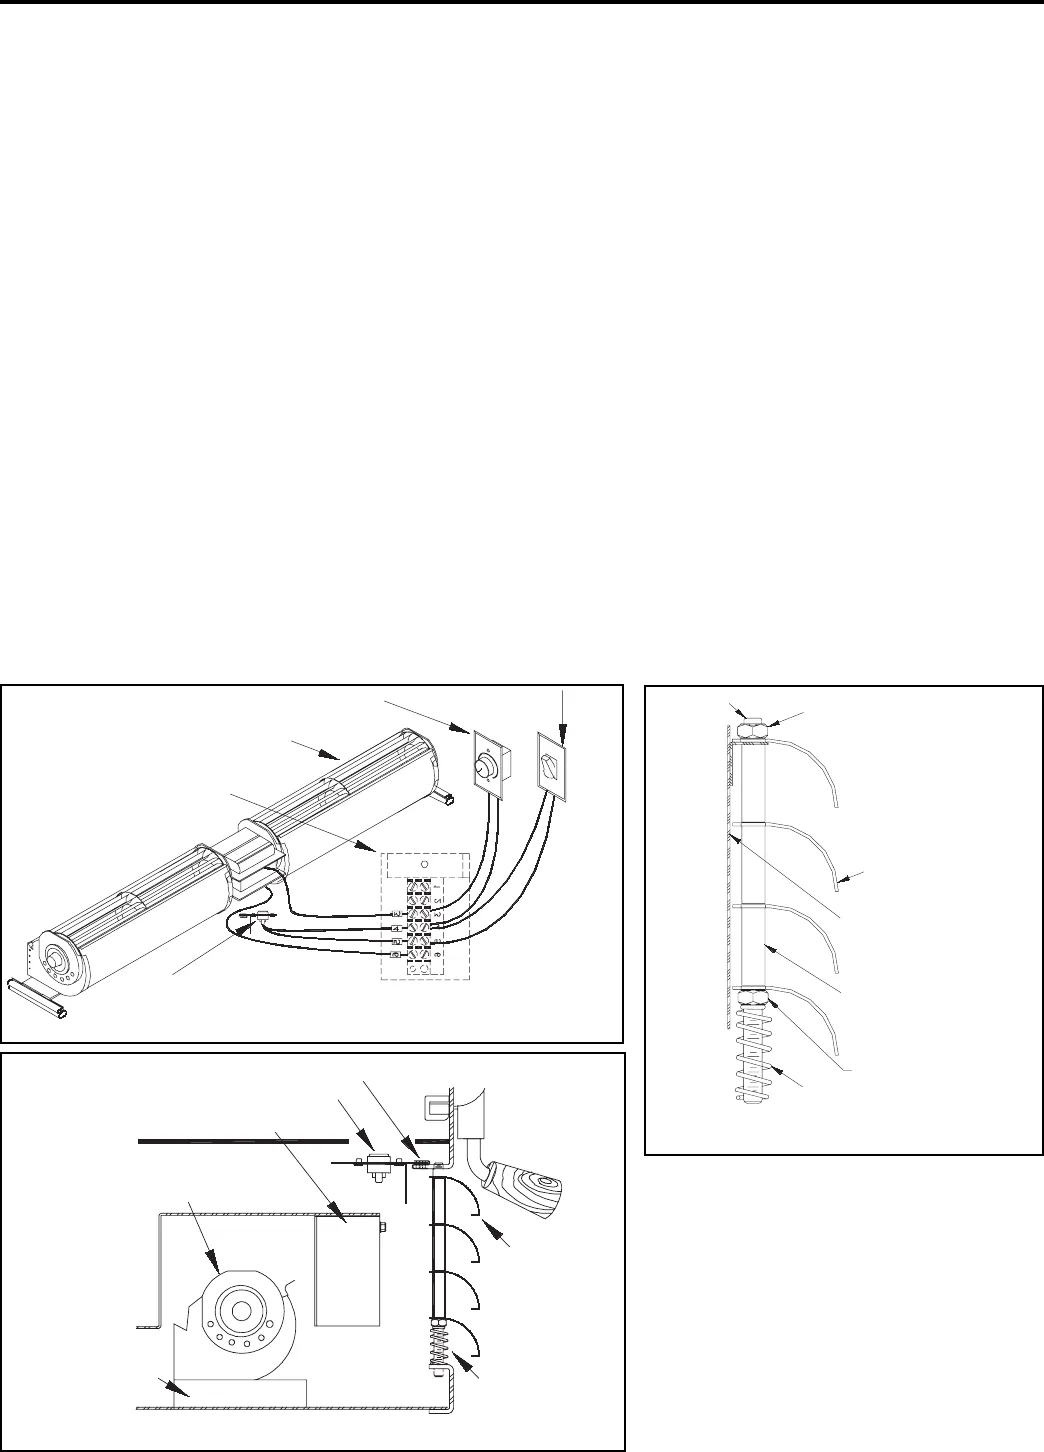
CIRCULATING BLOWER (FDHB5-N)
NOTE: It is important that the wiring for the blower kit is
installed during framing so that the wiring can be easily
hidden.
1. Remove the bottom middle louver. It is held in place
by springs underneath. Therefore, push down from
the top and pull forward.
2. Hold the blower with the outlet facing up from the
back. Fit the blower through the louver opening.
3. Slide the blower into the two blower mounts being
sure that it is pushed all the way down.
4. Mount the thermo disc as shown in (Figure 21). The
front face of the fireplace is bent into a flange just
above the lower opening. The thermo disc mounts
just above the centre louvers. Push the clips on to the
flange as far as they will go.
NOTE: One thermo disc is all that is required to operate
either the internal blower, the central heat blower, or
both.
5. Mount the provided speed control in a switch box at a
convenient location on the wall and connect it with
conventional 90° C 18 gauge wire (see Figure 20).
GOLD LOUVERS (FDLD)
The standard black louvers above and below the doors
can be replaced with a gold plated set. You may order
these from your dealer.
Dismantling and assembling louvers
For the following refer to (Figure 22):
1. The louvers are held in place by springs underneath.
Therefore, to remove, push down from the top and
pull the top of the louvers forward.
2. Take the assembly apart by removing the top nuts
from the rods. Leave the bottom nuts and spring
assemblies on the ready rod.
3. Assemble the louvers the same way the black ones
came apart, reusing the original rods, spacers and
springs. There should be about 1/4" of the rod pro-
truding above the top nut.
4. Put the reassembled louvers back into the
fireplace by inserting the rods into the lower
holes, and pushing the louvers into place.
Warning: Be sure to replace the heat shield
behind the top centre louvers the same way
it was removed. Failure to do this may
result in a fire hazard (see Figure 22).
IMPORTANT! Before you light the first fire
after you have installed the new louvers, you
must wipe all fingerprints and dirt off the gold
Page 15
DELTA
circulating blower
blower speed control
thermal
switch
bypass
terminal block
thermo disc
Figure 20: Circulating blower kit (FDHB5-N)
mounting clips
bottom
louvers
louver retention
spring
thermo disc
terminal block
circulating blower
blower mounting
brackets
Figure 21: Circulating blower location (sectional view)
See wiring diagram figure 40.
rod
top nut
louver
heat shield
(center top louver
set only)
spacer
bottom nut
spring assembly
Figure 22 : Louver assembly