Use the offset option if you need to clear a joist or pass
around a cupboard.
Install the fireplace and chimney as described earlier.
When you require an elbow, proceed as follows:
1. Install the required elbow. Turn it in the desired direc-
tion, and fasten it to the other section with 3 metal
screws at the joints.
2. Install enough lengths to obtain the desired offset.
Secure each joint with 3 metal screws.
3. Use another elbow to return the chimney to the verti-
cal direction.
4. Install a roof support, an offset support, or a wall sup-
port after the return elbow, to support the weight of
the flue (elbows are not designed to support a flue
above an offset). Refer to the Excel chimney instal-
lation manual for more information.
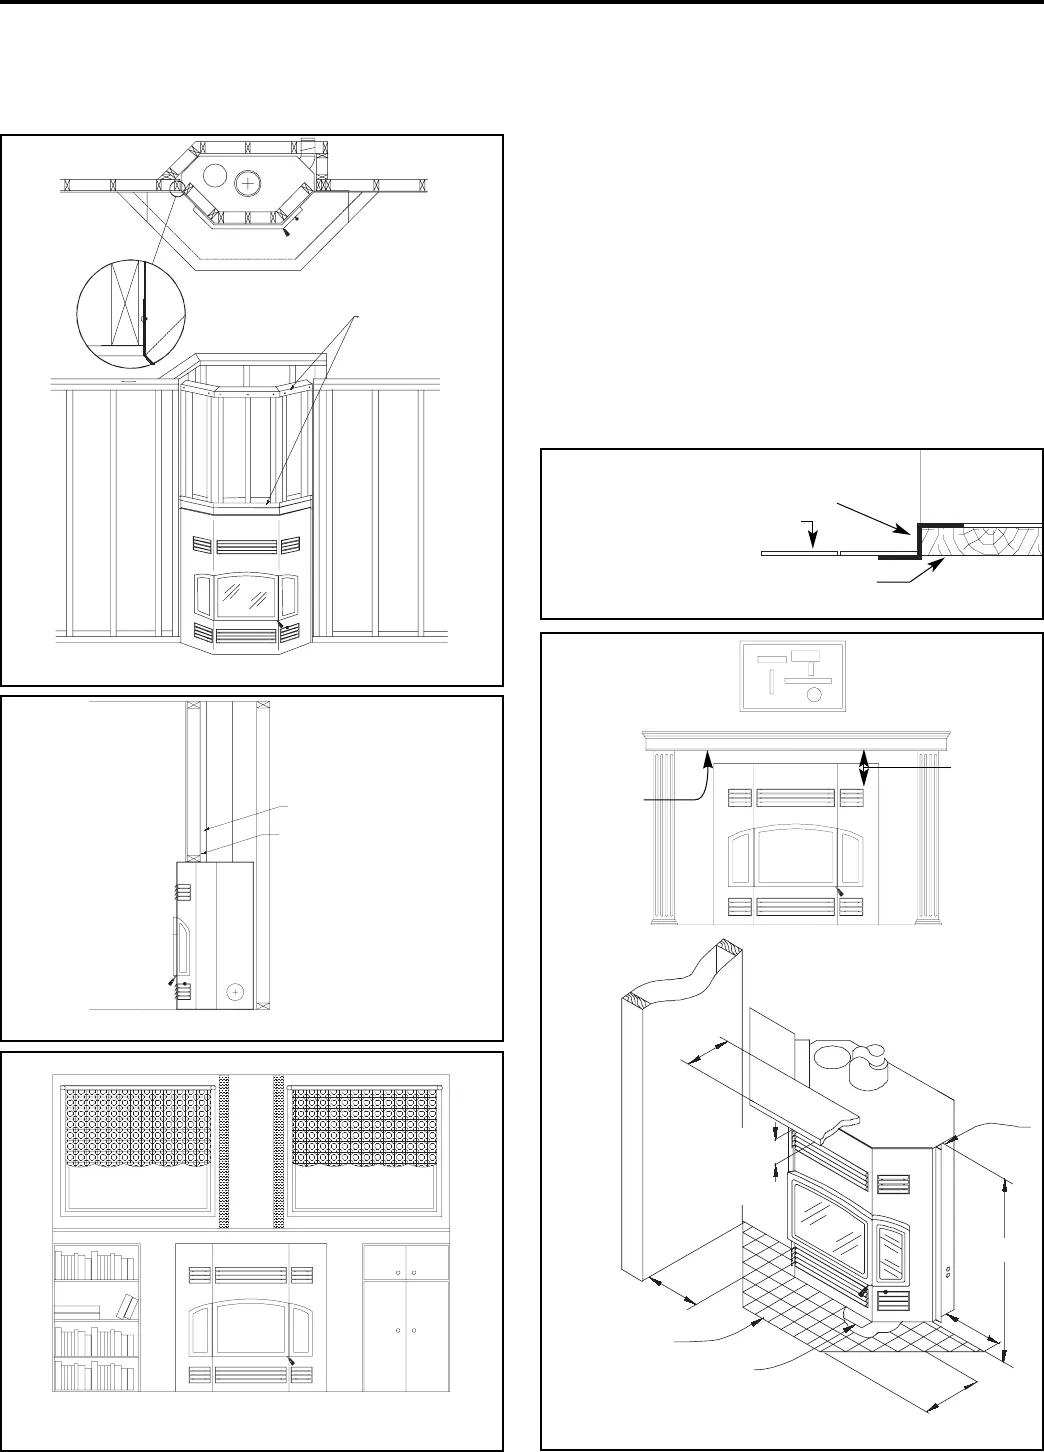
Page 12
DELTA
nailing strip detail
metal framing
channel provided
Figure 12: Example of framing-in
Figure 13: Side framing dimensions
2" clearance
between chimney
and combustibles
must be maintained.
standoff with 2 x 4 flat
in framing guide
2" minimum from chimney to combustibles
11" minimum clearance on each side
Figure 14 : Example of close clearances to chimney
z-shaped spark guard for raised installation must be
custom supplied by installer (minimum 26 guage
steel)
non-combustible flooring
Figure 15: Z-shaped spark guard
raised platform
DELTA
1
2
"
m
a
x
10 ½" min.
mantle height
from top lou-
vers
framing
nailing
strip
11" min. to side
wall from edge
of unit
non-combustible
hearth
spark
guard
16" min.
8
"
m
i
n
.
45"
Figure 16: Clearance to combustibles
mantle is 50
1/2" mini-
mum from
the base of
the fireplace
10 ½" min
no limit to
side sur-
round as
long as 11"
side clear-
ance is
observed.