DELTA2 Owner's Manual 10 RSF Woodburning Fireplaces
LOCATION
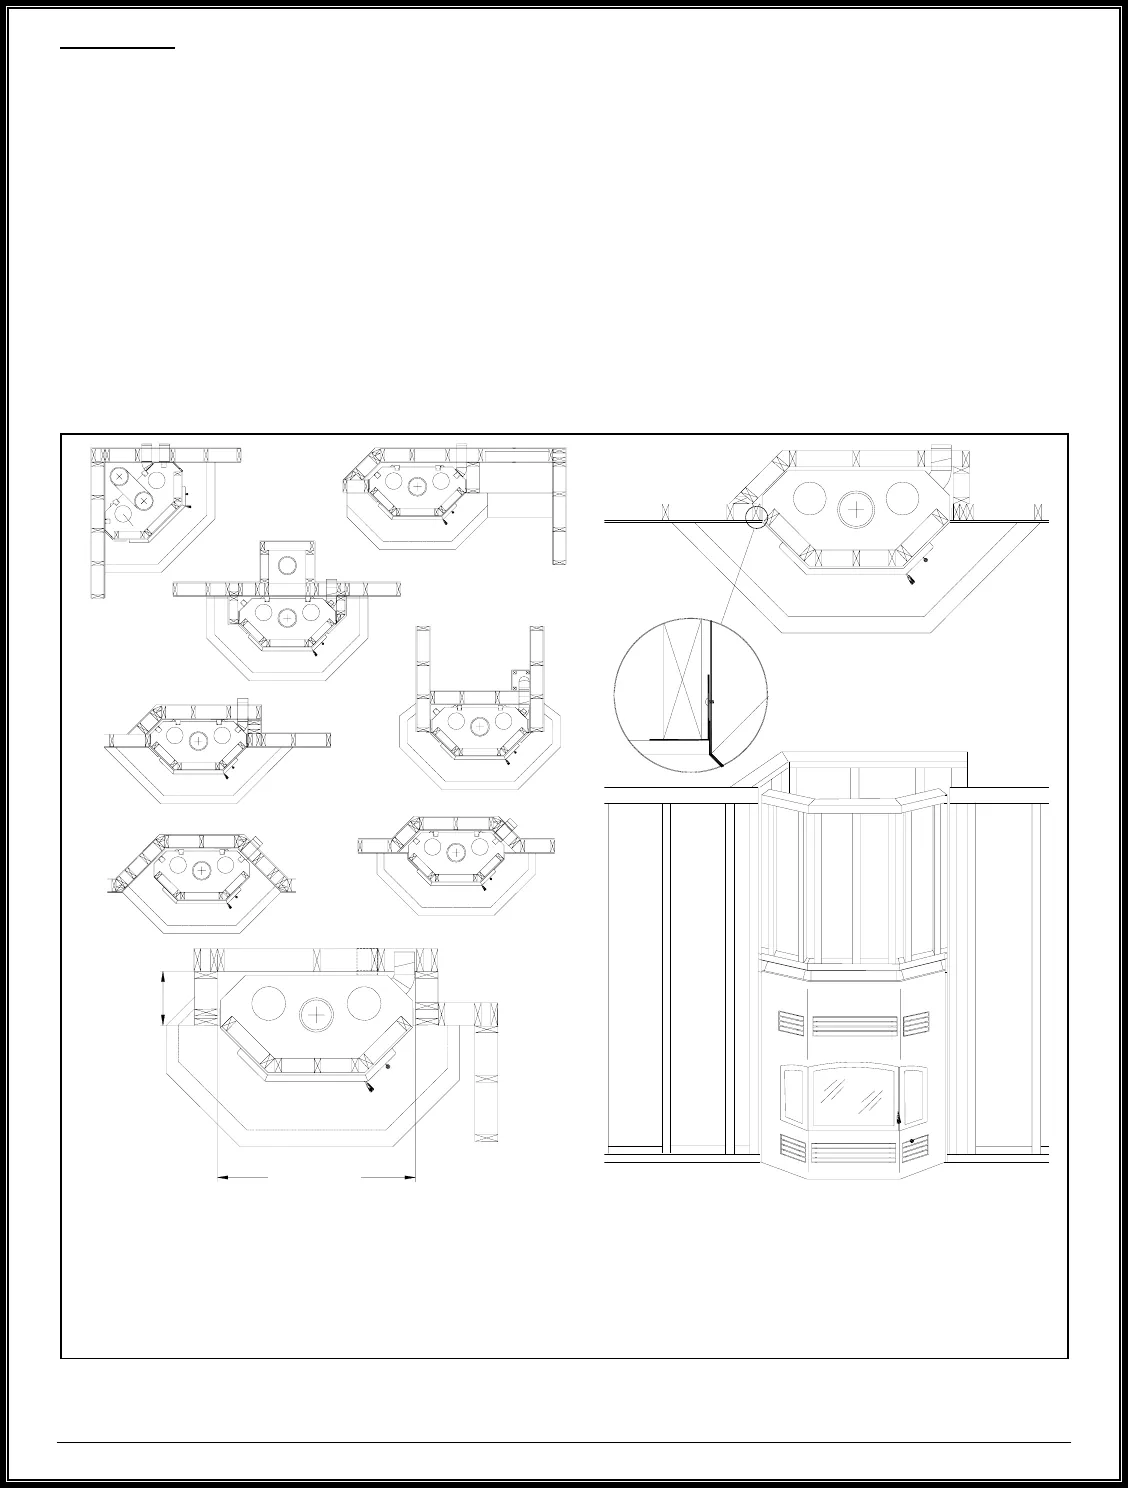
Your DELTA2 fireplace may be installed in many different ways (see Figure 7) without any special floor
reinforcement. We recommend that you take the time to plan your entire installation (fireplace, chimney, and
options) before beginning the actual installation (refer to Figure 8 and Figure 9).
Dimensions of the fireplace along with clearances are shown in Figure 1 and Table 1.
WARNING: IF THIS FIREPLACE IS NOT PROPERLY INSTALLED, A HOUSE FIRE CAN RESULT. FOR
YOUR SAFETY, FOLLOW THE INSTALLATION INSTRUCTIONS AND CLEARANCES. DO NOT PACK
REQUIRED AIR SPACES WITH INSULATION OR OTHER MATERIALS.
1. Note the location of roof and floor joists. Try to choose a location that does not require cutting them.
2. If at all possible, run the chimney up through the inside of the house. If it must be run outside, it should be
enclosed in an insulated enclosure (see Installation: Chase Enclosure). Remember, a cold chimney causes
poor draft.
The framing dimensions are larger than required for ease of installation. Examples shown here are for a
Louvered DELTA2. An extra 12" is required either on the left or behind the fireplace of a Clean Face DELTA2
to connect the intake air duct.
Figure 7 Louvered DELTA2 Framing Examples
49 1/4"
13 1/2"


