35
3 Updating the BIOS and Sending the Support Ticket
Advanced Users: Setting Up the e-Features
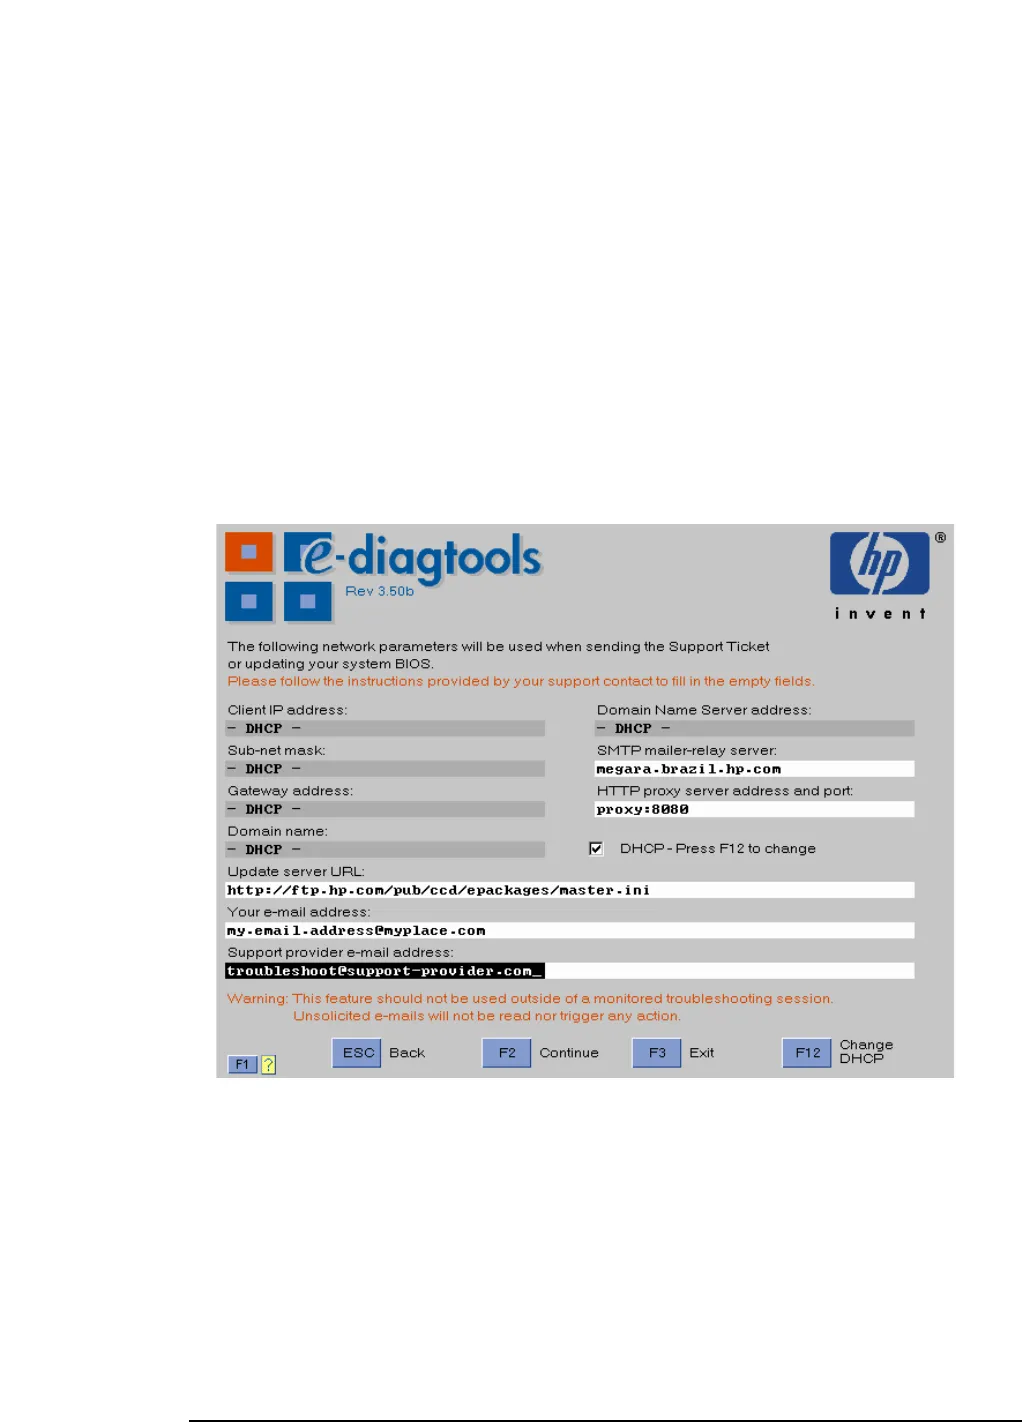
Step 2: Enter the Basic Network Parameters or Set to DHCP
If the computer has a fixed IP address:
Press
<F5>
and manually enter the basic network parameters:
❒ Web proxy IP address and port number
❒ SMTP mail relay address and host name
❒ Domain name and server address
❒ TCP/IP properties (local IP address/DHCP, IP Subnet Mask, default gateway,
DNS).
This can also be performed automatically by the LAN Configuration Agent. However,
you must satisfy the prerequisites described in “Before You Begin” on page 31. For
more information about the LAN Configuration Agent, refer to page 37.
If the computer does not have a fixed IP address, press
<F5>
to enter the advanced
configuration screen, then press
<F12>
to get the DHCP setting:
Step 3: Set the BIOS Update Parameters
Check the
Update server URL
parameter. This should already be correct and set to
the location of the BIOS packages on HP’s server, as follows.
•
For HP Business PCs and Workstations:
http://ftp.hp.com/pub/ccd/epackages/master.ini
•
For HP Notebook PCs:
http://ftp.hp.com/pub/mobile_computing/software/edtpackages/
master.ini


