DELTA2 Owner's Manual 17 RSF Woodburning Fireplaces
1. The masonry chimney is well constructed and fully lined, in accordance with Local Building Codes and the
National Building Code of Canada (NBC) or National Fire Protection Association chimney standard (NFPA
211).
2. It has been thoroughly cleaned of any soot or creosote residue and inspected to determine that it is in good
working condition.
3. There is no insulation of any type in contact with the masonry chimney and there is no insulation stuffed
anywhere in the chimney.
4. All the necessary clearances around the masonry chimney, along the complete run of the chimney, are
respected as per NBC or NFPA 211. If the masonry chimney is enclosed in drywall, openings will probably be
required in order to verify clearances at all points.
5. The masonry chimney will only be used for the fireplace and no other appliance.
If major repairs are required to meet the above conditions, a new chimney should be constructed.
To make the hole through the masonry chimney and make the connection to the fireplace, we recommend that
you follow these steps:
1. Sight-in and mark the outline of where the EXCEL chimney will penetrate the masonry chimney.
2. Using a large (¾" - 2") masonry drill bit, drill a hole exactly in the center of the oval outline. With a masonry
hammer and drill, slowly enlarge the hole to the size required. Remember to work from the center out. Be
especially careful with the clay liner behind the brick because three sides of it must stay in place.
3. Bring the stainless steel liner down from the top of the chimney.
If you are using a rigid liner you will need enough room to secure an elbow to it with at least two screws.
If it is difficult to install rigid stainless steel liner in the existing masonry chimney or for a masonry chimney
with less than 10"x10" inside, a listed stainless steel flexible liner can be used along with a flexible/rigid
adaptor (LM-8LAF) available from your RSF dealer.
4. Install the liner elbow and masonry adaptor on the lower end of the liner.
5. Move the fireplace forward enough to install the EXCEL chimney on the fireplace (elbow and length) then
move the fireplace back into position as you connect the masonry adaptor to the EXCEL chimney.
Using a New Masonry chimney
Since the masonry chimney is not build yet, we recommend that you position your fireplace, install the EXCEL
chimney on it and connect to the first length of liner before building the chimney as explained above and shown in
Figure 15 . The liner sections can easily be installed as the layers of brick are being placed. Since this is a new
chimney, we recommend that you build it to the right size so you do not have to ovalize the liner but if you choose
to use a 6"x10" clay liner you will need to ovalize the stainless steel liner to fit into the clay liner.
REMEMBER: The stainless steel liner should be fitted inside the clay liner all the way to the top of the masonry
chimney. It is not meant to replace the clay liner.
FRAMING
The enclosure walls can be framed with any suitable
materials (2x4 or 2x6 studs, plywood, gypsum board,
etc.). Because of the high heat output potential of the
DELTA2, combustible materials must NOT go closer
to the fireplace than the standoffs, top, back and sides.
You may also completely cover the top of a Louvered
DELTA2 as long as you maintain all fireplace standoff
clearances and the 2" clearances around the chased
chimney. The 2" clearance around the chimney must
be open from the fireplace up to the ceiling. See
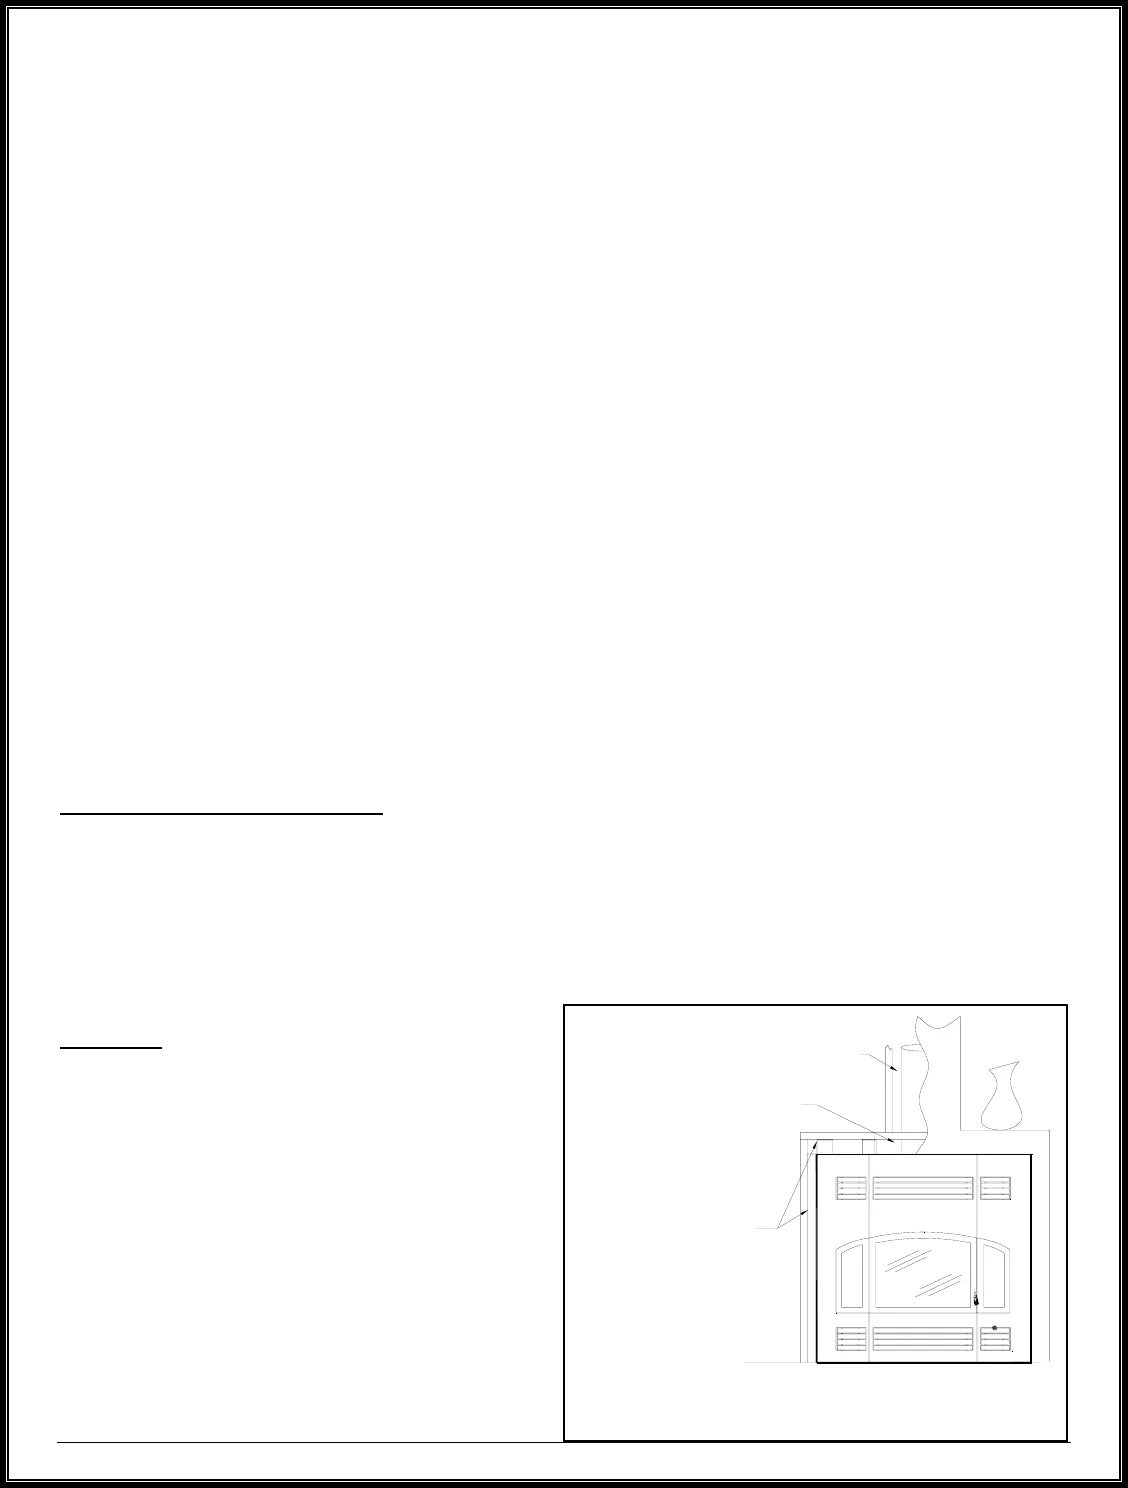
Figure 16 for an example of a close clearance
installation.
Always maintain 2" min.
clearance with chimney
Always respect the
fireplace standoffs
Leave the space between
the chimney and the
framing open (no firestop)
Figure 16 Close Clearance Installation of a
Louvered DELTA2


