10
905077 REV B 7/23/14, 1970-78 CAMARO WITH A/C EVAP KIT PG 10 OF 28
1/4-20 X 1 1/2”
Bolt w/
Washer
Fresh Air Cover and
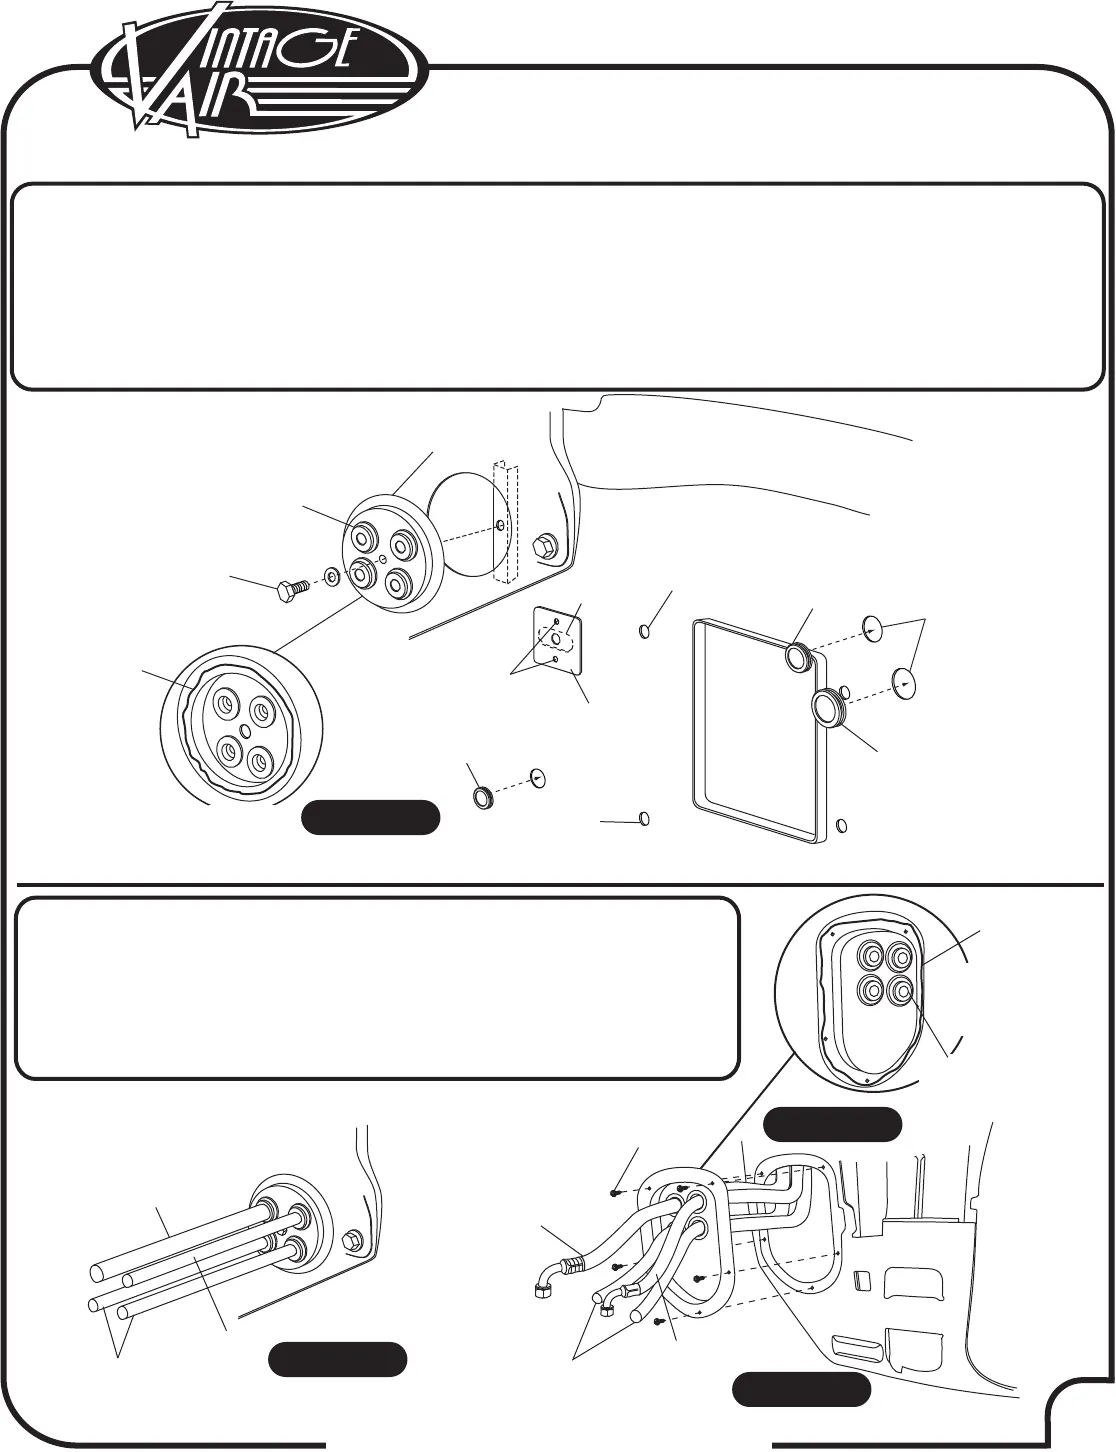
Heater Cover Assembly Installation
Silicone
Fresh Air
Cap
OEM
Holes
(4) Grommets
33137-VUI
Back Side
of Fresh Air
Cap
Engine
Compartment
Firewall
1. Using heater firewall cover assembly as a template, mark and drill (2) 5/16” holes (See Figure 10, below). NOTE:
Make sure to center heater firewall cover assembly hole with OEM hole on firewall before drilling.
2. Enlarge (2) OEM holes in firewall to 5/16” (See Figure 10, below).
3. Install (4) grommets in fresh air cap (See Figure 10, below).
4. Apply a 1/4” bead of silicone around the back side of the fresh air cap as shown in Figure 10, below. Attach fresh
air cap to firewall using a 1/4-20 x 1 ½" bolt and washer (See Figure 10, below). NOTE: Fresh air cap installs
on engine side of firewall.
5. Install plugs in firewall (See Figure 10, below).
Kick Panel Fresh Air Cap Installation
1. Install (4) grommets in kick panel fresh air cap (See Figure 11a, right).
2. Route A/C and heater hose through fresh air cap and kick panel fresh air
cap as shown in Figures 11 and 11b, below.
3. Apply a 1/4” bead of silicone around the back side of the kick panel fresh
air cap as shown in Figure 11a, right.
4. Secure kick panel fresh air cap using OEM screws as shown in Figure 11b,
below.
(5) OEM
Screws
Silicone
#10 A/C
Hose
#6 A/C
Hose
(2) Heater
#10 A/C
Hose
#6 A/C
Hose
(2) Heater
Hose
(4) Grommets
33137-VUI
Figure 10
Figure 11b
Figure 11
Figure 11a
(2) Drill
5/16” Hole
OEM
Hole
Heater Firewall
Cover Assembly
644021
7/8” Plug
317100
1”
Plug
317099
Enlarge Hole
To 5/16”
1 5/8”
Plug
317101
Enlarge Hole
To 5/16”
Back Side of
Kick Panel
Fresh Air Cap


