Replacing the Processor: Dell XPS 430 Service Manual
processo.htm[4/15/2014 11:28:33 AM]
Back to Contents Page
Replacing the Processor
Dell™ XPS™ 430 Service Manual
Removing the Processor
Installing the Processor
CAUTION: Before working inside your computer, read the safety information that shipped with your
computer. For additional safety best practices information, see the Regulatory Compliance Homepage at
www.dell.com/regulatory_compliance.
NOTICE: Do not perform the following steps unless you are familiar with hardware removal and replacement.
Performing these steps incorrectly could damage your system board. For technical service, see the Quick Reference
Guide.
Removing the Processor
1. Follow the procedures in Before You Begin.
2. Remove the computer cover (see Removing the Computer Cover).
3. Disconnect the power cables from the POWER and 12VPOWER connectors (see System Board Components) on the
system board.
4. Remove the airflow shroud (see Replacing the Processor Airflow Shroud
Assembly).
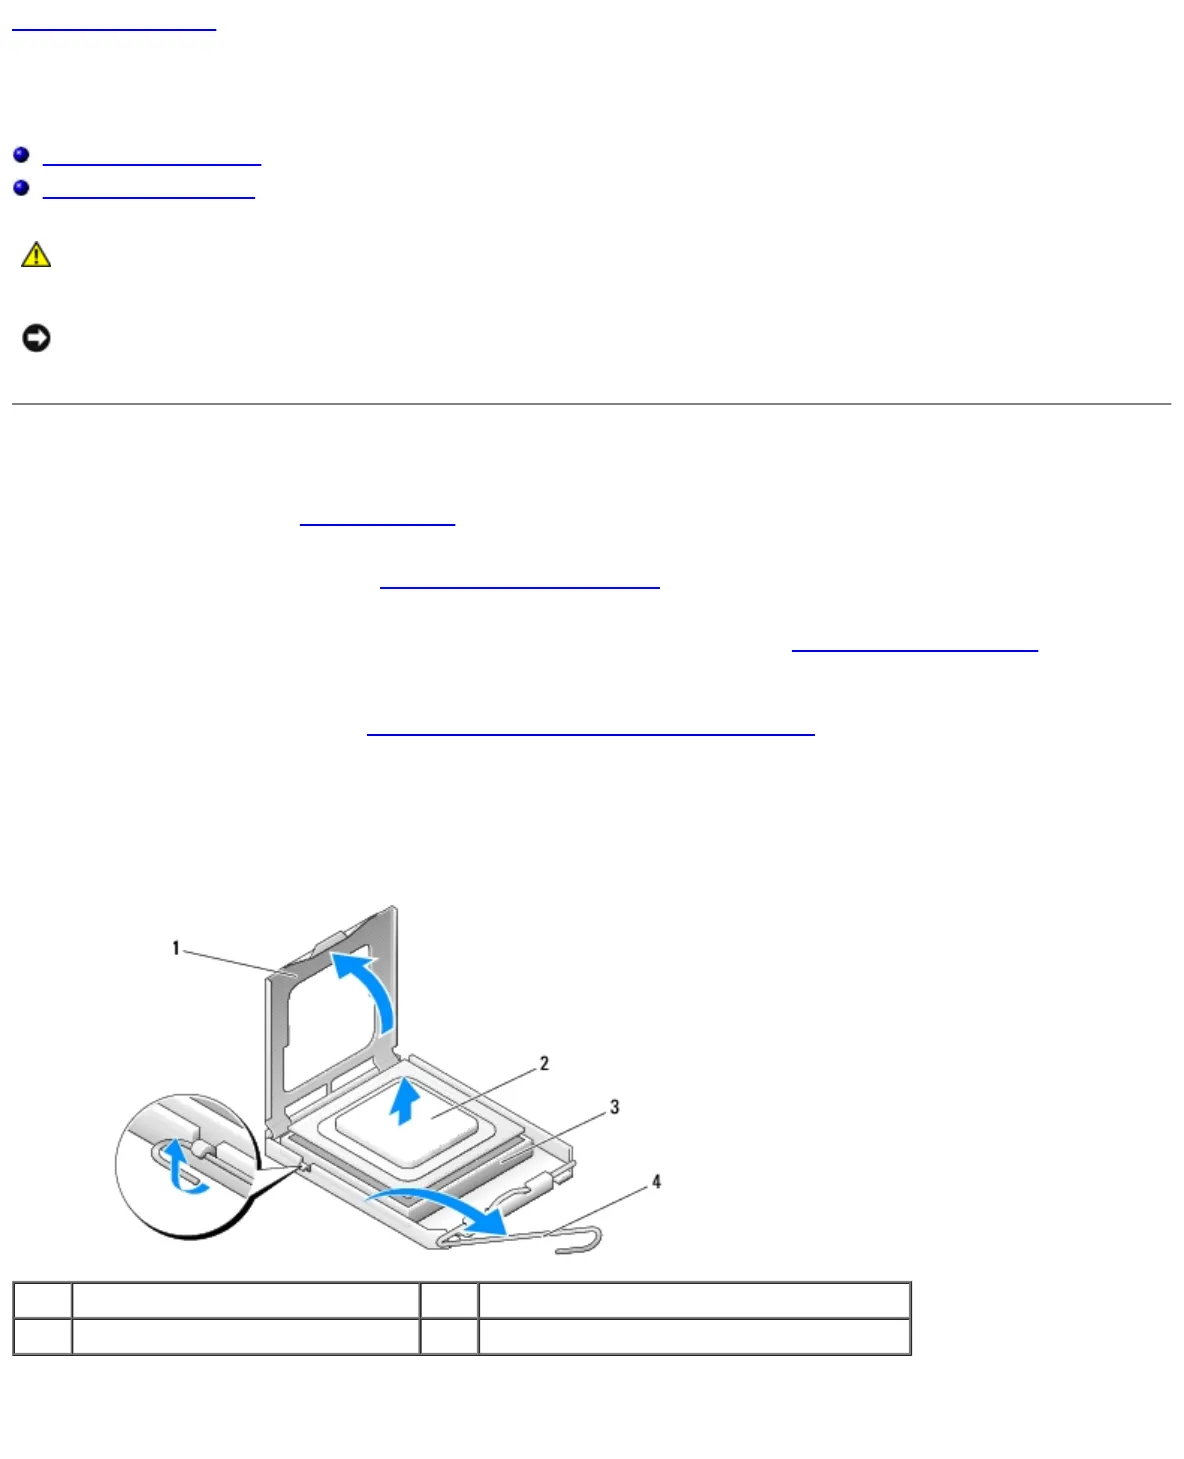
5. Push down and out on the socket release lever.
6. Lift the socket release lever and open the processor cover.
1 processor cover 2 processor
3 socket 4 socket release lever
7. Remove the processor from the socket.
Leave the release lever extended in the release position so that the socket is ready for the new processor.


