42
EZ-2000+/6000+ User’s Manua
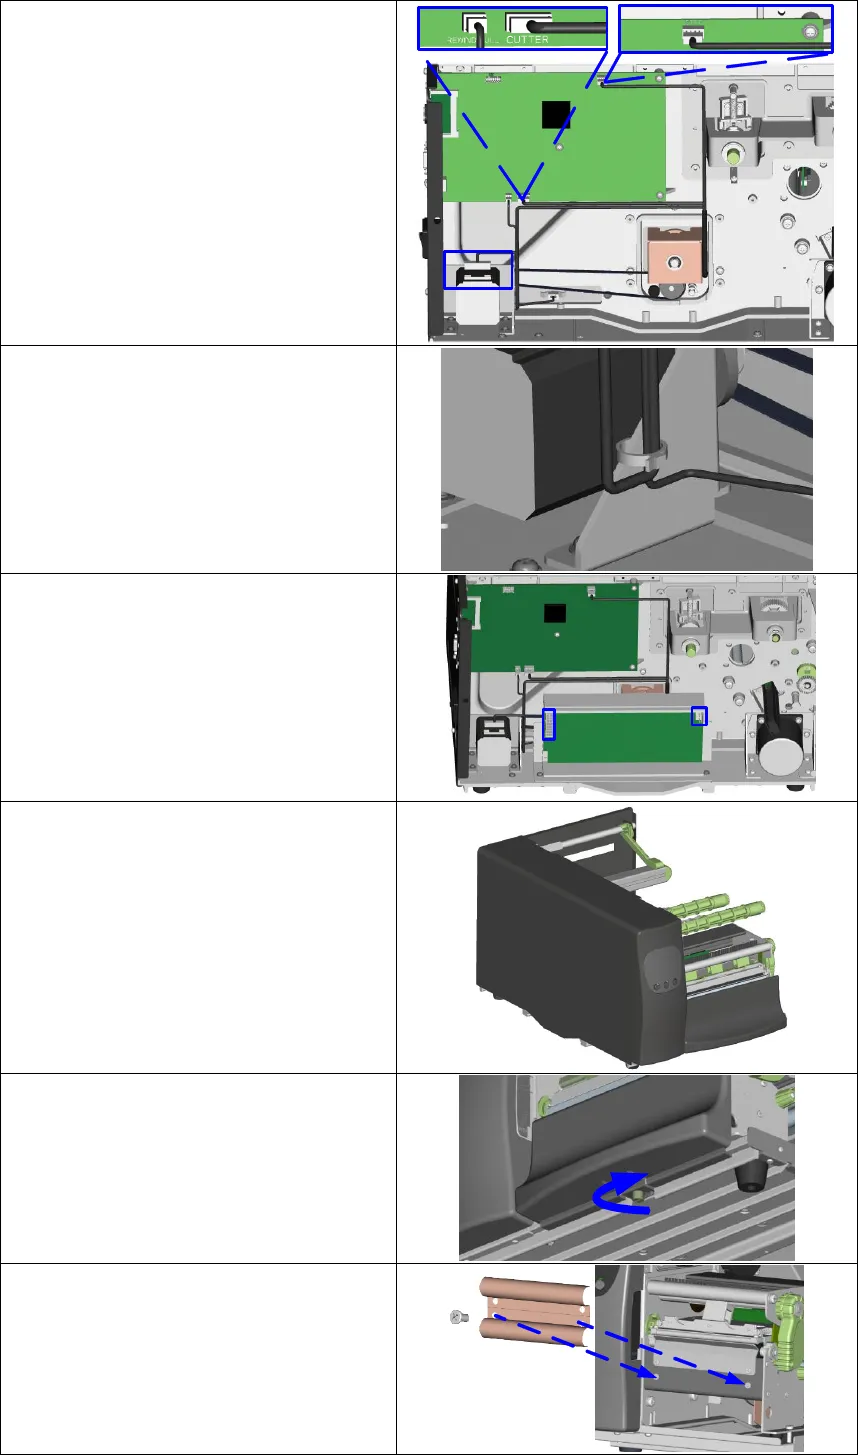
19. Connect the cable with the 5-pin
connector to the jack marked
"CUTTER" on the motherboard.
20. Connect the cable with the 4-pin
connector to the jack marked
"STRIP" on the motherboard.
Connect the remaining
connector to the motor.
21. Attach the motor cable and the
"Rewinder full" cable to the motor
bracket using the cable tie.
【
Note
】
You should position the "Rewinder full"
cable underneath the belt to avoid
possible faults.
22. Now replace the power supply
unit and connect it to the
motherboard.
23. Replace the left-hand part of the
printer housing and secure it with
screws
24. Remove the lower cover plate
from the front of the printer by
unscrewing the screw marked in
the illustration.
25. Remove the lower cover plate.
26. Mount the rewinder guide on the
print mechanism and secure it
with screws.


