40
EZ-2000+/6000+ User’s Manua
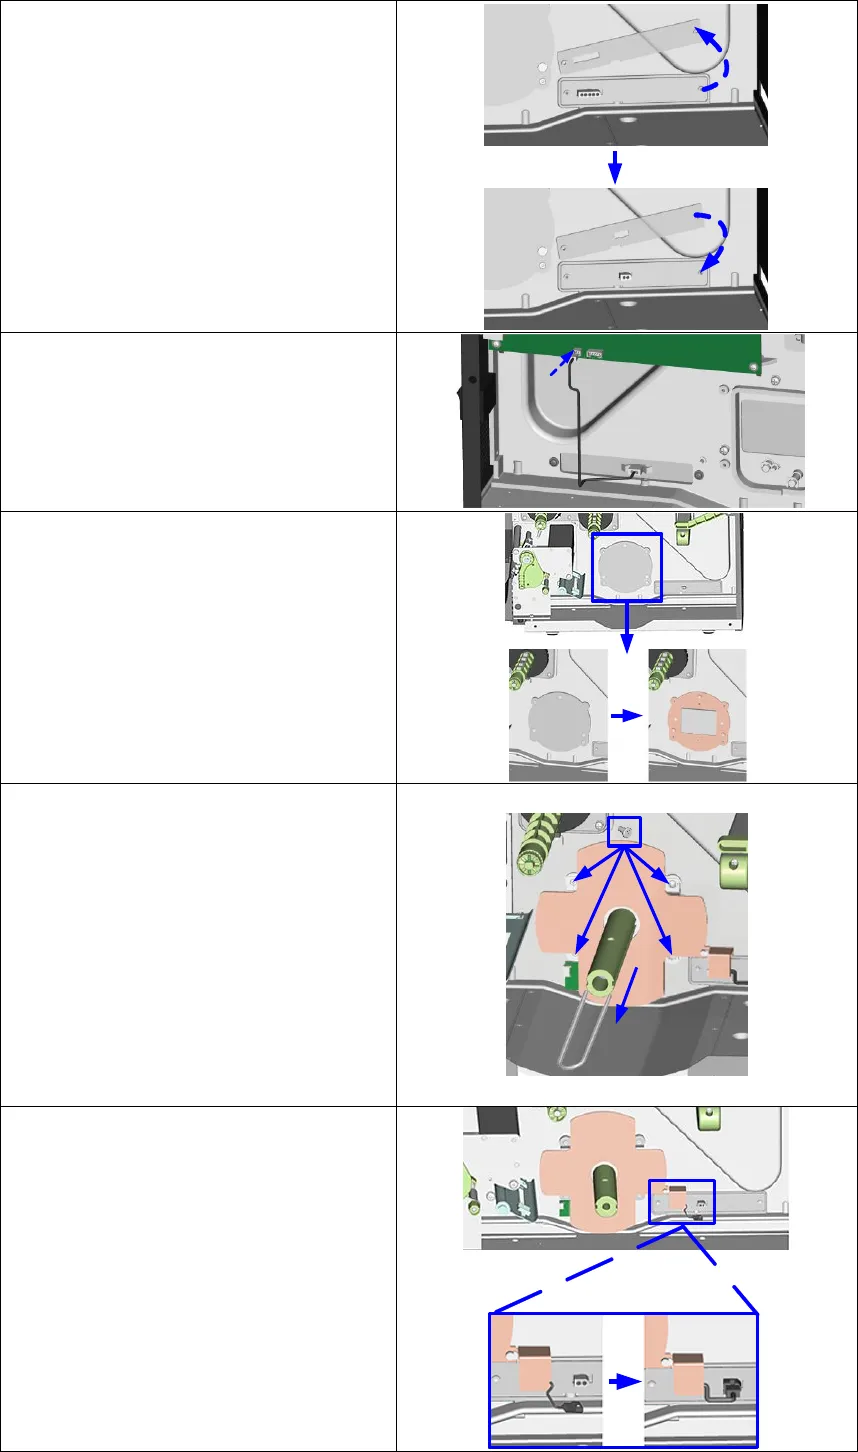
7. Remove the two screws securing
the connector bracket from the
inside of the printer housing.
8. Now attach the rewinder
connector bracket supplied.
9. Connect the rewinder connector
bracket to the motherboard as
shown in the illustration.
10. Remove the cover for the
rewinder module.
11. Remove the retention clip from
the rewinder.
12. Secure the rewinder on the
printer housing using the four
screws supplied.
【
Note
】
Please make sure that all rewinder
cable connectors are arranged on the
side of the motherboard before you
tighten the screws that secure the
rewinder.
13. Connect the "Rewinder full"
switch to the jack on the rewinder
connector bracket.


