INSTALLING YOUR WASHER
Selecting a location
Before you install your washer, make sure the location:
• Has a hard, level surface without carpeting or flooring that may obstruct ventilation and avoid
vibrations
• Allows at least 4 in (10 cm) between the washer and the wall
• Is away from direct sunlight and not exposed to rain as moisture may destroy the electrical
insulation causing an electrical shock hazard
• Has adequate ventilation
• Is not exposed to temperatures below freezing (below 32 ˚F and 0 ˚C)
• Is away from heat sources such as oil and gas
• Has enough space so that your washer doesn’t stand on its power cable
Connecting the water supply hose
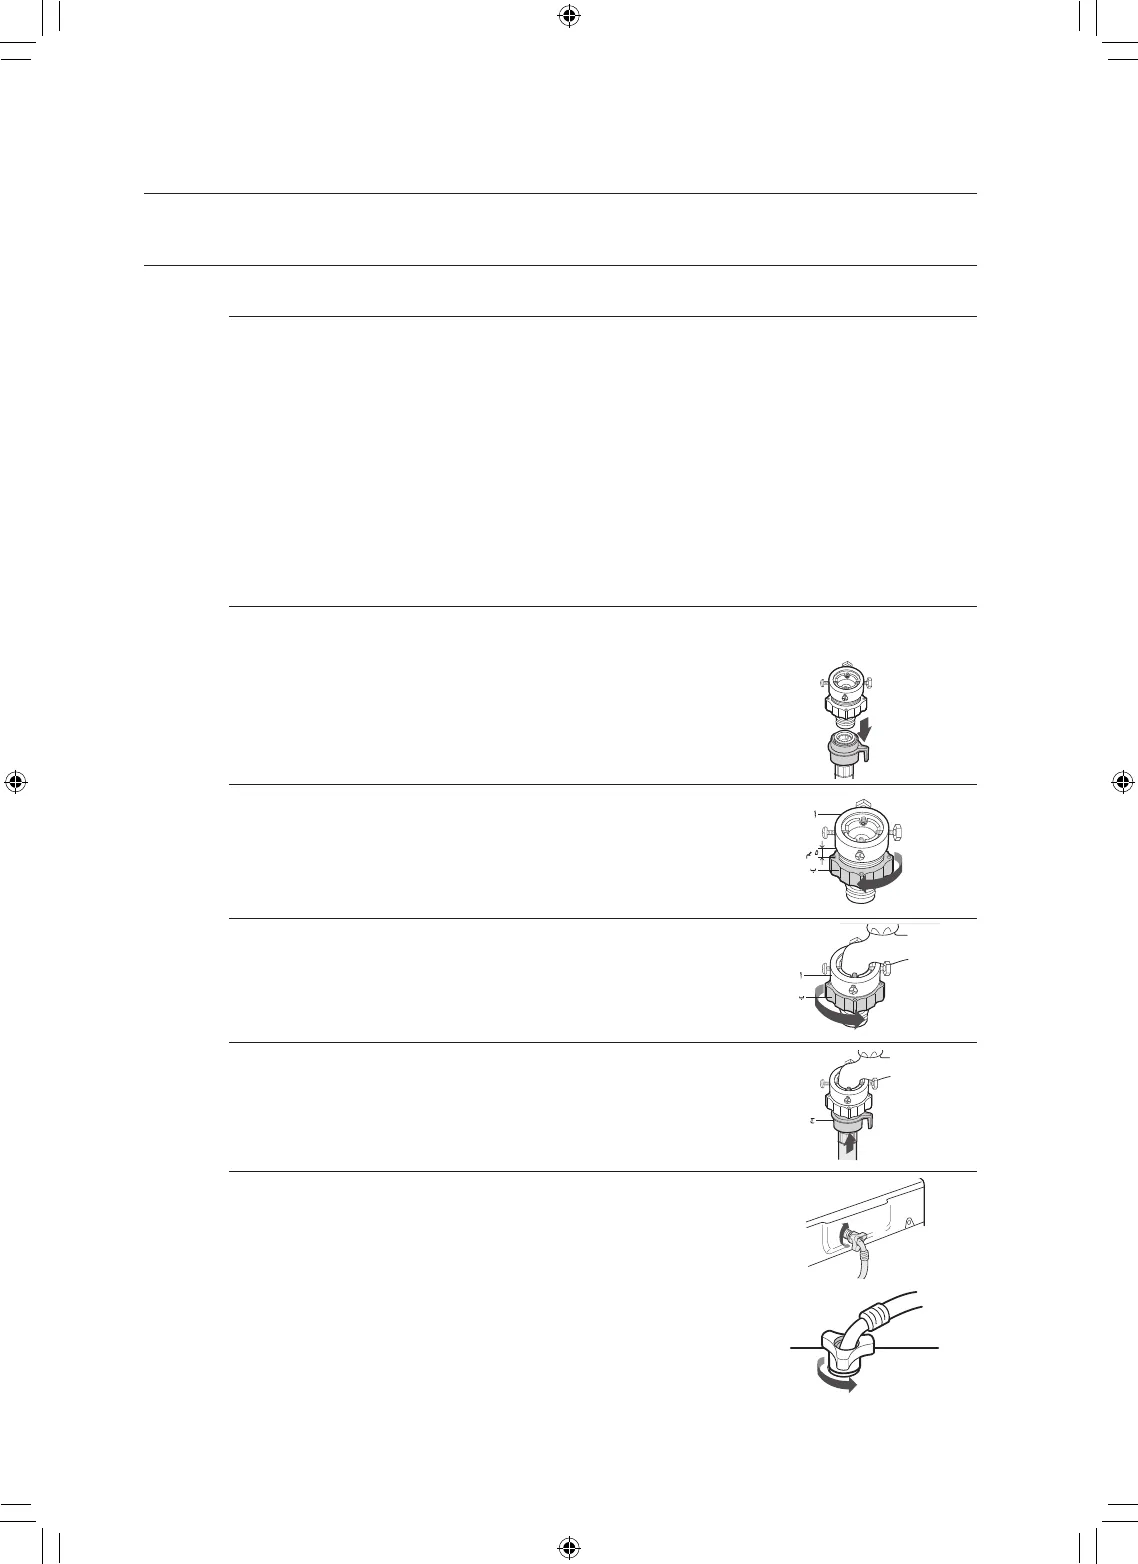
Connecting the hose to the faucet
1. Remove the adaptor from the water supply hose.
2. Loosen the four screws on the adaptor using a “+” type
screwdriver. Then take the adaptor and turn part (b) following
the arrow until there is a gap of about 0.2 in (5 mm) between
part a and b.
3. Connect the adaptor to the water tap by tightening the
screws firmly. Then turn part (b) following the arrow, and
push (a) and (b) together.
4. Connect the water supply hose to the adaptor. Pull part (c)
(water supply hose) downwards. When part (c) is released,
the hose is automatically connected to the adaptor and
makes a ‘clicking’ sound.
5. Connect the other end of the water supply hose to the
inlet water valve at the back of the washer. Screw the hose
clockwise all the way in.
OR
Connect the other end of the water supply hose to the
inlet water valve at the top of the washer. Screw the hose
clockwise all the way in.
setting up your washer