25
Appendix A Change the IP Address
The following two methods allow Pacific C-A / C-AG / C-HSS / C-SHS to be in the same network mask
with the connected computer.
Method 1: Change the IP Address of the Pacific C-A / C-AG / C-HSS / C-SHS
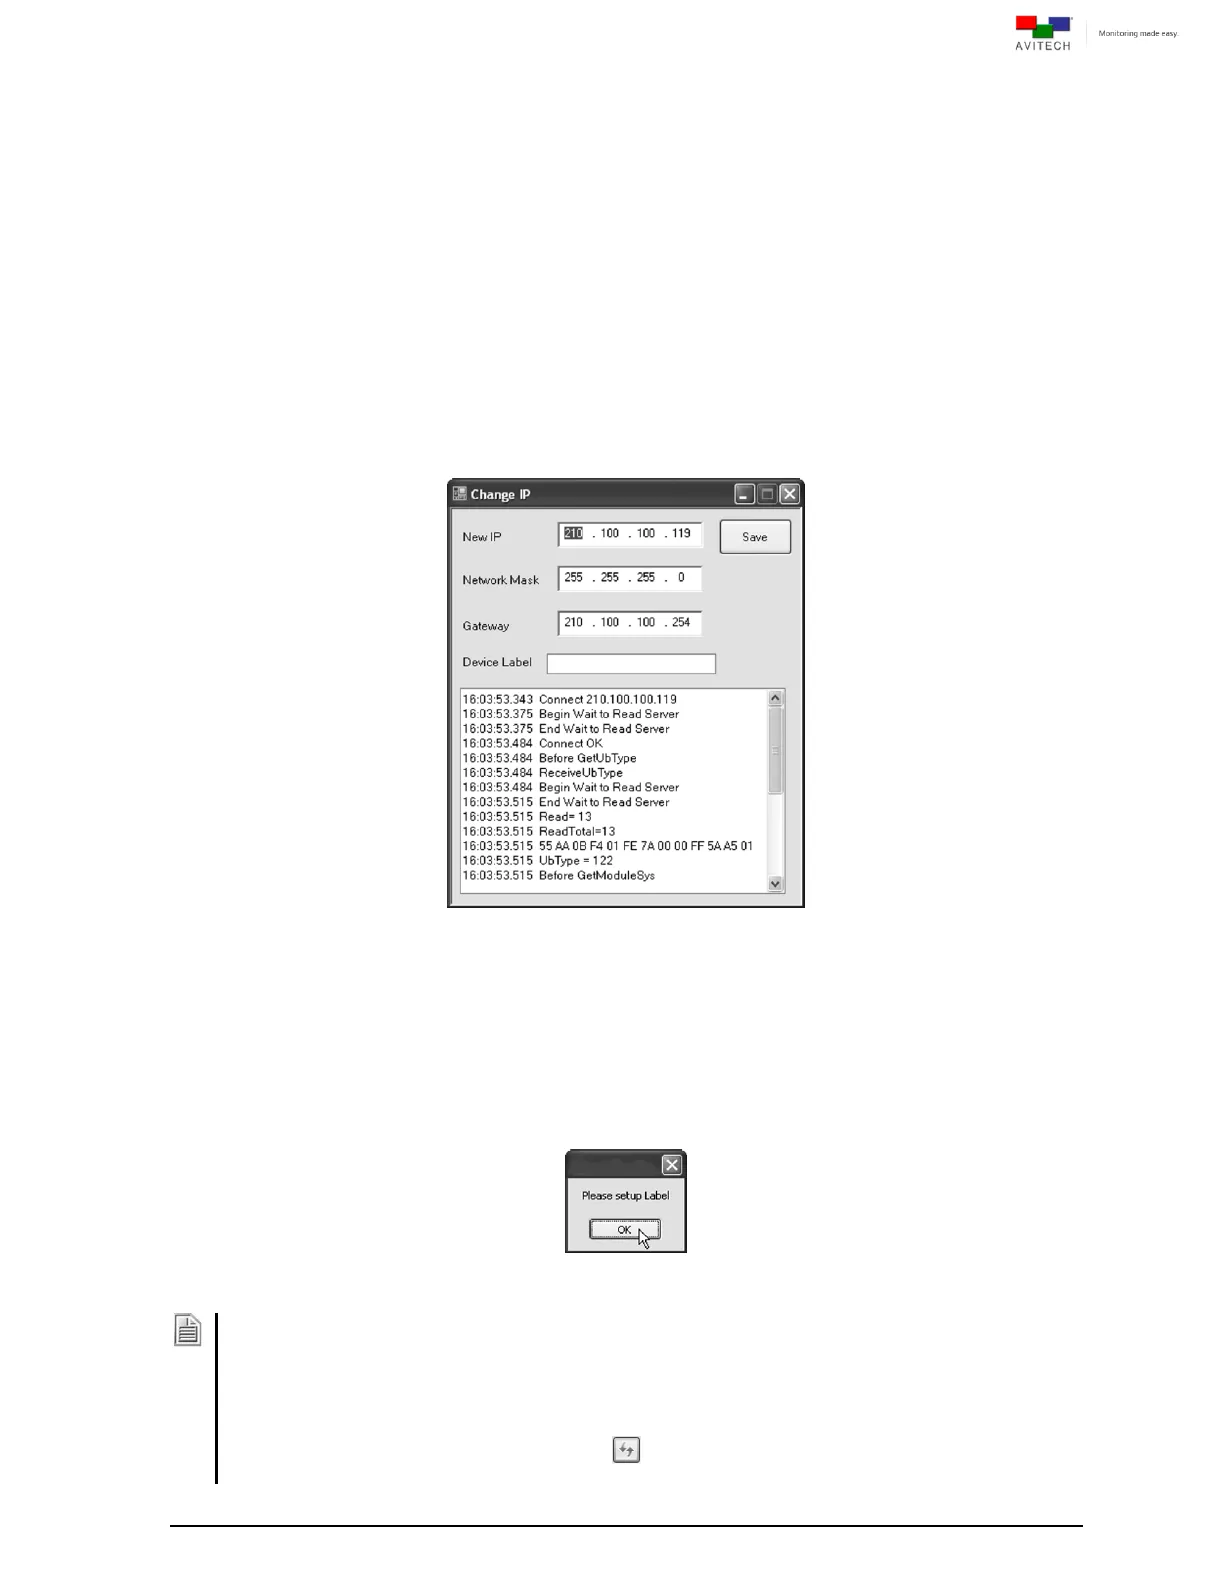
Step 1. Run PacificConfig utility by double-clicking PacificConfig.exe. Select the Pacific C-A / C-AG /
C-HSS / C-SHS IP address appearing in Devices on Network window. Then click Change IP.
The following screen will appear showing the current IP address in the New IP field. The
corresponding Network Mask and Gateway belonging to the current IP address will be
automatically displayed.
Figure A-1 PacificConfig Utility: Change IP Screen
Step 2. Enter a New IP address. Edit the Network Mask and Gateway. Then, click Save. The IP
address will be changed for the target device (saved to flash memory of Pacific C-A / C-AG /
C-HSS / C-SHS).
Step 3. Enter the Device Label. This feature allows the attaching of a label to the corresponding IP
address appearing in the Devices on Network window. The following window will appear when
attempting to exit without setting the Label.
Figure A-2 PacificConfig Utility: Enter Label Prompt
1. This label can only be seen on the computer running the PacificConfig utility. Any remote computer
running the PacificConfig utility will only see the IP address listed in the Devices on Network window
without the label.
2. Upon attaching a label to a particular IP address, a text file will automatically be generated in the
Config folder of the computer where the PacificConfig.exe file was saved.
(e.g., 210.100.100.228.txt). A text-editing program can be used to edit the label in this text file. After
saving the changes, click the refresh button to see the new label in the Devices on Network
window.


