33
MOORING COVER INSTALLATION
1. Locate the two sewn-in tags on one end of the mooring cover (Figure 1)
or playpen cover (Figure 2) that has the material, boat type, date,
seamstress or tailor name imprinted & the Do Not Transport warning. This is
the front of the cover.
2. Lay out your mooring cover on your pontoon boat with the two tags at
the front of the boat.
3. Start snapping on your mooring cover onto the built-in snaps located at
the outside-top of the walls. We recommend starting at one of the rear
corners of the boat. Make sure you line up the snaps correctly; you’ll know
right away if you missed a snap. Velcro any boots around the Bimini top
frame as you come to them.
4. Once you have completed snapping your mooring cover on, ready the
poles for installation inside the boat.
5. The poles fit into the sewn-in vents that are located along the center of
the mooring cover. The first few vents are for the standard straight poles.
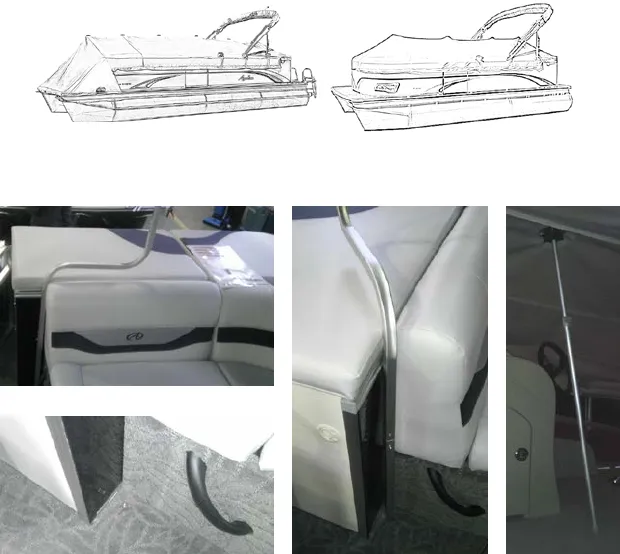
6. Once you reach the rear sundeck area (if applicable) install your S-shape
pole. This pole is designed to fit around the sundeck. The snap is located on
the floor near the rear bench (See figures 3-6).
7. You are now ready to store your boat.
S-Pole Snap Location (fig. 4)
Pole (Fig. 6)


