’
. iCHMENT AS
■V-X^
I
A
CAUTION
DO NOT get the power cord caught under the nozzle when using the vacuum or
attachments as it can be damaged by the agitator as It revolves.
ATTACHMEflTS
E-
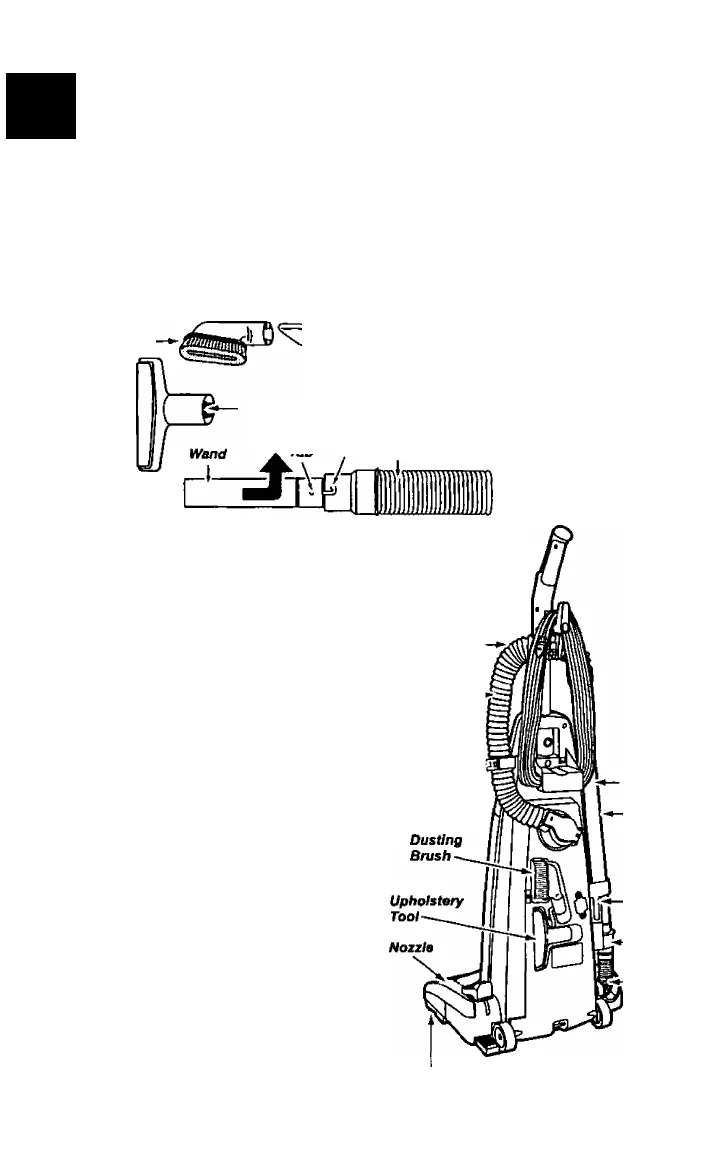
Wand
Dusdng
Brvsh -
Upholstery Tool
Raised "'/*
rah Slot Hose
Crevice
Tool
The attachments should be conveniently positioned on the back and
side of the cleaner for easy access. Some of the attach
ments may already be assembled. Assemt^e the hose
and attachments to the cleaner as follows:
Place the hose in back of the handle on the hose hold
er.
Attach the wand to the hose by aligning the two (2)
raised tabs on the wand with the “J" slots in the hose.
After guiding the tabs along the grooves, twist to lock
in place.
Hose
Holder
Hose
Hose
Ring
Place the wand in the rear slot of the tool holder,
twisting and pushing down over the short hose to assure a
good connection.
The hose ring should be inserted into the slot to
hold in place only when vacuuming areas below
the upper cord hook.
Store the dusting brush, and the upholstery tool in
the rear of the dust compartment in their proper
locations. Place the crevice tool into the front slot
of the tool holder. Refer to the illustration in the
PARTS IDENTIFICATION section for correct attach
ment storage.
Wand
Crevice
Tool
(Behind
Wand)
Hose Ring
Mount
- Tool
Holder
- Short
Hose
Agitator (Underneath)
- 7 -


