6
905077 REV B 7/23/14, 1970-78 CAMARO WITH A/C EVAP KIT PG 6 OF 28
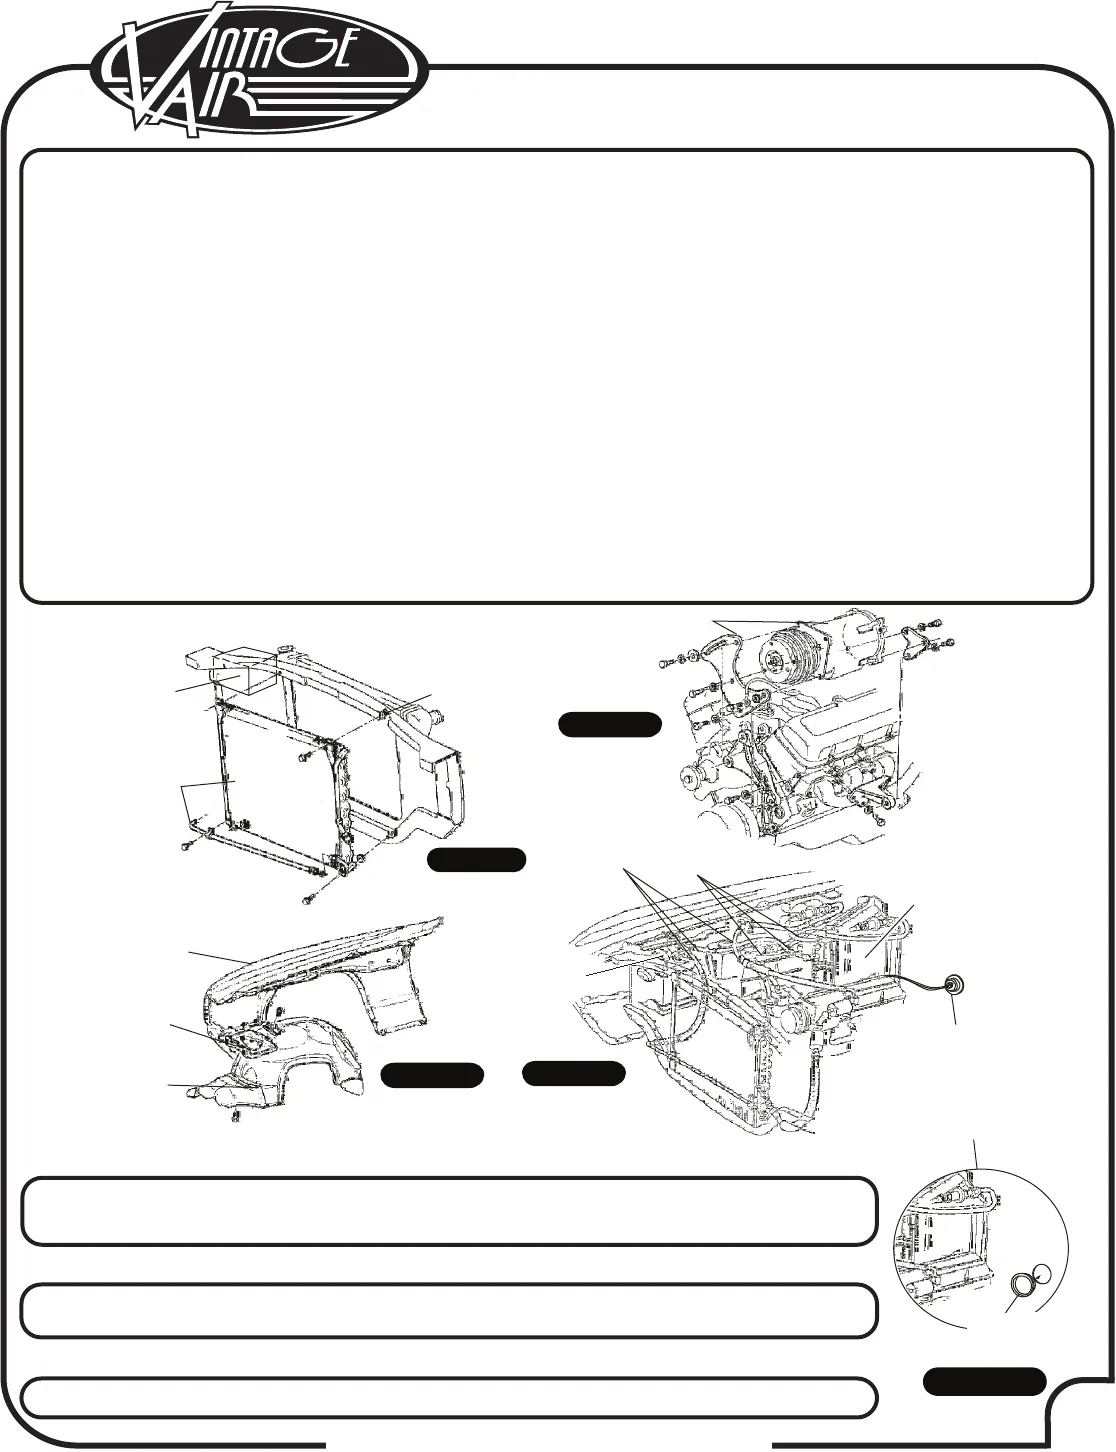
Engine Compartment
FIGURE 1
1. Battery and battery tray (retain) (See Figures 1 and 3, below).
2. Drain radiator.
3. Evacuate the A/C system if necessary.
4. Condenser, lines and the (4) OEM rubber well nuts in core support (discard) (See Figure 1, below).
5. OEM compressor and bracket (discard) (See Figure 2, below).
6. Evaporator and blower assembly (discard). To remove the evaporator and blower assembly (under hood) and the
air distribution system (under dash), the factory m
anual indicates doing the following: Remove right lower
rocker molding. Remove lower fender attaching bolts. Remove skirt to fender and skirt to
reinforcement screws. Pull out on lower portion of fender, moving the skirt away from the
fender flange and firewall. Block the skirt with a 2” x 4” block of wood. To avoid damage to paint and
sheet metal, and for ease of removal and replacement of component
s, Vintage Air suggests that the right fender
be removed and inner panel be lowered (See Figure 3, below). Remove OEM heater hoses, A/C hoses, hardlines
and drier (discard) (See Figure 4, below).
7. Remove OEM A/C & heater wiring/vacuum harness molded grommet (See Figure 4, below).
8. Install 1 ½” plug in firewall (See Figure 4a, below).
Battery
Condenser
and Lines
(4) OEM Rubber
Well Nuts
Typical Condenser
Shown
Typical V8 Shown
Typical Hoses
& Lines Shown
OEM Compressor and Bracket
Passenger
Fender
Battery
Tray
Inner
Fender
Panel
Drier
Assembly
A/C Hoses
Heater
Hoses
Blower &
Evaporator
Assembly
Figure 1
Figure 3
Figure 4
Figure 2
Remove The Following:
OEM A/C
& Heater
Wiring/Vacuum
Harness
Molded Grommet
33173-VUI
1 ½” Plug
Figure 4a
1.
1.
Refer to separate instructions included with the bracket kit to install the compressor
bracket.
In most instances, the belt lengths will remain the same.
Compressor & Brackets
Pulleys
1.
2.
Condenser Assembly & Installation
Refer to separate instructions included with the condenser kit to install the condenser.
Binary switch installation (Refer to condenser instructions).
NOTE: Before starting the installation, check the function of the vehicle (horn, lights, etc.) for proper
operation, and study the instructions, illustrations, & diagrams.


