19
ZonePRO
TM
4.4 ZC DIP Switches & Programming
When configuring the ZCs, there are two steps which need to be completed before the ZCs will
function:
• Step 1: Assign the ZC IDs and perform the ZC Configuration programming
• Step 2: Associate the ZCs
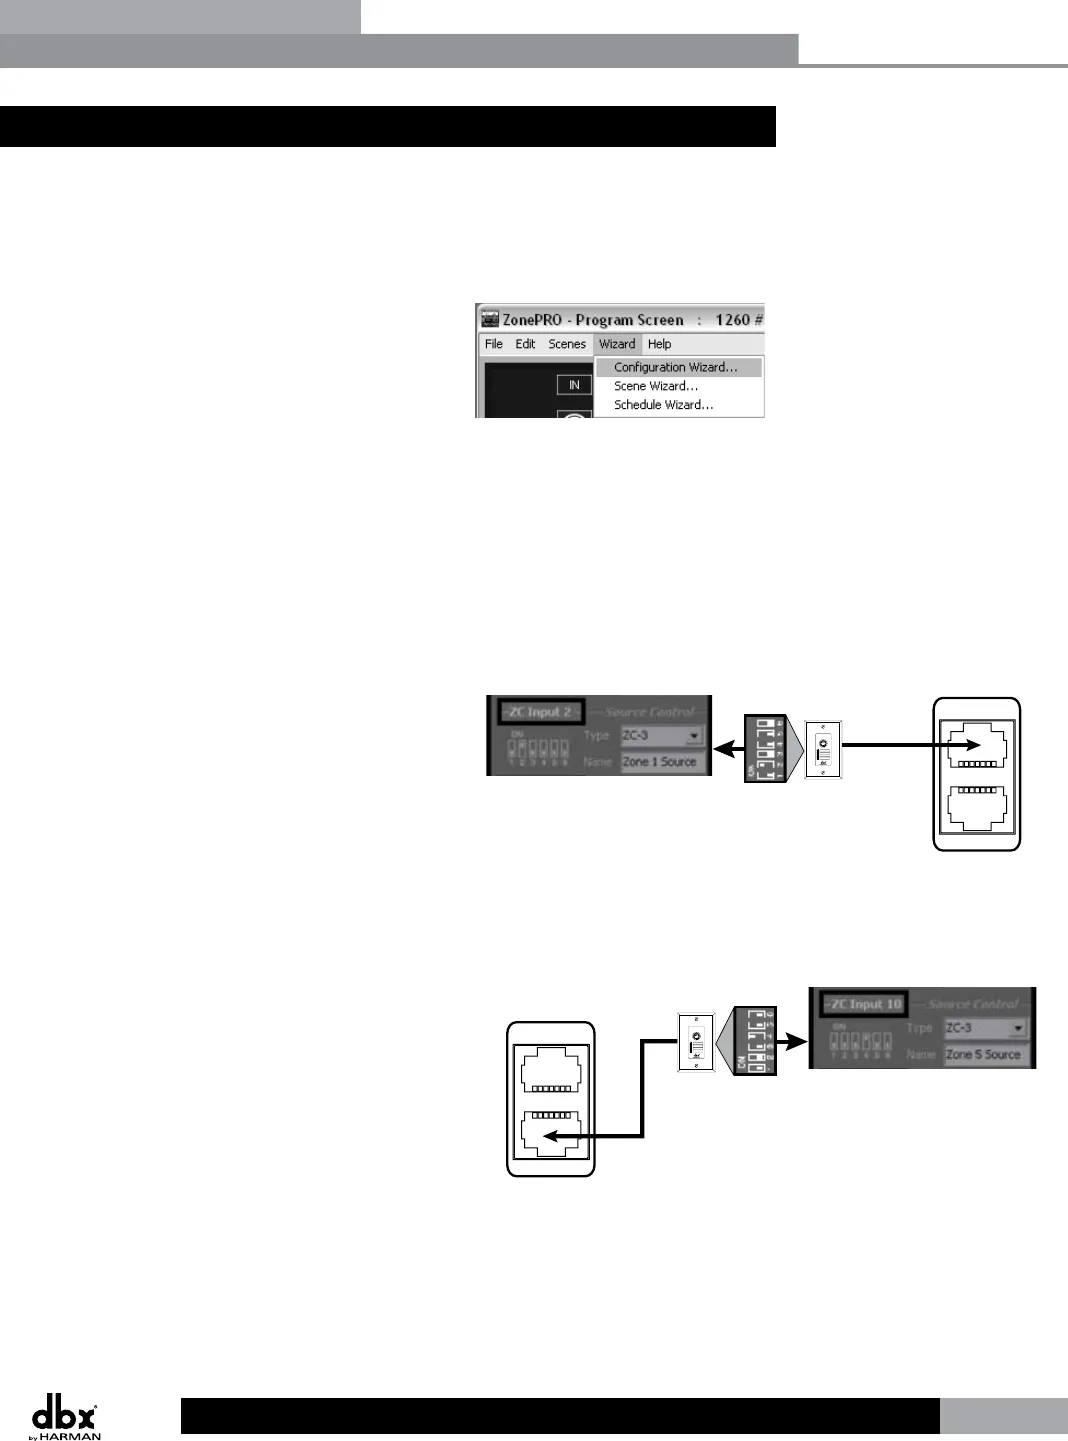
The programming of the ZCs is performed using the
Configuration Wizard in ZonePRO Designer.
Step 1: Assign the ZC IDs and perform the ZC Configuration programming
The ID# assignments on each Zone Controller, set using the DIP switches on the side of each,
must correspond with the appropriate ZC Input port on the back of the ZonePRO device and
with the program loaded into the ZonePRO.
Top ZC Input Port (1-6)
The top ZC Input port on the back of the ZonePRO
device corresponds with ID#s 1-6. Therefore, to
select ID#2 for example, simply flip the 2 DIP
switch into the on position and connect the ZC to
the top ZC Input port on the ZonePRO. You must
then program this ZC, on the corresponding ZC
Panel Configuration page in ZonePRO Designer’s
Configuration Wizard, as ZC Input 2 (ID#2).
ZC INPUT
ZC INPUT
ID’s 1-6
(Top ZC Input Port)
ZonePRO Designer
Software Programming
DIP
Switches ZCs
ZC-3
A
B
C
D
SELECT
A
B
C
D
ID#2
Bottom ZC Input Port (7-12)
The bottom ZC Input port on the back of the
ZonePRO device corresponds with ID#s 7-12. The
physical DIP switch settings simply start over or
repeat when connecting to the bottom ZC Input
port on the ZonePRO. For example, to create ID#s
7-12, add 6 to the ID# selected on the ZC’s DIP
switch. For example, to get an ID# of 10, connect
to the bottom ZC Input port and set the ID# to
4 (4+6=10). You must then program this ZC, on
the corresponding ZC Panel Configuration page in
ZonePRO Designer’s Configuration Wizard, as ZC
Input 10 (ID#10).
ZC INPUT
ZC INPUT
ID’s 7-12
(Bottom ZC Input Port)
ZonePRO Designer
Software Programming
DIP
SwitchesZCs
ZC-3
A
B
C
D
SELECT
A
B
C
D
ID#10
Section 4
Zone Controllers


