Firmware Update Procedure for RX-Z7
Page.4 of 5
Firmware Update Through the Internet
Step1:
Set the MASTER ON/OFF button on the front panel to OFF, and confirm that
the AC power cable is properly connected to an outlet.
Step2:
While pressing the STRAIGHT button, press (and release) the MASTER
ON/OFF button and then keep depressing the STRAIGHT button until
“ADVANCED SETUP” appears on the front panel display.
(Note: “ADVANCED SETUP” is only displayed for a few seconds.)
Step3
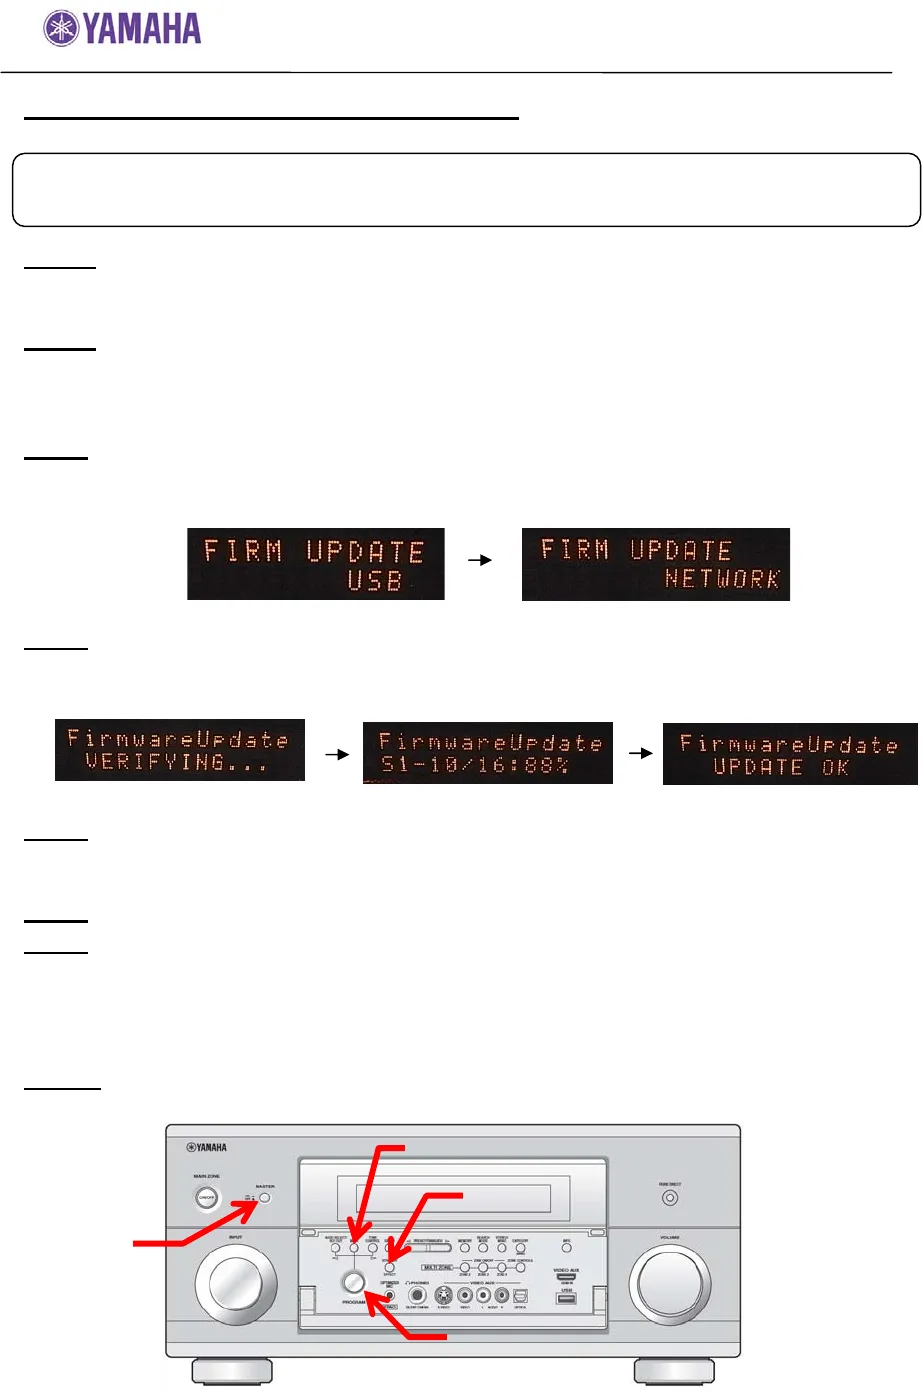
Rotate the PROGRAM selector counterclockwise to select “FIRM UPDATE
USB”.
Press STRAIGHT button to change update mode to network.
Step4
To start the firmware update, press the MENU button.
(Allow about 10mins for update)
Firmware reprogramming in progress
Caution! Do not interrupt power during the update.
Step5
When “UPDATE OK” appers on the display, firmware update is completed.
The receiver automatically powers off and on again in normal operation
mode.
Step6
Power OFF the unit by pressing MASTER ON/OFF button on the front panel.
Step7
While pressing the STRAIGHT button, press (and release) the MASTER
ON/OFF button and then keep pressing the STRAIGHT key until
“ADVANCED SETUP” appears on the front panel display.
Rotate the PROGRAM selector counterclockwise to select “VERSION”.
Confirm that the firmware version is updated to the latest.
Step10
Power OFF the unit by pressing MASTER ON/OFF button on the front panel.
Requirement:
Network environment to be able to connect to the Internet via RX-Z7.
(For more information, refer to the owner’s manual.)
MASTER
MENU
STRAIGHT
PROGRAM


