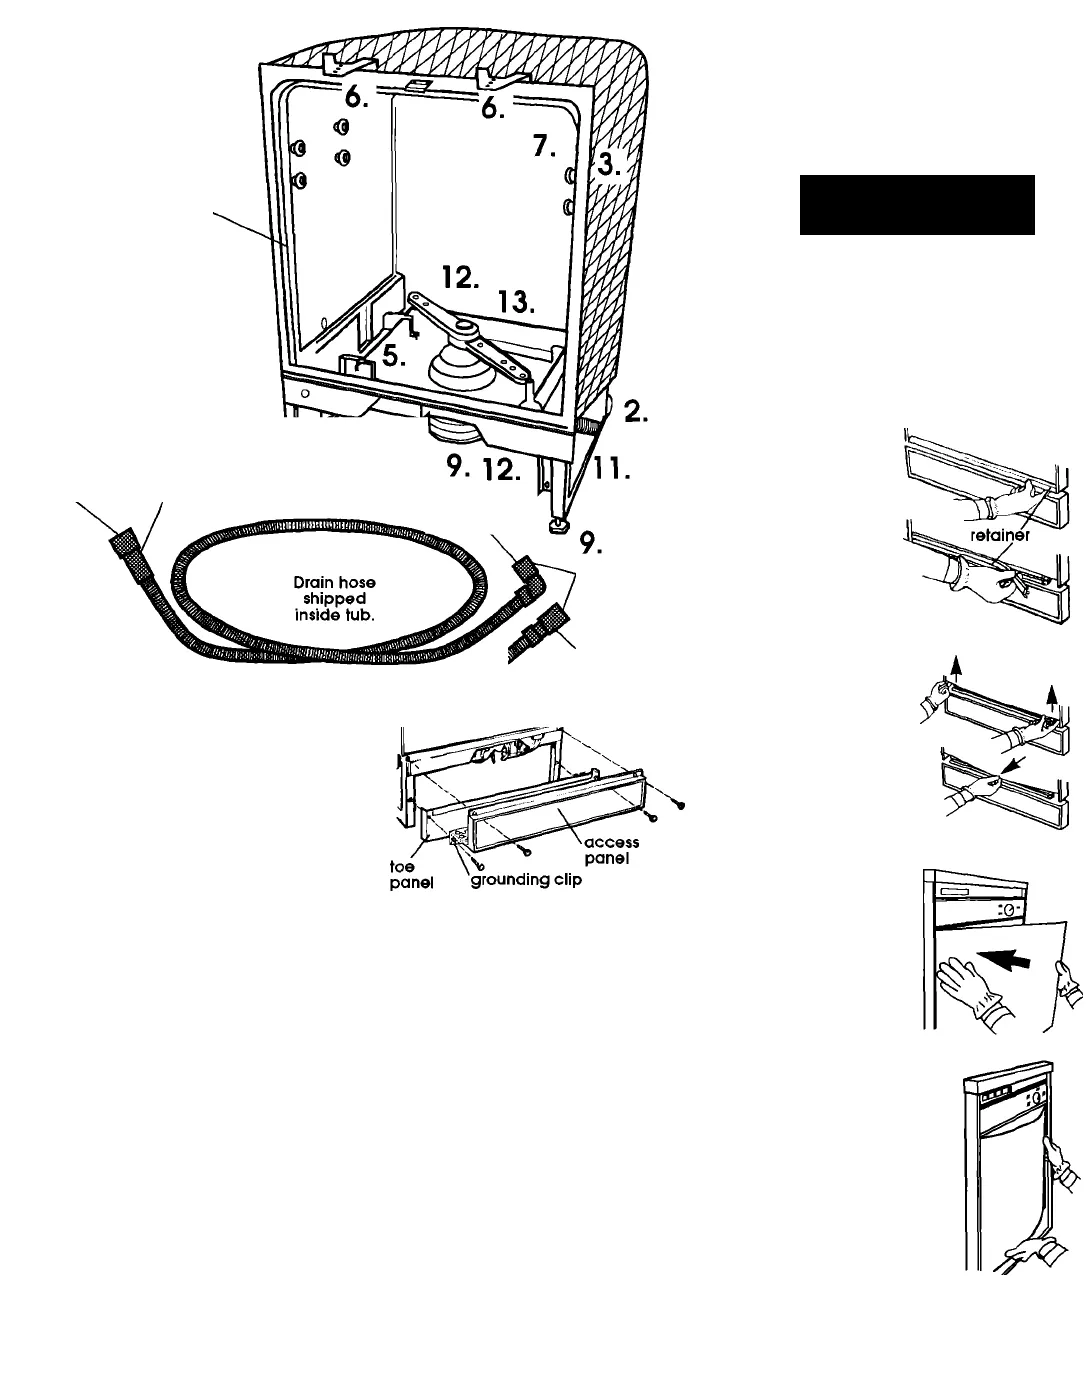
Numbers
correspond to
installation steps.
drain hose
shipped
inside tub
Door, racks,
access and toe
paneis not
shown.
Connect to
Cut here to
connect to
4.j¥
8.^
garbage
waste tee or
disposer
connector.
air gap.
14®
14.
L-shaped end i
Connect to
dishwasher
drain
connector,
straight end
12. I Make eiectrical
connection. CHECK ELECTRICAL
REQUIREMENTS. BE SURE YOU HAVE
THE CORRECT ELECTRICAL SUPPLY
AND RECOMMENDED GROUNDING
METHOD. Check that all parts have
been installed, and that no steps
were skipped. Check that no
screws have fallen into the tub.
Reinstall rack in dishwasher. Turn on
electrical and water supplies.
13
■ Take a few minutes to
read the Use and Care Guide to
fully understand your new
dishwasher.
Start dishwasher and allow it to
complete a full wash cycle. Check
that dishwasher is working properly
and that there are no leaks. When
dishwasher stops, open door and
check for proper draining.
Make sure this clip stays
attached to access panel.
14
.I Reattach the toe panel
and access panel. Check that
grounding clip is attached to the
access panel. The bottom edge of
toe panel must be positioned to
contact floor.
You have just finished
installing your new
undercounter dishwasher.
Keep Instailation instructions
availabie for easy reference.
To change door
panel colour
Note: The opposite side of the
door coiour panei is a different
coiour.
Awarning
Injury Hazard
Wear gloves and handle panels
carefully.
Cut metal edges are sharp and
may cause serious injury.
1
I Insert
finger under
one end of
retainer and
pull towards
you in a
peeling
action. Set
retainer aside.
■ Lift door
panel(s) at
outer edges.
Use one hand
to bow bottom
of panel(s).
Remove
panel(s). Do Not
remove spacer.
W ■ Insert one
side of door
panel(s), with
desired colour
facing out, into
one side of door
frame.
■¥■ Bow door
panel(s) and insert
other side of door
panel(s) into
door frame.
Page 9


