1
How to congure the TP-Link TL-WR702N from “Stand Alone” Mode to “Network Mode” Page 2
How to Congure the TP-Link TL-WR702N from Network to “Stand Alone” Mode Page 3
How to Congure the TP-Link TL-WR702N to Stand Alone Mode after a TP-Link Reset Page 4
Please update PMII to the latest Driver version before switching modes.
Connect to PMII and click on the QRSPWR icon at upper right of display to see the current version..
Download the current Driver from the QRS website.
http://qrsmusic.com/support_pmii.asp
Copy update to a USB memory drive and plug drive into USB port on piano.
TP-Link TL-WR702N - Congurations for QRS PNOmation II
The TP-Link AND the PM II unit must be programmed to switch modes.
Stand Alone
ThereisnoconnecontotheInternet.TheuserwirelesslyconnectstotheTP‐Link(SSID=QRSPNO)andPMII
deliverscontrolonGoogleChrome,orSafari,attheIPAddressof192.168.1.1.PMIIandtheusersWi‐Fidevice
communicateonlywitheachother.
#3 Light = Green
Network
TheTP‐Linkisprogrammedtoco
nnecttotheusershomenetwork.PMIIisprogrammedtogetanIPAddress
fromthelocalrouter.TheadvantageisthattheWi‐FicontroldevicecanbeconnectedtotheInternetandsll
controlPMII.
TheTP‐LinkwillNOTco
nnecttoa5GHzhomerouter.
#3 Light = Yellow
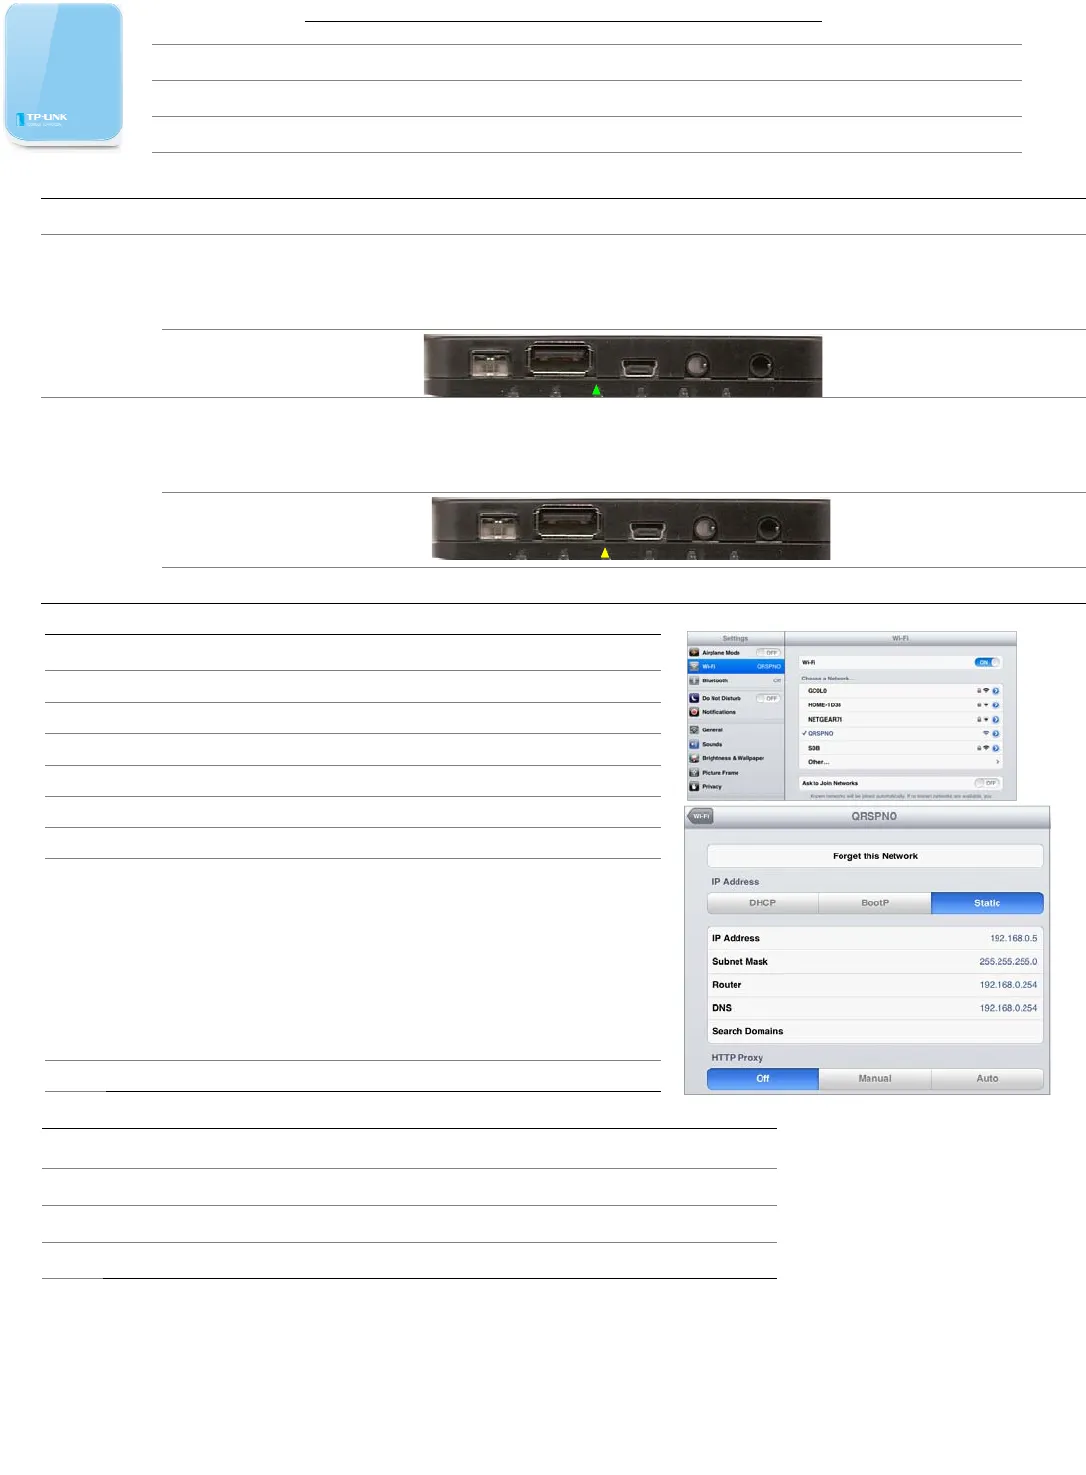
Set a Static IP on your device
A Go to Settings then Wi-Fi
B Connect to the “QRSPNO”
C Touch the blue circle to the right of “QRSPNO”.
D Select “Static”
E-G Enter the following:
IP address: 192.168.0.5
Subnet mask: 255.255.255.0
Router: 192.168.0.254
DNS: 192.168.0.254
H Repeat above and at “E” select “DHCP”.
Apple Products: iPad; iPhone and iTouch
If you’re using an Apple device, use these steps in place of those on the following pages.
Android Device
Sengs/WirelessNetworks/Wi‐FiSengs/Connectto“QRSPNO”
PressthemorebuonandselectAdvanced.
Select“UseStacIP”andenterthesamenumbersasforAppleproductsabove.


