ENGLISH
30
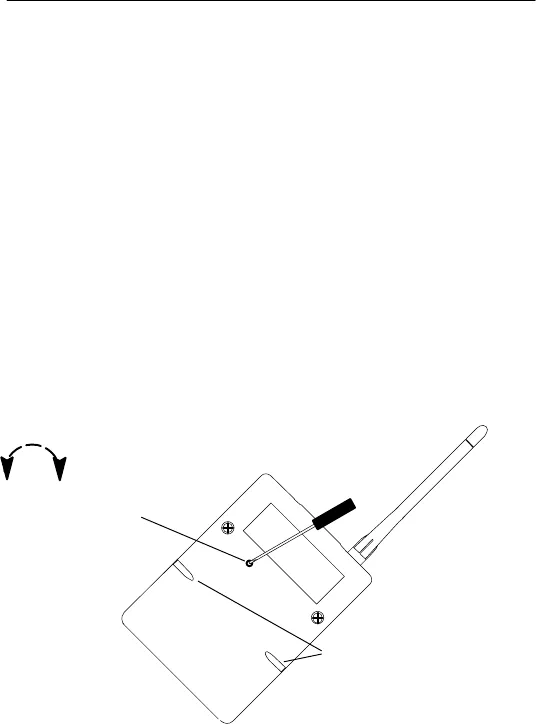
ADJUSTING TRANSMITTER AUDIO INPUT LEVEL (FIGURE 48)
NOTE: The factory-preset (–6 dB) should match most applications. Before chang-
ing the audio input level, try adjusting the transmitter gain (see Figure 47).
The U1 body-pack transmitter has an attenuator switch allowing you to set the audio
input level for different types of applications. Use one of the following three settings
according to the type of input source used:
• 0 dB (fully counterclockwise) is for low-output microphones, such as those in
headsets.
• –6 dB (center) is the factory-preset position; it should accommodate most vocal
and instrumental applications.
• –20 dB (fully clockwise) is for extremely high-output instruments, such as electric
guitars with active electronics.
To change the audio input level, re-position the attenuator switch using the following
steps:
1. Remove the belt clip from the back of the transmitter by carefully prying the wire
bracket, one side at a time, from the sides of the transmitter. Removing the clip
reveals an access hole in the back of the transmitter.
Attenuator
access
Clip sockets
Decrease
input level
Increase
input level
FIGURE 48
2. Use the supplied 1.6 mm (
1
/
16
in.) flat blade screwdriver to turn the Attenuator con-
trol fully clockwise (–20 dB), fully counterclockwise (0 dB), or center (–6 dB). In
the center detent position, the screw slot is horizontal when the transmitter is up-
right.
3. Readjust the Gain pot so the red “Audio”
LED on the U4 receiver flickers only oc-
casionally at the strongest peaks during a performance (see Figure 47).
4. Orient the belt clip so that “Shure” is on the outside and toward the top (antenna
side) of the transmitter. Carefully reinsert the clip’s wire bracket, one side at a time,
into the body of the transmitter.


