54
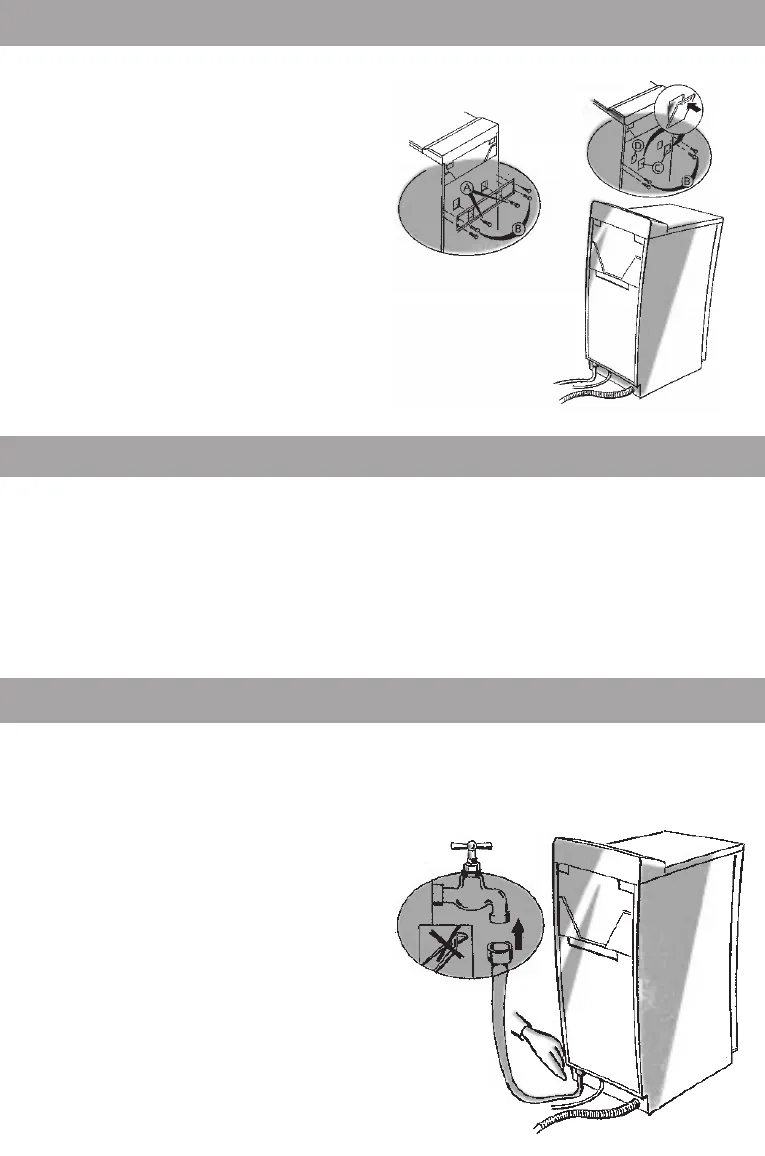
HOW TO REMOVE THE TRANSPORT BRACKETS
INSTALLATION
WATER CONNECTION
1. Follow the instructions illustrated on the package.
2. Tilt the machine backwards to remove the
polystyrene plinth.
3. Remove the transport bracket fixing the tub
during transport.
- Unscrew the two screws (A) with a flat
screwdriver or a N° 8 pipe wrench.
- Unscrew the four screws (B) with the same
screwdriver or with the pipe wrench.
4. Prior to carrying out the connections, remove the
two stop plugs (C) from the drain hose support
and clip them into the openings (D).
Note: In the case of future moves, always transport
the washing machine upright.
hInstall the machine close to connections for
electricity, water and drainage.
hThe machine can be installed in a min. 40 cm
width and 60 cm depth space.Unclip the plastic
hose holder situated on the rear of the machine.
hTo set the appliance to perfect level, adjust the
levelling feet
hTo move the machine, pull the mobility lever
located at the front of the machine (in option by
model). The machine will stand on wheels for
easy moving.
Note: it is important to avoid blocking the openings
on the underside of the machine when installing it
on a carpet floor.
Should the machine be installed in a room which is
subject to extreme temperatures, you need to empty
water at the end of each wash cycle. Please follow
the instructions given in chapter Cleaning the drain
pump and disconnect the water inlet hose.
You should observe local rules and laws regarding
connection to the water supply and drain.
FILLING HOSE
Screw the filling hose connector on to the tap by
hand.
Do not use tools.
Excessive force may damage the connections. Your
machine will operate from a wide range of water
pressures: minimum 5 N/cm
2
to maximum 100 N/
cm
2
. If your water pressure is very high or very low,
or if you encounter any problem, consult a qualified
plumber.


