Access Panel Color
Change
(For
Models
SO
Eauiurxtd)
Cutting Instructions for
Wood Front Panels
SCREW
CORRUGATE0
IF YOU WISH TO CHANGE THE ACCESS
PANEL COLOR: (See Page 4 for details on how
to remove the Access Panel)
NOTE : Observe that the insulation and corrugated
spacer are an assembly.
1. Remove the screws (1 each side) that hold the
bracket with the notch in it. Then loosen the
screws that hold the toe plate and “L” channel to
the access frame. See Figures 16 and 17.
2. Remove the insulation and corrugated spacer
assembly. Then the color access panels. (Your unit
may have two or three panels depending on the
model). Select the color desired.
3. Replace the color access panels and insulation
and corrugated spacer assembly. Make sure the
insulation side of the assembly is facing outward.
See Figure 18.
4. Retighten the screws that fasten the toe plate
and “L” channel to the access panel frame. See
Figure 17.
5. Install the bracket with the notch in it as shown
in Figure 18.
NOTE: When installing the Accesspanel on thedish-
washer, make sure the “notch” is visible and facing
toward the door (upward).
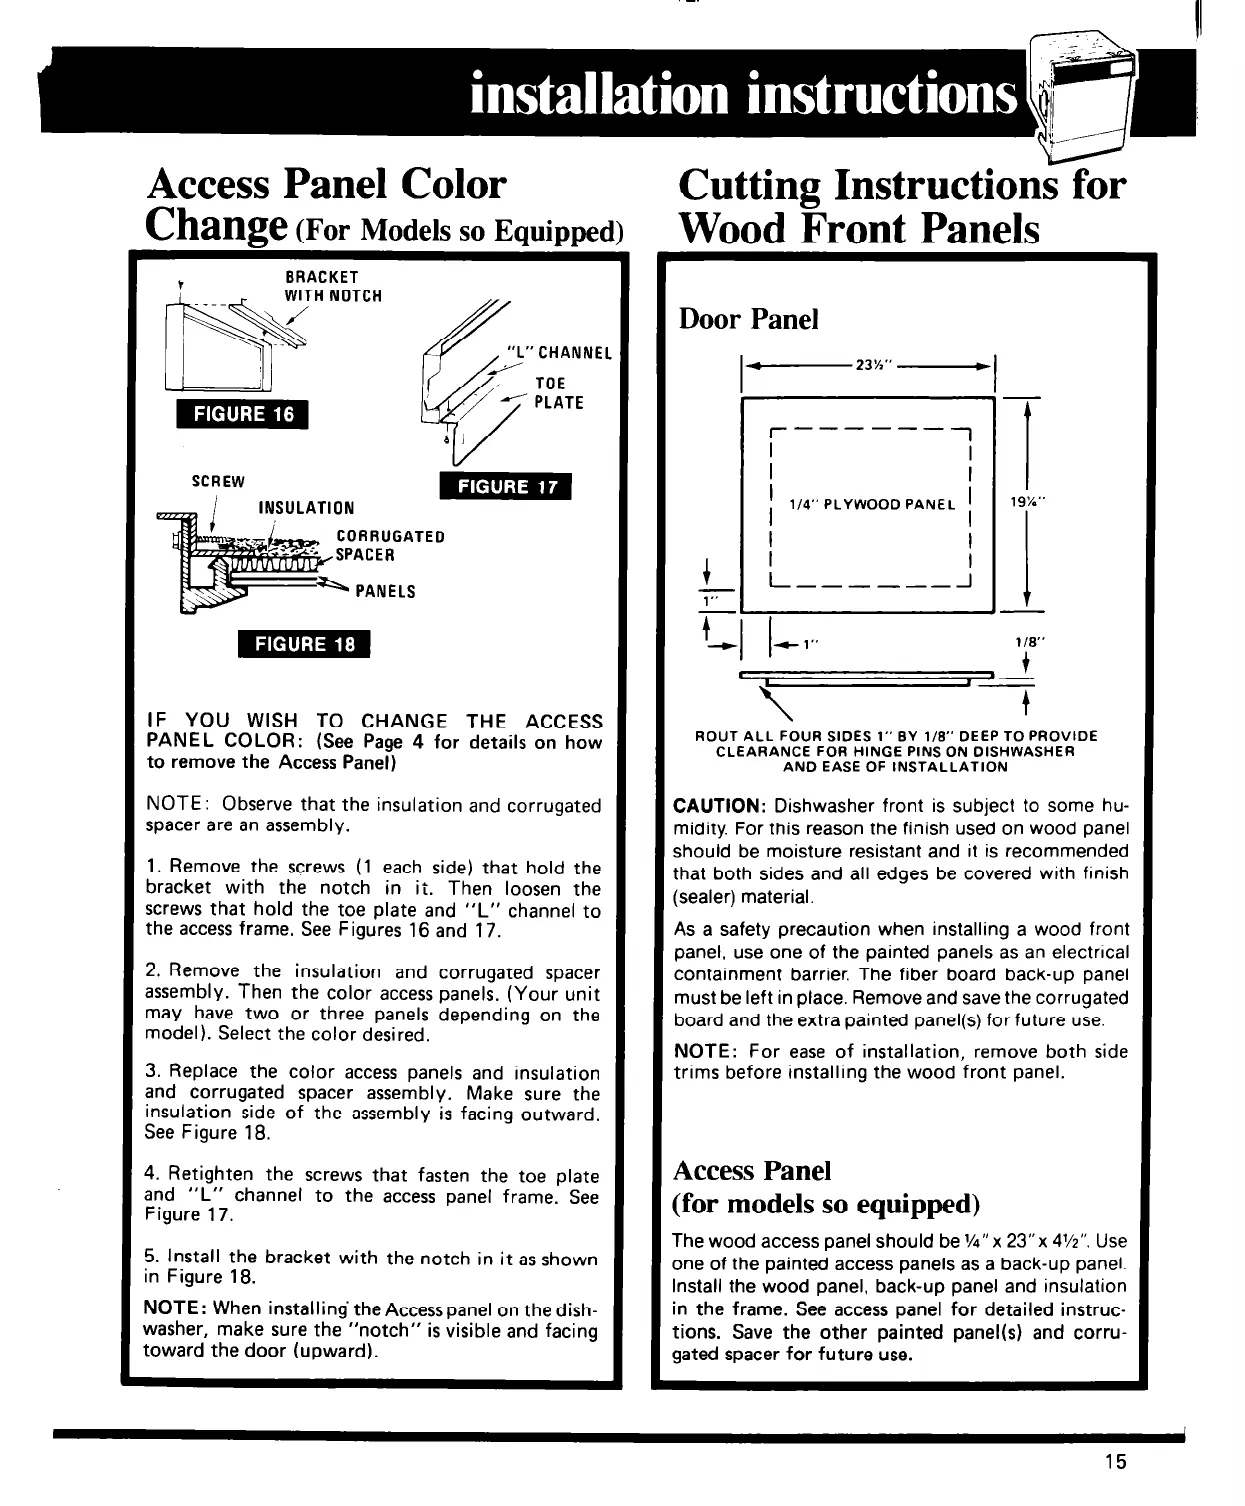
Door Panel
l-
------
1
I
I
I
l/4” PLYWOOD PANEL I
19%”
ROUT ALL FOUR SIDES 1” BY l/8” DEEP TO PROVIDE
CLEARANCE FOR HINGE PINS ON DISHWASHER
AND EASE OF INSTALLATION
CAUTION: Dishwasher front is subject to some hu-
midity. For this reason the finish used on wood panel
should be moisture resistant and it is recommended
that both sides and all edges be covered with finish
(sealer) material.
As a safety precaution when installing a wood front
panel, use one of the painted panels as an electrical
containment barrier. The fiber board back-up panel
must be left in place. Remove and save the corrugated
board and the extra painted panel(s) for future use.
NOTE: For ease of installation, remove both side
trims before installing the wood front panel.
Access Panel
(for models so equipped)
The wood access panel should be l/4” x 23”~ 4%“. Use
one of the painted access panels as a back-up panel.
Install the wood panel, back-up panel and insulation
in the frame. See access panel for detailed instruc-
tions. Save the other painted panel(s) and corru-
gated spacer for future use.
15


