Instructions for Changing Color in Front Panel
Pack
(For Models so Equipped)
CAUTION: As with any cut metal edge, use care in
changing panels to avoid personal injury or damage
to colored panels.
Remove one side trim
NOTE: Either side trim may be removed to change
color in
the
Front Panel Pack.
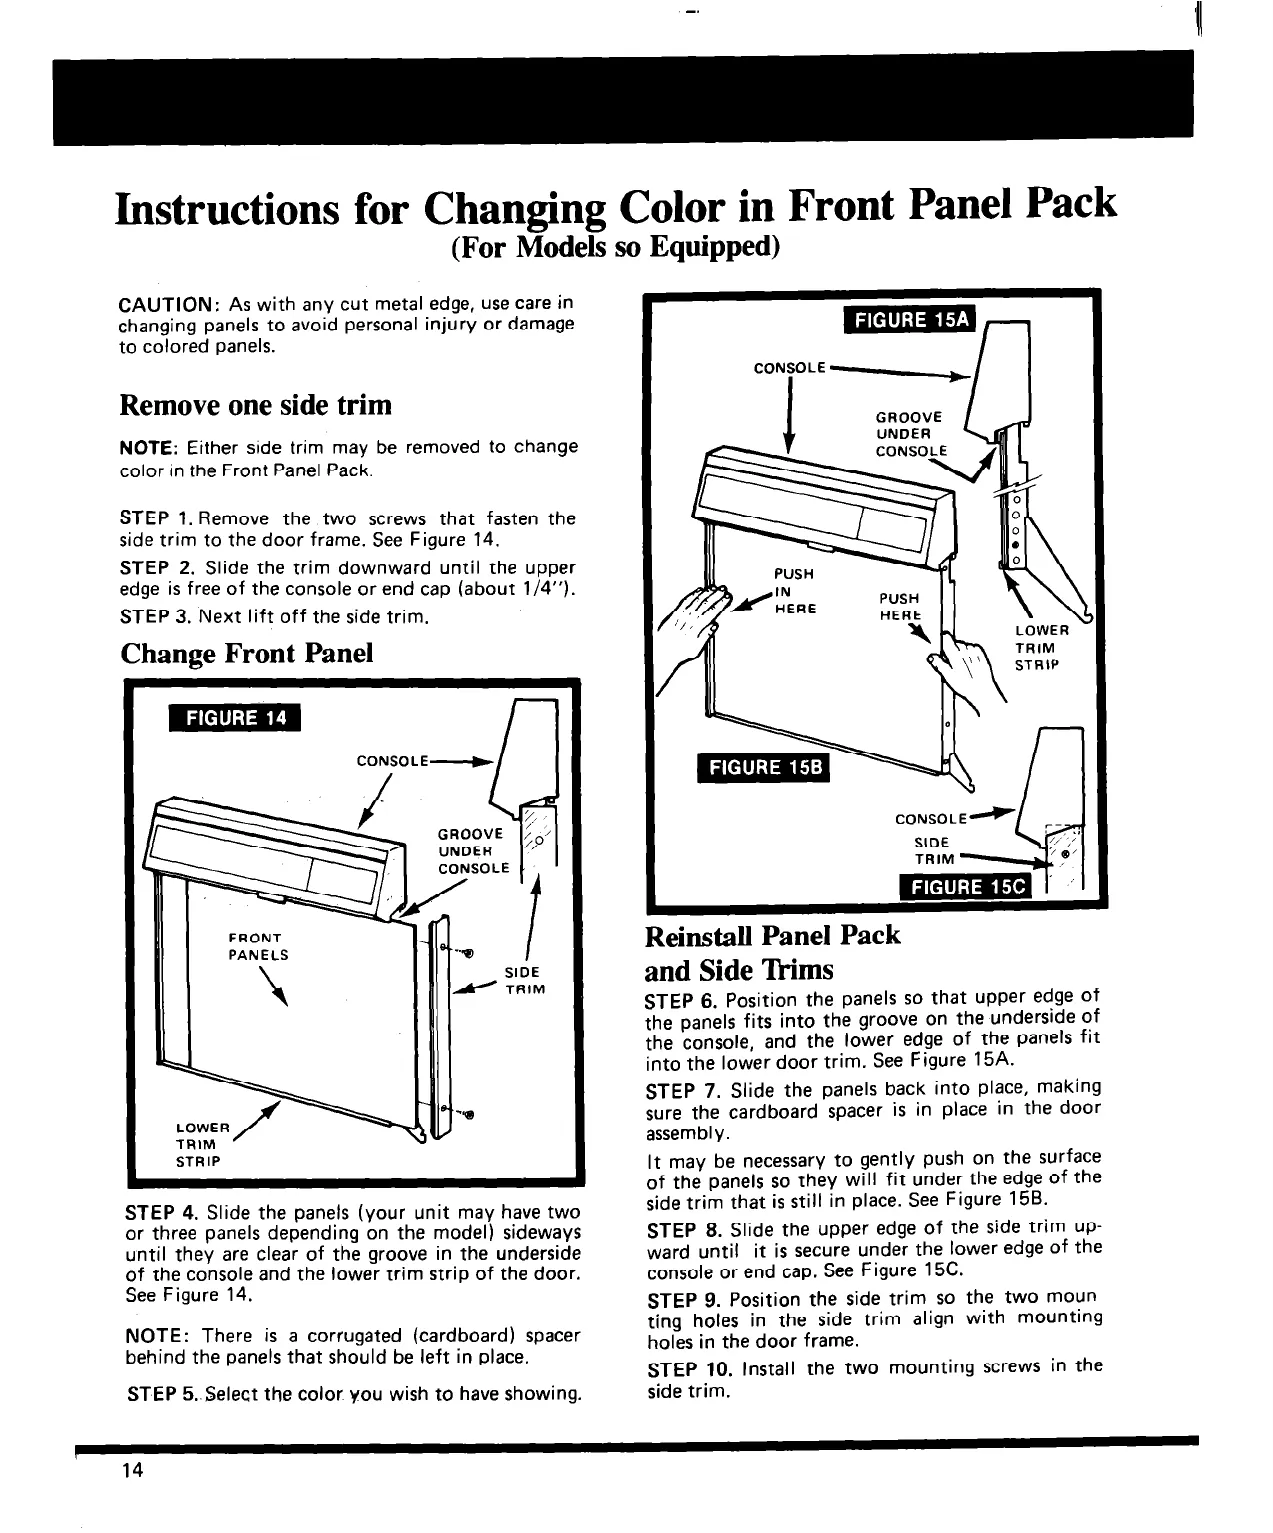
STEP 1. Remove the two screws that fasten the
side trim to the door frame. See Figure 14.
STEP 2. Slide the trim downward until the upper
edge is free of the console or end cap (about l/4”).
STEP 3. Next lift off the side trim.
Change Front Panel
CONSOLE-
r
I
1
STRIP
STEP 4. Slide the panels (your unit may have two
or three panels depending on the model) sideways
until they are clear of the groove in the underside
of the console and the lower trim strip of the door.
See Figure 14.
NOTE: There is a corrugated (cardboard) spacer
behind the panels that should be left in place.
STEP 5..Select the color you wish to have showing.
CONSOLE ‘-+
I
I I
Reinstall Panel Pack
and Side ‘Ibims
STEP 6. Position the panels so that upper edge of
the panels fits into the groove on the underside of
the console, and the lower edge of the panels fit
into the lower door trim. See Figure 15A.
STEP 7. Slide the panels back into place, making
sure the cardboard spacer is in place in the door
assembly.
It may be necessary to gently push on the surface
of the panels so they will fit under the edge of the
side trim that is still in place. See Figure 15B.
STEP 8. Slide the upper edge of the side trim up-
ward until it is secure under the lower edge of the
console or end cap. See Figure 15C.
STEP 9. Position the side trim so the two moun
ting holes in the side trim align with mounting
holes in the door frame.
STEP 10. Install the two mounting screws in the
side trim.
r
14


