Page | 221
Insert M5 grub screw into threaded hole
(right hand side of mount looking at Figure
210) until top of screw is just flush with
surface of mount.
Figure 212: Stud located on stanchion
If fitted remove the centre of three
windscreen-securing screws and replace
with supplied stud (shown in Fig 211)
using flat blade screwdriver. See Fig 213.
Place fibre washer over stud now located
in side screen. The previously assembled
mirror will now slide over the stud located
on the side screen. See Fig 214.
Figure 213: Final fitted assembly
Adjust the mirror position to allow for
optimum vision and lock in place by
tightening M5 grub screw.
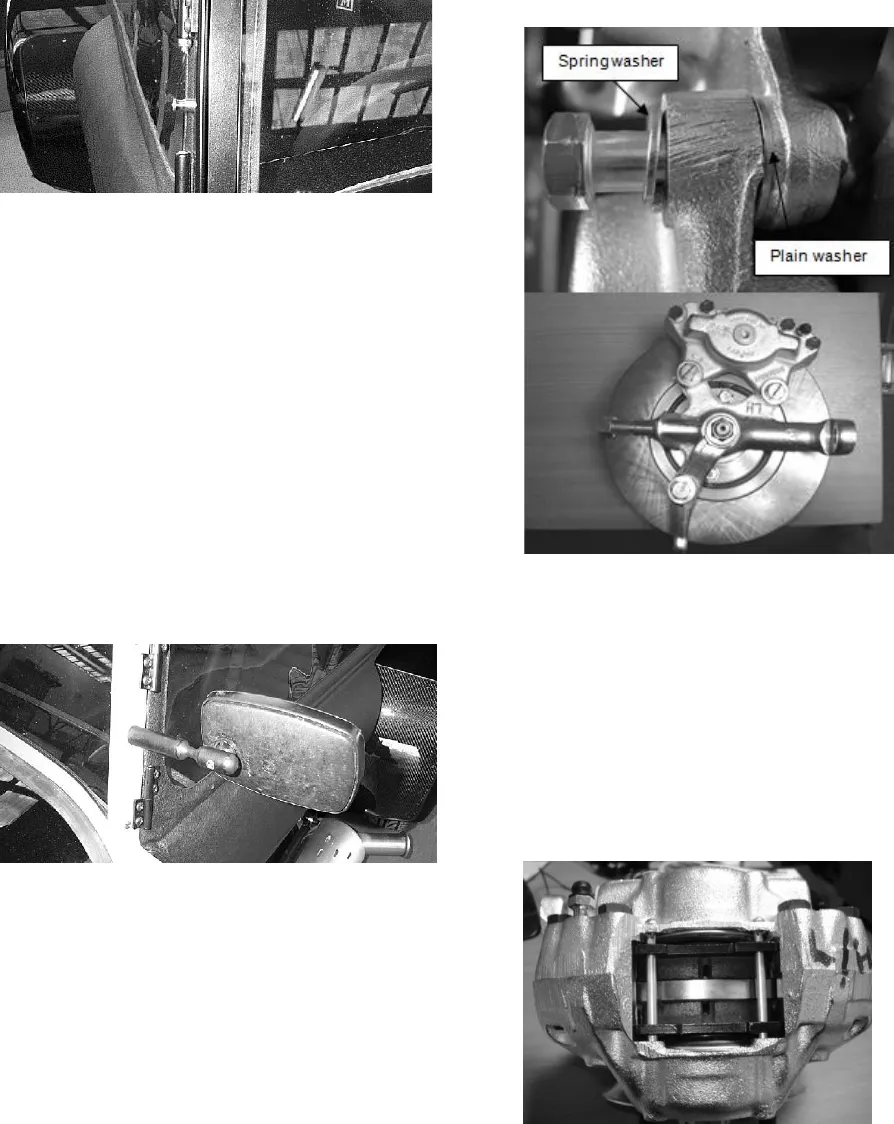
17.8.6) Front brake calliper sub assembly
Remove the bolts and washer from the
vertical link on upright. Slide the calliper
on to the brake disc (callipers and uprights
are handed make sure for correct hand).
Fit the bolt and washers in correct
orientation. Torque the bolts to 58NM.
Figure 214: Front brake calliper
assembly
Pull out the locking clips (‘R’ clip) on
calliper and remove the brake pad Pins.
Slide the brake pads into the calliper and
fit the brake pad pins. Fit the locking clips
(‘R’ clips).
Figure 215: Front brake pads assembly


