ECLIPSE Service Manual Carefree of Colorado
6 052547-301r6
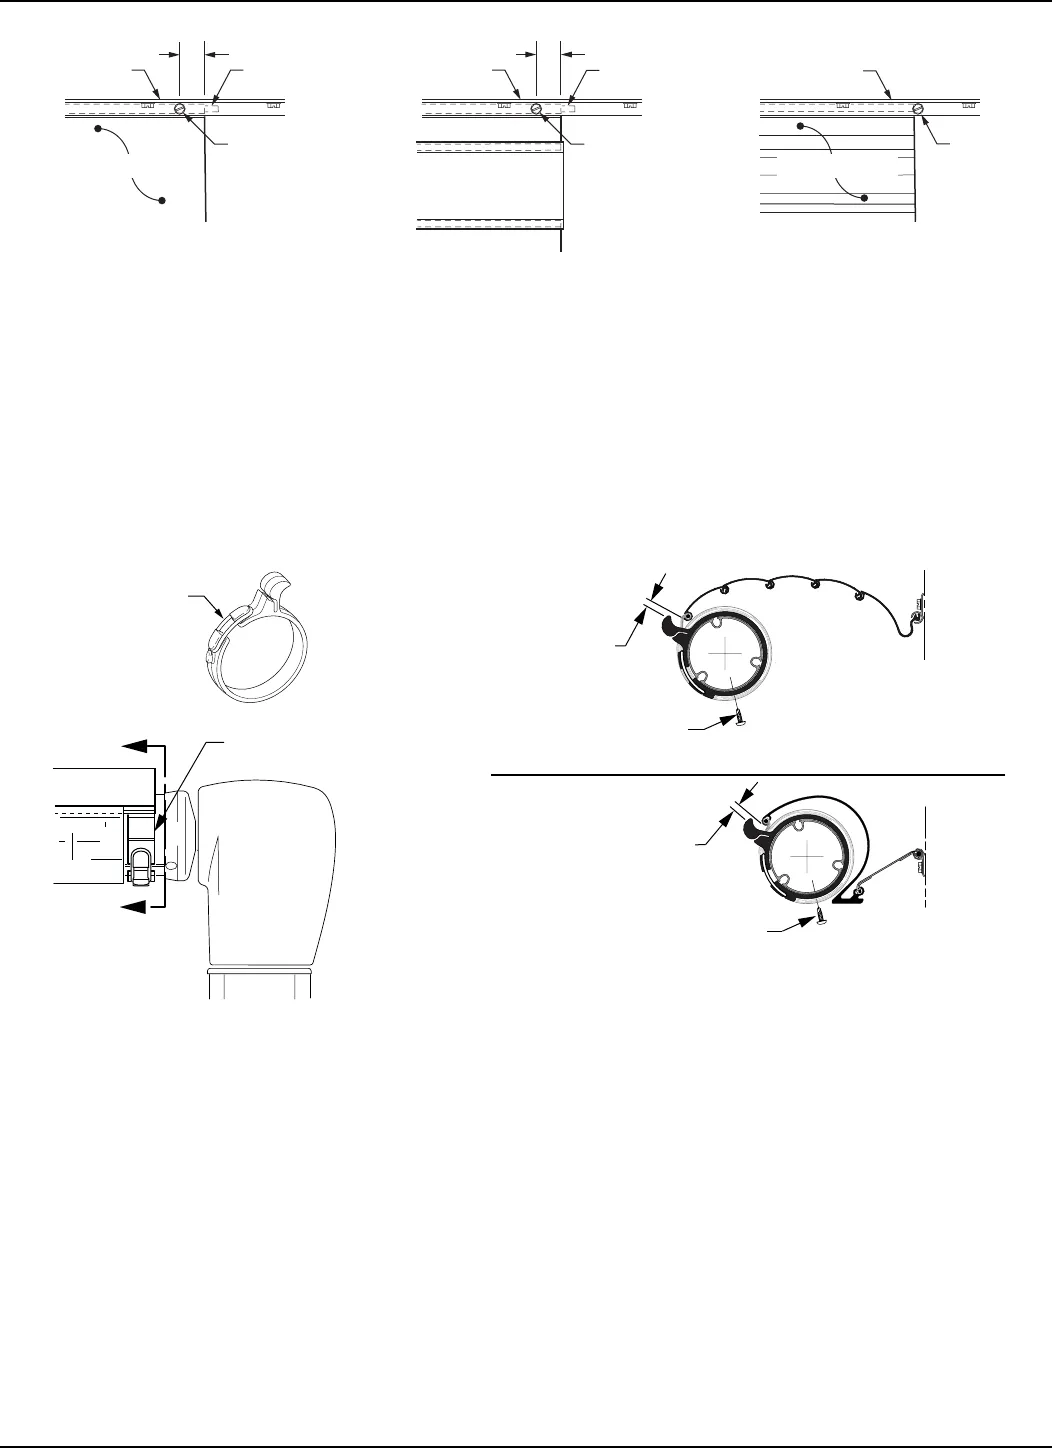
25. Secure the canopy to the awning rail using one, #6 x 3/8" hex head screw at both sides of the awning.
Fabric
Alumaguard
1"
#6 x 3/8
Screw
Polyrod
E0014
Fabric
1"
#6 x 3/8
Screw
#6 x 3/8
Screw
Awning Rail
Awning RailAwning Rail
Polyrod
Uniguard
Soft Connect
Figure 4. Securing the Fabric.
25.1. For vinyl awnings, place screw through awning rail, polyrod and canopy approximately 1” in from
the end of the fabric.
25.2. For Uniguard awnings, place screw through awning rail, polyrod and the soft connect material
approximately 1" in from the end of the fabric.
25.3. For Alumaguard awnings, place screw on the outer edge of the Alumaguard (not through the
Alumaguard).
INSTALLING THE TRACTIONERS
The tractioners are used with the alumaguard metal fabric wrap and uniguard with vinyl fabrics.
1/4" Gap
A
View
A-A
(Uniguard w/ Vinyl Fabric)
Position Tractioner under
Alumaguard/Uniguard
Keeper
E0058
1/4" Gap
Alumaguard or
Uniguard
View
A-A
(Alumaguard)
Place Screw Between
Slots on Roller
Place Screw Between
Slots on Roller
Figure 5. Installing the Alumaguard Tractioner.
1. Partially extend the awning until the Alumaguard/Uniguard is extended with the edge on the roll bar as shown.
2. Unlock the keeper and wrap the tractioner around the roller tube.
3. Position the tractioner under the Alumaguard/Uniguard with a 1/4” gap between the metal wrap and
tractioner. Lock the keeper.
4. Repeat for the other end of the rollbar.
5. Extend the awning to verify that the tractioners are lifting the metal wrap up and over the roller assembly.
6. To secure the tractioner, drill a 1/8” hole through the tractioner and rollbar; roughly center the hole
between two slots of the rollbar.
7. Secure with one (1) #10 square drive screw.
IMPORTANT NOTE: Over time and use, the awning fabric may stretch. When this occurs the
position of the tractioner relative to the metal wrap may change. It may be necessary to remove the
screw and adjust the position of the tractioners (both sides). It will be necessary to drill new holes
(step 6) before securing with the screw.
Manual Compliments of
Northwest RV Supply
Printed From
http://www.nwrvsupply.com


