Carefree of Colorado Service Manual ECLIPSE
052547-301r6 3
10. Slide the fabric out of the awning rail.
11. Clean and deburr the roll bar slots and awning rail/Alumaguard/Uniguard as required. If not
previously done, spread open the awning rail track to facilitate inserting the new fabric.
Tip: Lightly spraying the slots with a dry silicone lubricant will help the fabric slide into the slot without
staining the material.
12. Unfold the replacement fabric then slide the new fabric into the awning rail/Alumaguard/Uniguard.
Center the fabric and install any fabric retaining screws removed previously. Allow the fabric to hang
down the side of the coach.
• For Alumaguard installations: Use a pair of side cutters or similar tool and crimp the aluminum.
Use care to not bend or distort the aluminum slats.
NOTE: While the awning fabric is fairly robust, care must be taken not to snag it on the awning rail.
13. Position the fabric feeders on the roll bar. Be sure to use the same slots as the old canopy.
14. Slide the rollbar on to the new fabric. Center the fabric and install any fabric retaining screws
removed previously.
15. Remove the feeders.
16. If removed, install the upper mounting bracket.
17. Lift and align the roller assembly with the end cap on the motorized arm assembly. Rotate the end cap
until the slot in the cap aligns with the empty slot in the roller assembly, and then press the roller
assembly fully into the cap. The end cap must seat squarely over the end of the roller assembly when
complete.
NOTE: The roller assembly must be oriented with the fabric going over the roller toward the
coach wall.
18. Secure the end cap to the roll bar using two #10 square-drive screws.
19. Repeat steps 17 and 18 to attach the idler arm assembly to the roll bar.
20. Visually check that the fabric is squarely mounted. Adjust as required.
21. Roll the awning in and out several times to make sure that the fabric is square on the rollbar.
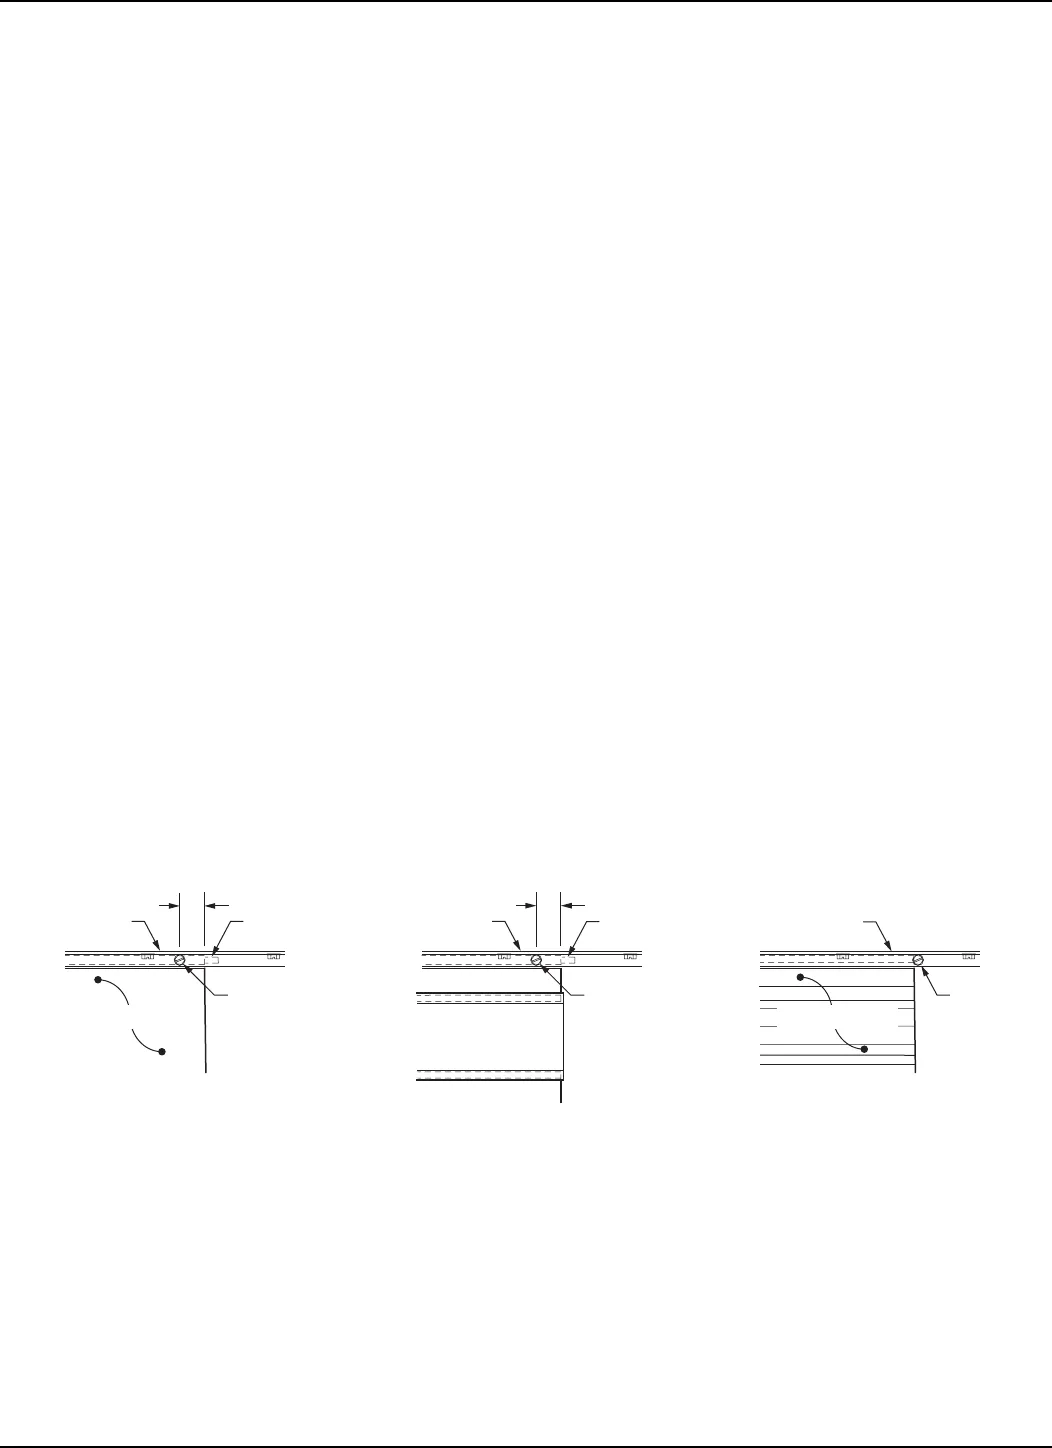
22. Secure the canopy to the awning rail using one, #6 x 3/8" hex head screw at both sides of the awning.
Fabric
Alumaguard
1"
#6 x 3/8
Screw
Polyrod
E0014
Fabric
1"
#6 x 3/8
Screw
#6 x 3/8
Screw
Awning Rail
Awning RailAwning Rail
Polyrod
Uniguard
Soft Connect
Figure 2. Securing the Fabric.
22.1. For vinyl awnings, place screw through awning rail, polyrod and canopy approximately 1” in from
the end of the fabric.
22.2. For Uniguard awnings, place screw through awning rail, polyrod and the soft connect material
approximately 1" in from the end of the fabric.
22.3. For Alumaguard awnings, place screw on the outer edge of the Alumaguard (not through the
Alumaguard).
For Alumaguard installations, go to "Installing the Alumaguard Tractioners" on page
6.
Manual Compliments of
Northwest RV Supply
Printed From
http://www.nwrvsupply.com


