Delay, Phaser and Flanger Custom Settings
3) When the display shows
"DELAY U
ORC.
will now read:
1 . USER"
press enter and the screen
mAY
COpy?
USER
Notice that there is a thin line (the cursor) under the letter
N.
At this point we have two
choices; we could copy the parameters
of
a preset Delay by pressing the "Yes" button and
-cEnter», or just press <Enter> to make our own.
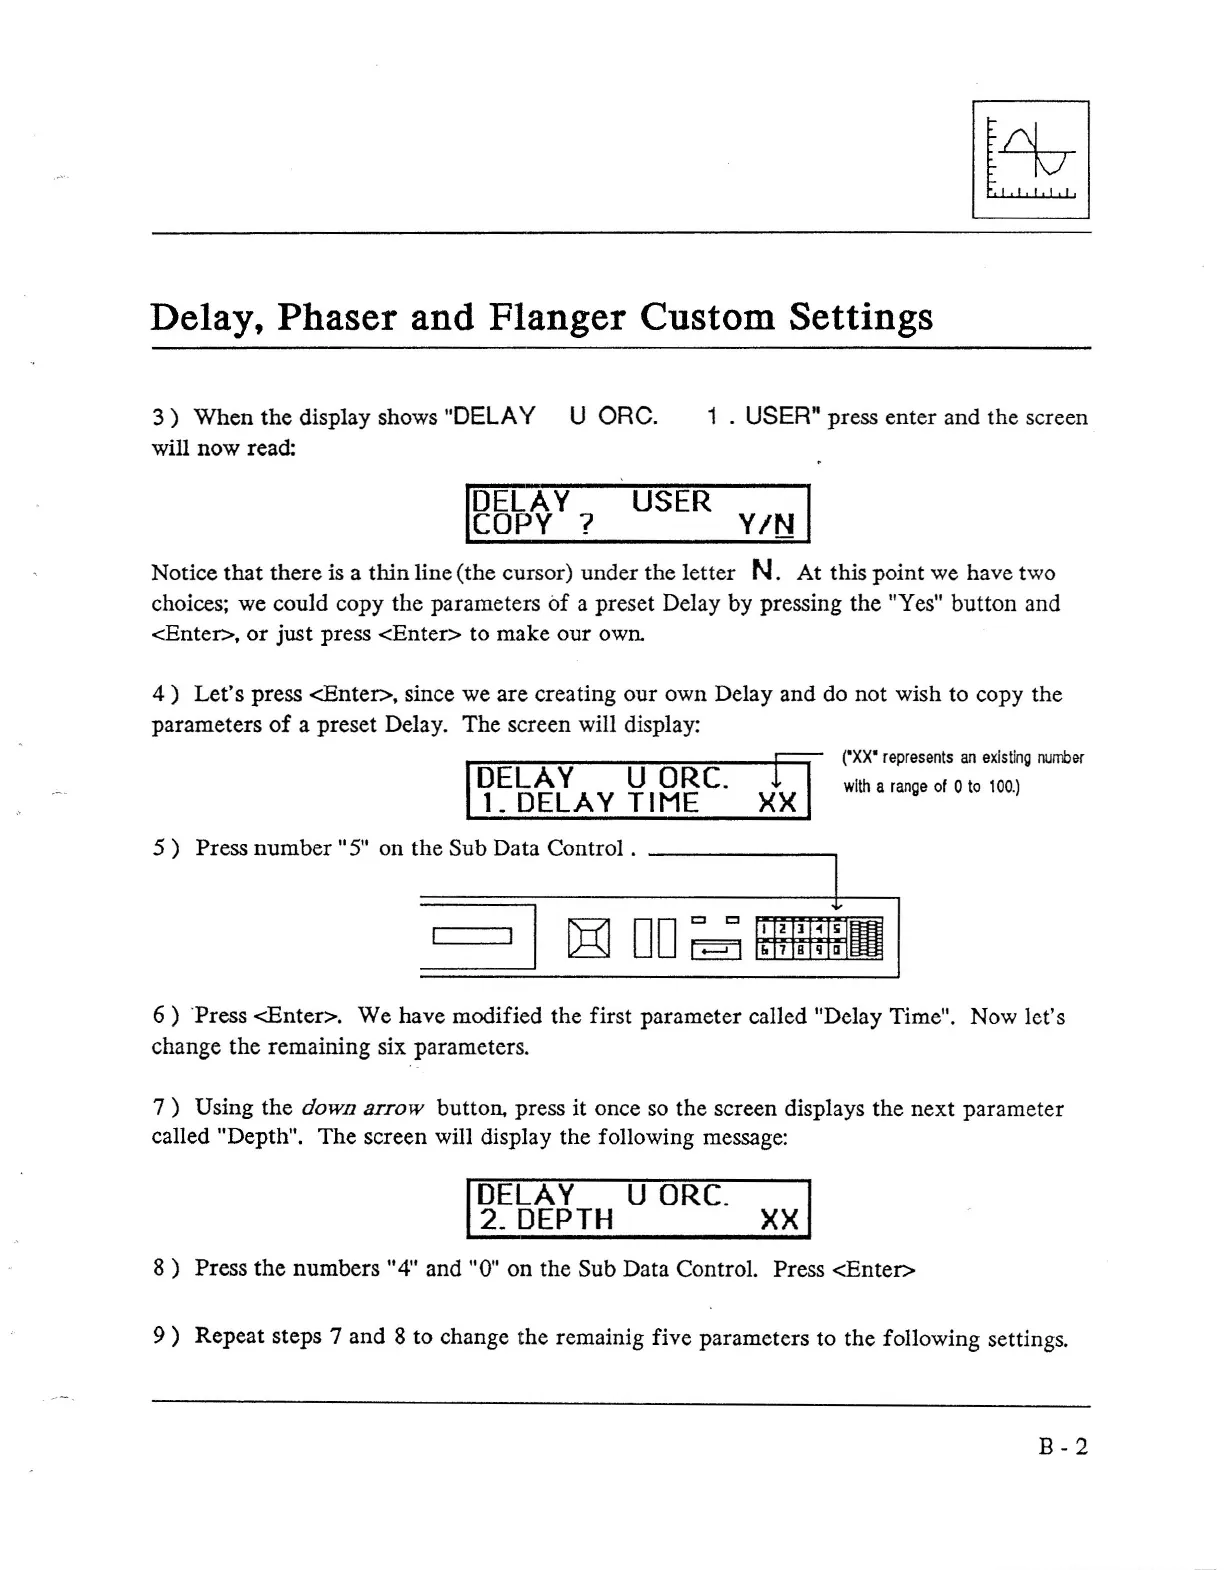
4) Let's press <Enter>, since we are creating our own Delay and do not wish to copy the
parameters of a preset Delay. The screen will display:
g
(·XX· represents an existing number
XX
with a range of 0 to 100.)
~~~~~~~~----~
I
DELA Y U aRC.
~. DELAY TIME
5) Press number" 5" on the Sub Data Control. -,
R=?1
DO
C C ~
BJ [-'I~
6) 'Press <Enter>. We have modified the first parameter called "Delay Time". Now let's
change the remaining six parameters.
7) Using the
down arrow
button, press it once so the screen displays the next parameter
called "Depth". The screen will display the following message:
I
DELA Y U aRC.
2. DEPTH
xxi
8) Press the numbers "4" and "0" on the Sub Data Control. Press <Enter>
9) Repeat steps 7 and 8 to change the remainig five parameters to the following settings.
B-2


