6.
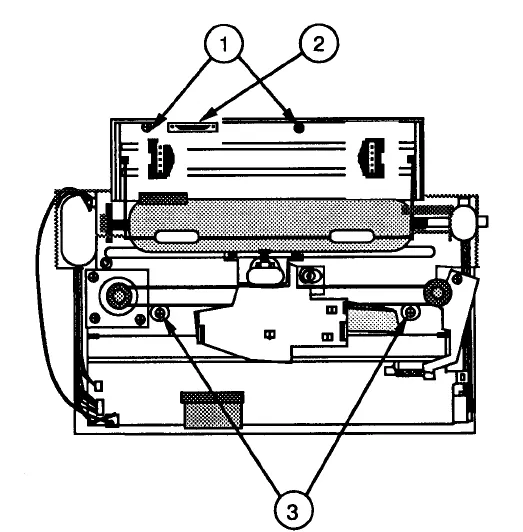
Reseat the frame in the printer by gently pushing back
on the rear of the printer case and lowering the metal
frame down under the three tabs of the case (Figure 26,
#1). The frame is seated properly when the two white
plastic plus-sign-(+)-shaped flanges, next to the shock
mount screws (Figure 27, #3) on the bottom are fully
exposed and no part of the frame is resting on them.
FIGURE 27
7.
Replace the two black shock mount screws at the
bottom of the frame (Figure 27, #3). (The shorter screw
mounts on the right side.
8.
Replace the sheet feeder sensor plug and its connector
plate (Figure 27, #2).
9.
Replace the two screws (Figure 27, #1) located above
the tractor assembly that secure the upper mechanical
assembly frame to the printer case.
10.
Tip the printer so that it rests on the front part of the
case. Reinstall the legs, making sure that the tabs of
the power plug are in the grooves on the right leg and
that the pin connector is lodged properly on the left.
V
erify that no wires are exposed. Screw the legs on.