Midwest Industries, Inc. Ida Grove, IA 51445 800.859.3028 www.shorelandr.com 0003476
Page 4 REV B 10/27/06
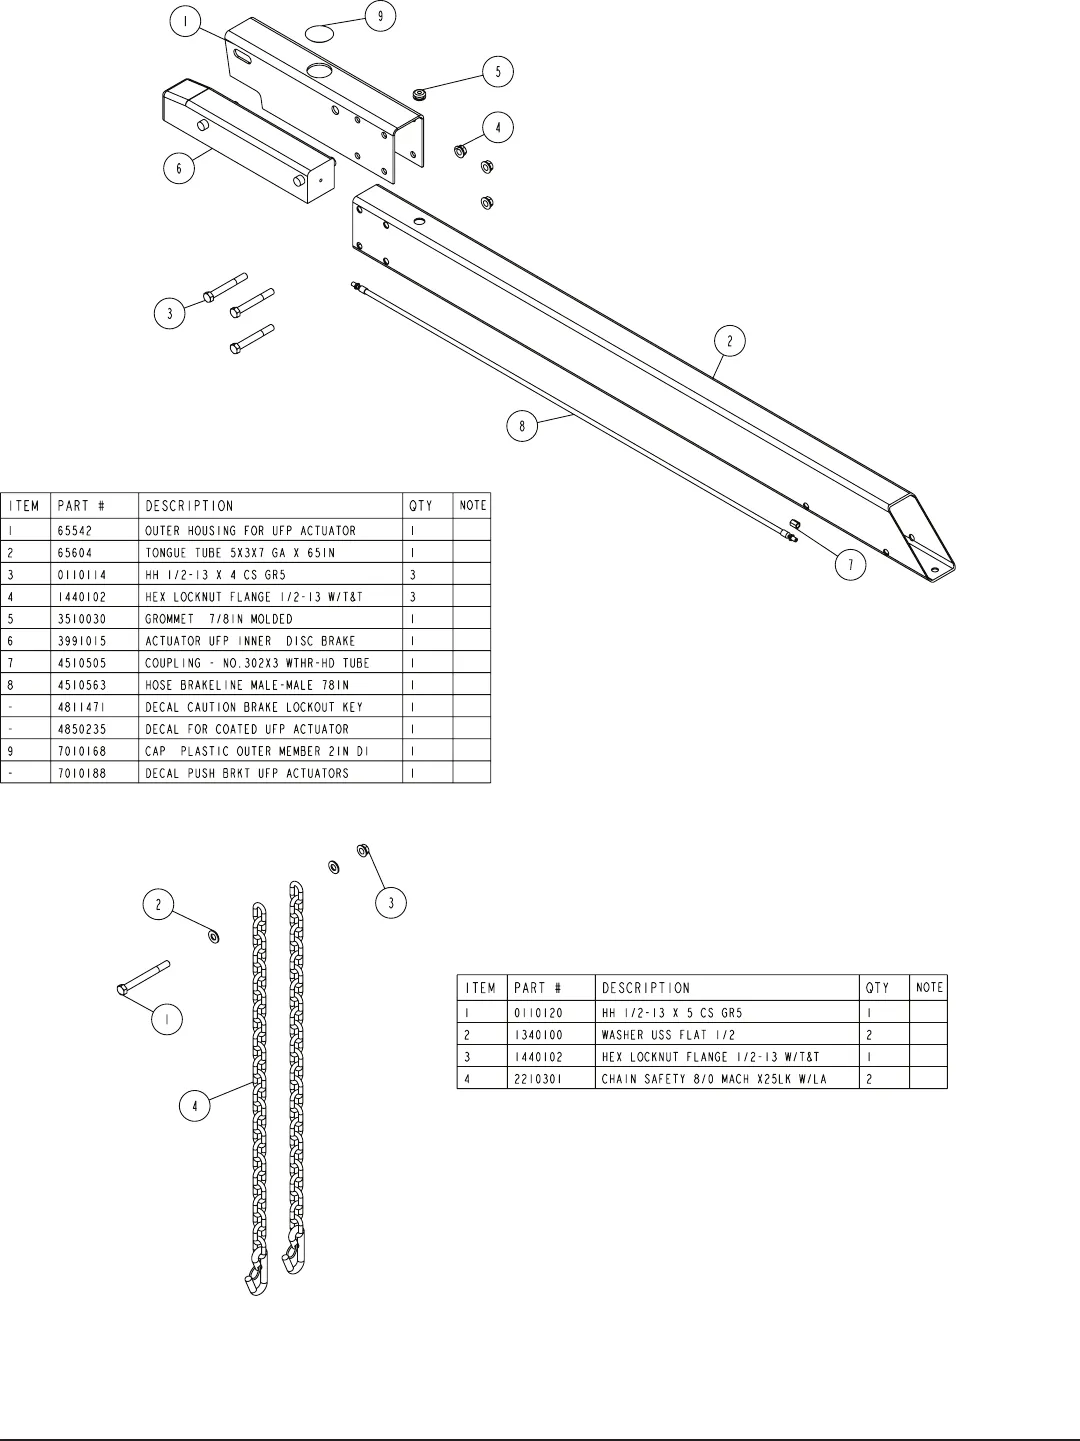
TONGUE
The tongue is shipped separate of the frame. Locate the appropri-
ate tongue and install by sliding it in the front of the tongue chan-
nel.
Align the holes in the tongue with the holes in the tongue channel.
Install the ½” x 4” hex bolt in the front cross hole and secure with a
½” ange lock nut.
Place the wire harness and the brake line through the hole pro-
vided in the tongue cover plate. See Detail A in Diagram A. Secure
the tongue cover plate in position with the same ½” x 1 ½” hex bolt
that secures the back of the tongue to the tongue channel of the
frame. Secure with ½” ange lock nut.
Plug the tongue wire harness ends into the frame harnesses by
matching colors and ends. Push the excess wire provided back into
the rear of the tongue.
WHITE GROUND WIRE INSTALLATION
Place the self-tapping screw provided through the round metal ring
on the white ground wire of the tongue harness located at the rear
of the tongue. Attach the ground wire to the main frame by driving
the screw in the hole provided next to the tongue channel of the
frame. This will assure a positive ground for the lighting.
Diagram B
SAFETY CHAINS
Locate the 1/2”x 5” hex bolt. Slip the bolt through a ½” at washer,
then place through the last link of one of the safety chains. Insert
the bolt into the hole provided in the drop portion of the tongue until
it comes out the hole on the other side of the drop tongue. Place
on a second safety chain, a ½” at washer, and secure with a ½”
ange lock nut. Tighten.


