MY BOOK
USER MANUAL
CONNECTING THE DRIVE AND GETTING STARTED – 8
2. Read the license agreement and click Accept to continue.
3. Wait for the software installation to complete. This could take several minutes.
4. After the software installation completes:
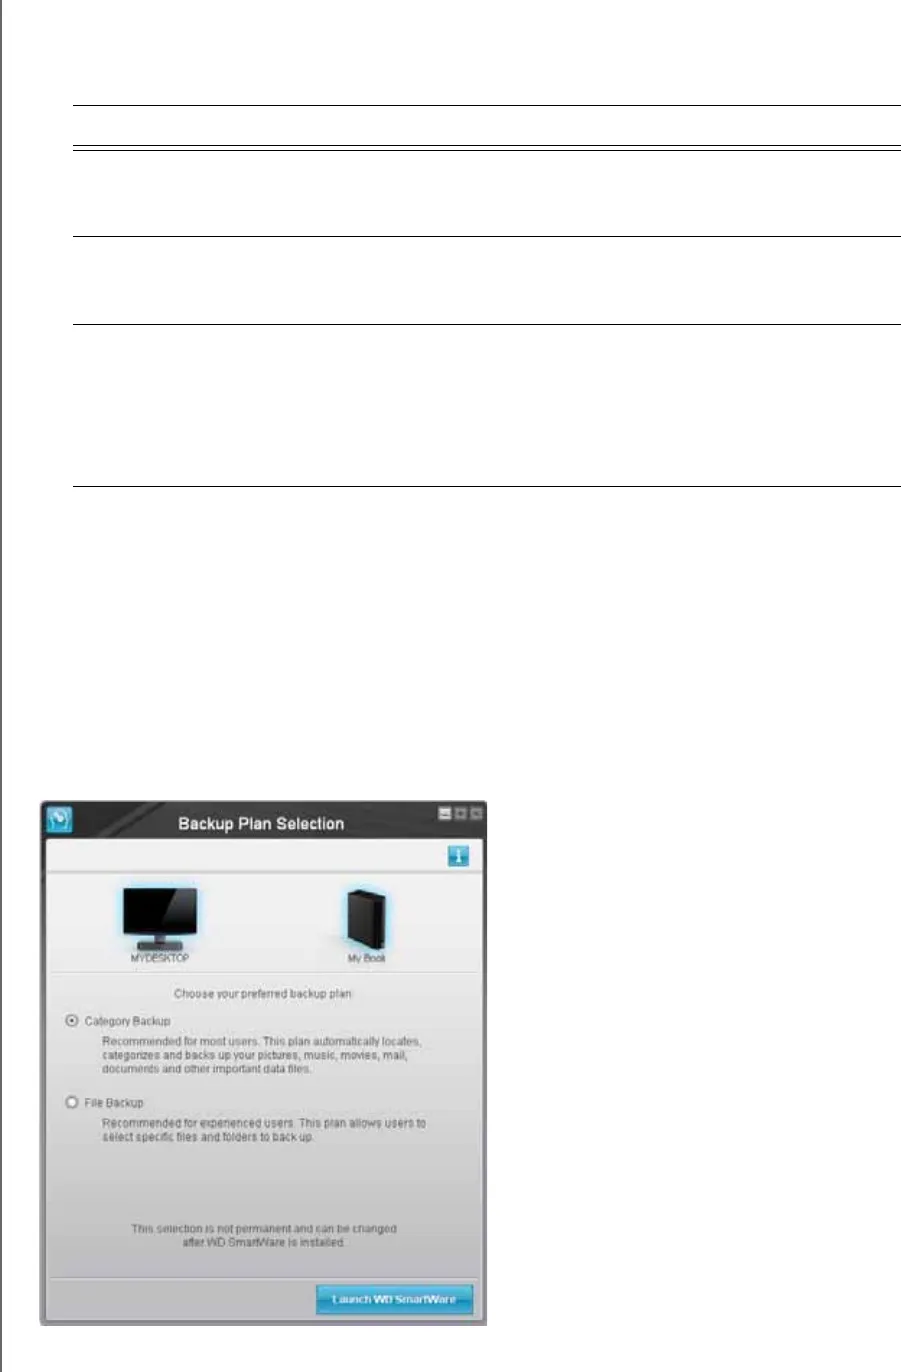
5. On the initial Backup Plan Selection screen:
a. Select the option for the type of backup that you want to run:
• Category Backup—Finds and backs up all of the files of the selected
categories on your computer.
• File Backup—Backs up files or folders that you select from a folder view of
your computer’s internal hard drive.
b. Click Launch WD SmartWare to display the initial Backup screen. See Figure 6
on page 9 and proceed to step 6 on page 10.
IF you clicked . . . at step 1, THEN the WD SmartWare software displays . . .
Install WD SmartWare The initial Backup Plan Selection screen for selecting the
type of backup that you want to perform. See Figure 5 and
proceed to step 5.
Install Drive Settings The initial Drive Settings screen for securing and
registering your drive. See Figure 7 on page 10 and skip to
step 9 on page 11.
Retrieve a backup The WD SmartWare Home screen for accessing all
WD SmartWare functions. See Figure 8 on page 15 and
“Retrieving Backed Up Files” on page 37.
This completes the getting started procedure after
selecting Retrieve a backup.
Figure 5. Initial Backup Plan Selection Screen


