‘8,
1
‘REMOVAL
AND INSTALLATION
‘i
:With
referqnce to the figure, operate
as
follows:~
1.
Rembye
front right wheel and its
relevant
grave1
Iguard
0.
2.
,‘Disc?nnect
right side direction
indicator ~
~ 3. OpeLating,;from, engine
compart-
,’
ment,
rerhqve
press~fit
filler
inletfitting
‘~‘l@.
‘~
~,
;,
4.
Unscr;ew~Uppe,r
fixing screw
0.
#i,
5. !Opei.a$ng
froml
under wheel arch,
,,
unscrew~
+rew
0
and lower tank
0.
~:
,6.
Discomnect
level sensor
@
wir-
;~~
ing
)and
ki~ring
‘@
from
pump
‘0.
,;“7.
Disc@nekt
tube
cc>
from pump,
8,
remove
ta&
and drain
liquid.
1
‘8. If ndcessery, remove
pump
@
completd
$th
gasket
@
and
sensor
@
with
qssociated
gasket from tank
a,
‘,
9. ‘For ta& installation, reverse order
of
removal!
May
1988
PUMP
REMOVAL AND INSTALLATION
1. Remove tank.
2. With
reference
to figure, remove
covering
@
and pump
@
press
fitted into its relative gasket
@
3.
For pump installation, reverse or&-
er of removal.
WINDSCREEN! WASHER
LIQUID LEVEL SENSOR
REMOVAL AND INSTALLATION
As per figure, operate as follows:
1.
Disconnect tank
@
and lower it,
as stated at “tank”
pp
toi
step
0.
‘~
2.
Disconnect sensor
@
wiring and
‘,
remove it from tank.
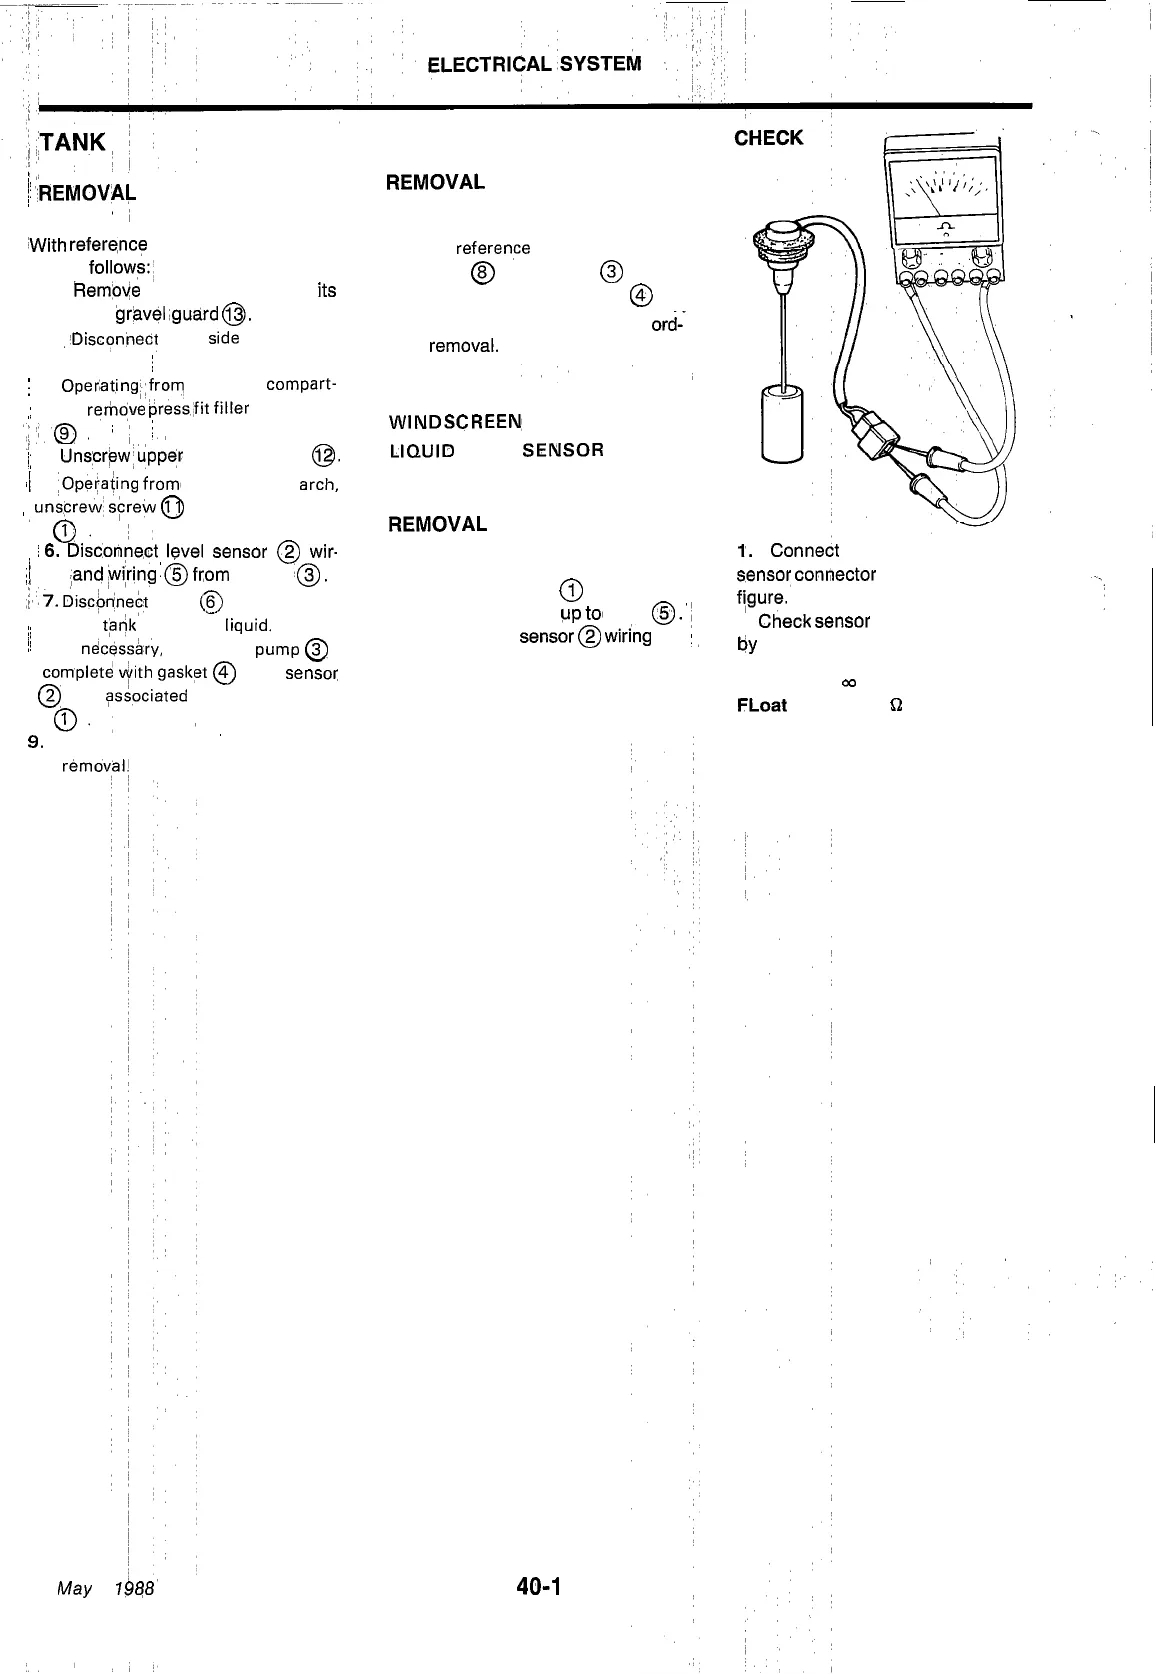
1.
Connect the two ends of tester to
sensor connecter by operating as per
f\gure.
2.
Check
sensor proper functioning
by
verifying the following.
3. Proceed to installation, operating
Float liftes:
00
in reverse order to re’moval.
FLoat
lowered: 0
D
40-l
6
PA333500883300


