3) °F or °C temperature unit (DAMP68 only);
4) AC or DC current measurement mode
(DAMP68 only)
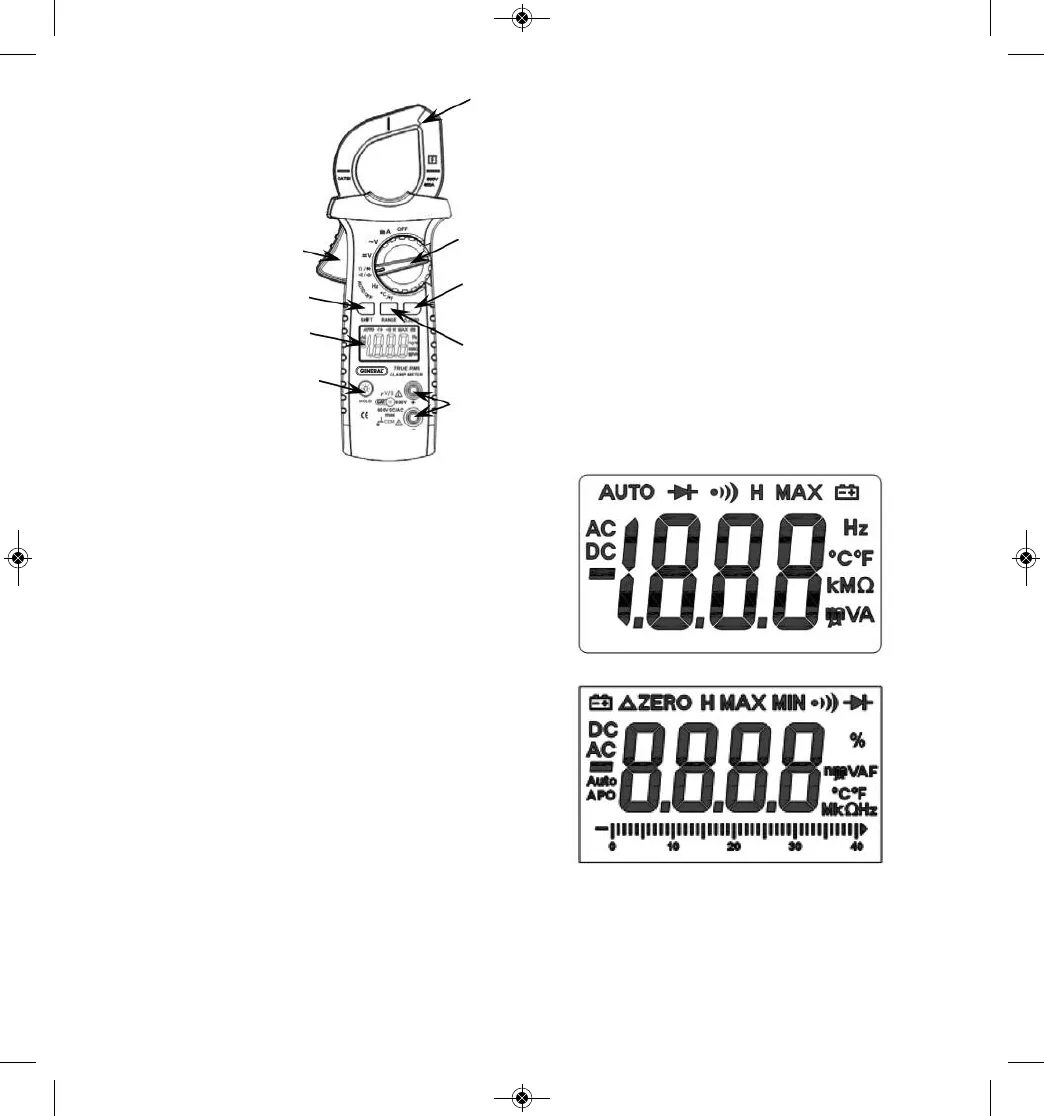
7.
HOLD
button (DAMP60);
RANGE
button
(DAMP68). On DAMP60, pressing this button
briefly holds/releases displayed measurement.
On DAMP68, pressing this button briefly
switches the meter from auto ranging mode
(default) to manual ranging mode. To return to
auto ranging mode, press and hold the
RANGE
button for 2+ seconds.
8. Clamp jaw release
9. Test lead sockets
DAMP60
DAMP68
76
1. 3-1/2 digit LCD
(DAMP60); 3-3/4 digit
LCD + analog bar
graph (DAMP68)
2. Clamp jaw
3. Function switch
4. Backlight button
(DAMP60);
Backlight/
HOLD
button
(DAMP68). On both
models, pressing and
holding this button for
2+ seconds turns
display backlight on
for 10 seconds. On
DAMP68, pressing
this button briefly
holds/releases
displayed
measurement.
5.
MAX
button (DAMP60);
ZERO
button
(DAMP68). On DAMP60, pressing this button
displays maximum value of displayed
parameter over time. On DAMP68, pressing
this button “zeroes out” the display (subtracts
the offset) before measuring DC current. In
auto ranging mode, pressing the
ZERO
button again displays the offset value.
6.
SHIFT
button (DAMP60 and DAMP68).
Press to select:
1) resistance measurement, diode check or
continuity check mode (DAMP60);
2) resistance measurement, diode check,
continuity check or capacitance measurement
mode (DAMP68);
3
2
5
7
9
4
1
6
8
Fig. 1. The controls,
indicators and
connectors of the
DAMP60 and DAMP68
Fig. 2. All possible display indications on the
DAMP60 (top) and DAMP68 (bottom)