7
745-847-C1-001 Rev. B (10/2013)
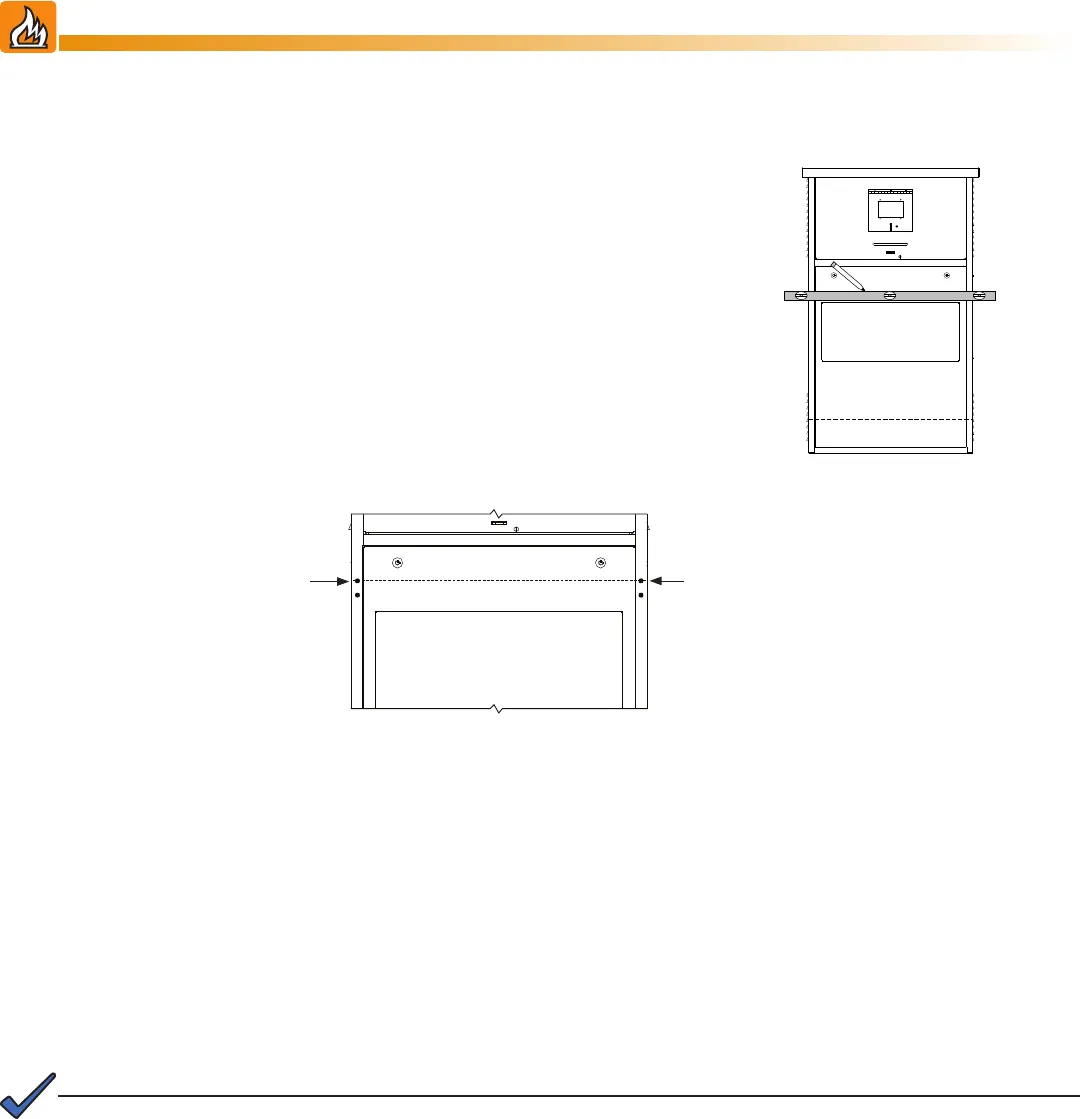
1. Use a 4-ft level to mark the front of the enclosure at the
height indicated for the enclosure (see Fig. 2-1).
2. Measure from the sides and mark the holes with a center
punch. These will be the top holes used by the side
brackets.
3. Remove the door.
4. Place cardboard or a similar material behind the door jamb
to protect the electronic equipment from the metal shavings
created while drilling. Use a vacuum cleaner to remove the
shavings when drilling is complete.
5. Drill the holes using a 9/32" drill bit.
Fig. 2-1, Marking Guide Lines
Fig. 2-2, Drill Holes
Guide Line
Drill Holes
See Diagrams
for Specic
Dimensions
Drill
Holes
2.0 Installation
This procedure applies to each of the supported enclosures. Refer to Section 2.1 Dimensioned Enclosure
Drawings for specic information pertaining to the enclosure onto which the kit(s) will be installed.
All enclosures require installation of both side brackets and lock brackets. The side brackets hold the security bar,
and the lock brackets hold the security lock (refer to Figures 2-3 and Figure 2-4).
6. Line up the top hole of the side bracket with the hole drilled in the enclosure in step 5. The side bracket
provides a template to accurately mark the bracket’s bottom hole locations.
7. Mark the bottom holes with the center punch.
8. Drill the bottom holes of the side brackets using a 9/32" drill bit.
9. On the door removed in step 3, measure and mark the top hole locations for the lock brackets and drill using
a 9/32" drill bit.
10. Line up the top hole of the lock bracket with the hole drilled in the door in step 9. The lock bracket acts as a
template.
11. Mark the locations of the bottom holes with the center punch and using a 9/32" drill bit, drill the bottom holes.
NOTE:
Where necessary, use the utility knife to trim and remove insulation from inside the door.
A gas line runs behind the door jamb on the 5K generator enclosure (CE Series). Turn off the gas prior
to installing the security bar. Be careful not to puncture or damage the line. Upon completion of the
installation procedure, turn gas on and perform a leak test before leaving the site.
WARNING! FIRE HAZARD


