1 of 6
Power
Field Installation Instructions,
Portable Generator Wheel Kit and Handle Assembly
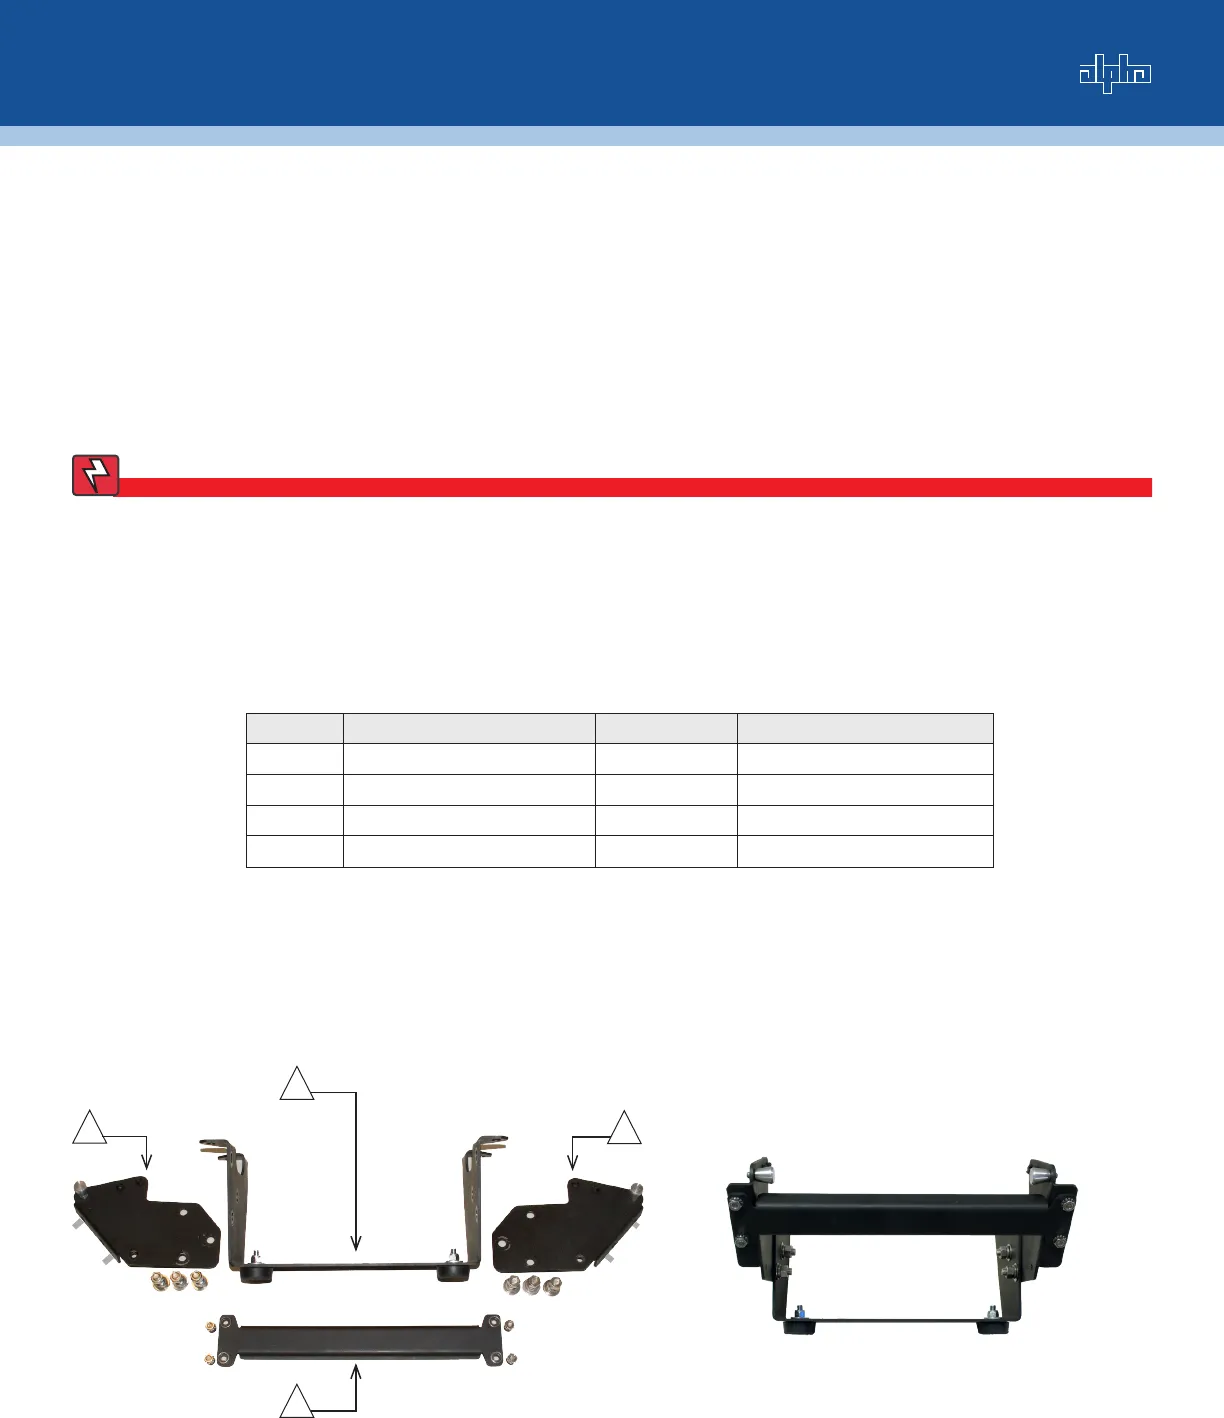
Fig. 2, Completed Foot Bracket Assembly
WARNING!
Verify the fuel and oil tanks are empty prior to installing the wheel/handle kit. Refer to the Honda
engine owner’s manual for details. If the fuel and oil tanks are not empty, raise the generator and
provide adequate support before performing the installation.
Front Foot Bracket and Cross Brace Assembly:
Requires the following:
Quantity Part description Part number Tool required
6 3/8-16 x 1" hex bolt 630-398-12 9/16" open-end wrench
12 3/8" lock washer (SST) 633-300-12 N/A
6 3/8" hex nut 634-020-12 9/16" socket
4 1/4-20 hex nut 634-059-12 7/16" wrench
1. Use 9/16" wrench and socket and 3/8" hardware to attach left (B) and right (C) handle brackets to foot
bracket (A).
2. Place the cross brace (D) over the four PEM studs on the left and right handle brackets. Secure in place
with a 7/16" wrench and four captive-star washer nuts.
This set of procedures details the removal of the existing front and rear foot brackets and replacement with a wheel
assembly and front foot/transport handle assembly. The procedures contain instructions for:
Front foot bracket and cross brace assembly
Foot bracket removal and replacement
Handle installation
Installation of optional cable bag
•
•
•
•
B
A
C
D
Fig. 1, Foot Bracket and Cross Brace Components


