Installation
Remove all protective packaging for transit be-
fore using for the first time. Keep in case nee-
ded for future transit: Transporting a non-se-
cured appliance may damage internal compo-
nents and cause leakages and malfunctions.
The appliance can also be damaged through
physical contact.
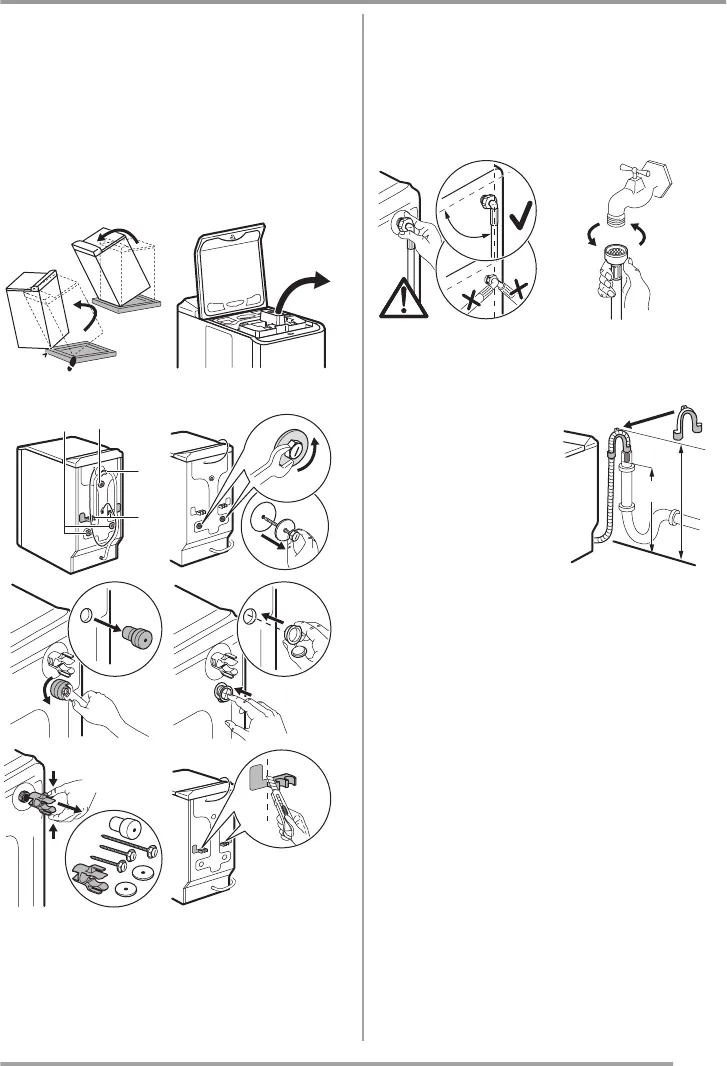
Unpacking
2
1
Untying
AB
C
D
A
1
2
B
2
1
2
1
1
C
D
To install your washing machine at the same
level as surrounding furniture, proceed as
shown on picture D.
Water supply
Install the supplied water inlet hose at the rear
of your washing machine by proceeding as fol-
lows. Do not reuse an old hose. The water inlet
hose can not be extended. If it is too short,
please contact the after-sales service.
90
O
90
O
Open the water inlet tap. Check there are no
leaks.
Drainage
Fit the U-piece on the
drainage hose. Place
everything in a drainage
point (or in a sink) at a
height of between 70
and 100 cm. Ensure it
is positioned securely.
Air must be able to en-
ter the end of the hose,
to avoid any risk of siphoning.
The drain hose must never be stretched. If it is
too short, contact an engineer.
Electrical connection
This washing machine must only be connected
in single-phased 230 V. Check the fuse size:
10 A for 230 V. The appliance must not be
connected with an extension lead or multi-plug
adaptor. Ensure that the plug is earthed and
that it is in accordance with current regulations.
Positioning
Position the appliance on a flat and hard sur-
face in a ventilated location. Ensure the appli-
ance does not come into contact with the wall
or other furniture. Accurate levelling avoids vi-
brations, noise and prevents the appliance from
moving when running.
max
100 cm
min
70 cm
11
www.zanussi.com


