Xerox 490/980 Color Continuous Feed Printing System PC-GUI Introduction and Setup
Printer & PC GUI Guide 1-3
Configure Network
1. Select the [My Network Places] icon on the Desktop, right-click and select [Properties]. The
Network Connections screen appears.
2. Select the [Local Area Connection] icon on the Network Connections screen, right-click on
it and select [Properties]. The Local Area Connection Properties dialog box appears.
3. Select [Internet Protocol (TCP/IP)] and select [Properties]. The Internet Protocol (TCP/IP)
Properties dialog box appears.
4. Select [Use the following IP address]. Fill in the IP address and Subnet mask and select
[Advanced....]. The Advanced TCP/IP Settings dialog box appears.
5. Select the [DNS] tab, select to clear Register this connection’s addresses in DNS and select
[OK]. The Advanced TCP/IP Settings dialog box closes.
6. Select [OK] in the Internet Protocol (TCP/IP) Properties dialog box and Local Area
Connection Properties dialog box. The network settings are now completed.
Install Software
1. Place the 490/980 Color Continuous Feed Printing System CD-ROM into the remote PC’s
CD-ROM drive.
2. Double-click [setup.exe]
3. Select [Next].
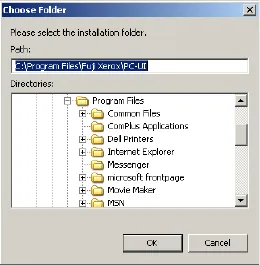
4. To reset the destination folder to the default [C:\], select [Next]. To install the software to a
folder other than the default, select [Browse...] to open a dialog box and specify a
destination folder. Select [Next].
5. Select a program folder to add program icons and select [Next]. The default program folder
is \Xerox.
6. Select [Next]. The installation process will begin.
7. The InstallShield wizard complete dialog will appear. Select [Finish].
When all of the requested operations are completed, remove the CD-ROM from the CD-ROM
drive. Keep the installation CD-ROM in a safe place. You may need it later to recover from errors
running the software or to upgrade it.


