Date and Time Display
ADJ. (Adjust) DATE/TIME
Button ^ Button
Display in Viewfinder
Month
Day
Year
AM 12:00:00
\ I /
1. 1.1993
- Hours and
AM or PM
-Minutes
Seconds
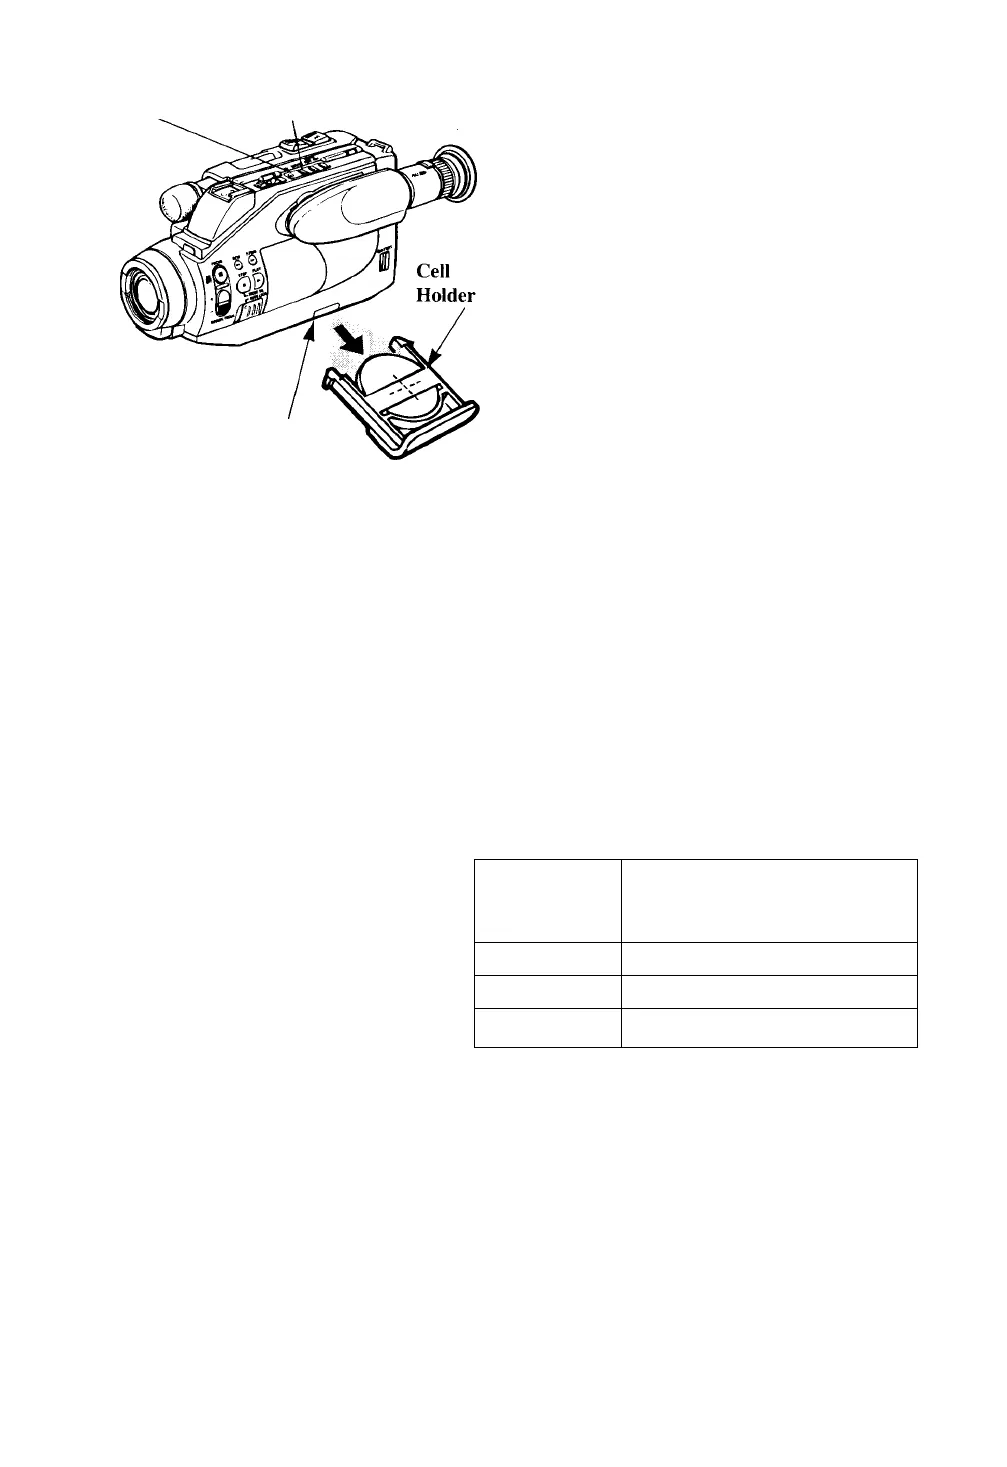
Cell Compartment
Install the Lithium Cell for Time and Date Display
1. Pull out the cell holder.
2. Insert the cell with the “+” terminal up.
3. Replace the cell holder.
Note: The lithium cell should last about one
year. When it expires, the date display shows
“88:88”. Reset the date and time after
replacing the cell.
CdUtions: Lithium cell battery. Must be disposed of properly.
Never handle punctured or leaking cells. May cause burns or personal
injury.
Keep out of the hands of children. Can cause death or injury if
swallowed. If swallowed, consult a physician immediately for
emergency treatment. ,
The lithium cell used in this device may explode resulting in a fire or
chemical burn if mistreated. Do not recharge, disassemble, heat above
212^ (100° C), or incinerate. .
Never use metallic tweezers to hold the cell, and never short circuit the
+ and - sides of the battery.
Set and Record the Time and Date
Record the Time and Date
Whenever time and date or date appear in the
viewfinder, it will be recorded on the tape.
Press the DATE/TIME button to display and
remove the time and date.
Press
DATE/TIME
Button
To Display in Viewfinder
and Record on the Tape
Press Once
Date Only
Press Again
Date and Time
Press Again
Neither Date nor Time
Set the Time and Date
1. Install the lithium cell as described above.
2. Attach a power supply to the camcorder. Press
and hold the small button on the POWER switch
while you slide it to CAM. Place the ON/POWER
SAVE lever in ON.
3. Use a straightened paper clip or pen to press and
hold the ADJ. (adjust) button for about one second.
The reset date (1.1. 1993) and time (AM
12:00:00) will appear in the viewfinder.
4. The month will flash. Repeatedly press DATE/
TIME button until the correct month appears.
5. Then, press the ADJ. button. The flashing cursor
will move to the next part of the display.
6. Repeat steps 4 and 5 until you have entered the
correct month, day, year, hour including AM or
PM, and minute.
7. After setting the minutes, press the ADJ. button to
start the seconds. The seconds counter will start
with “00".
To correct the date or time after the clock has been
started, repeat steps 3-7.
22


