Operating Instructions Alarm/Light Module XWA11V
01/14 Rev F. 142498 Page
Occupancy Sensor for Light Operation
Installation:
1) Determine best location for sensor. Ideal
location is above door to monitor traffic entering
the work area. Limit false tripping by keeping
away from fans and vent ports.
2) Set the DIP switches to match operating
requirements. (Setting options are on next
page) Record setting and date on last sheet on
this instruction sheet and keep for reference.
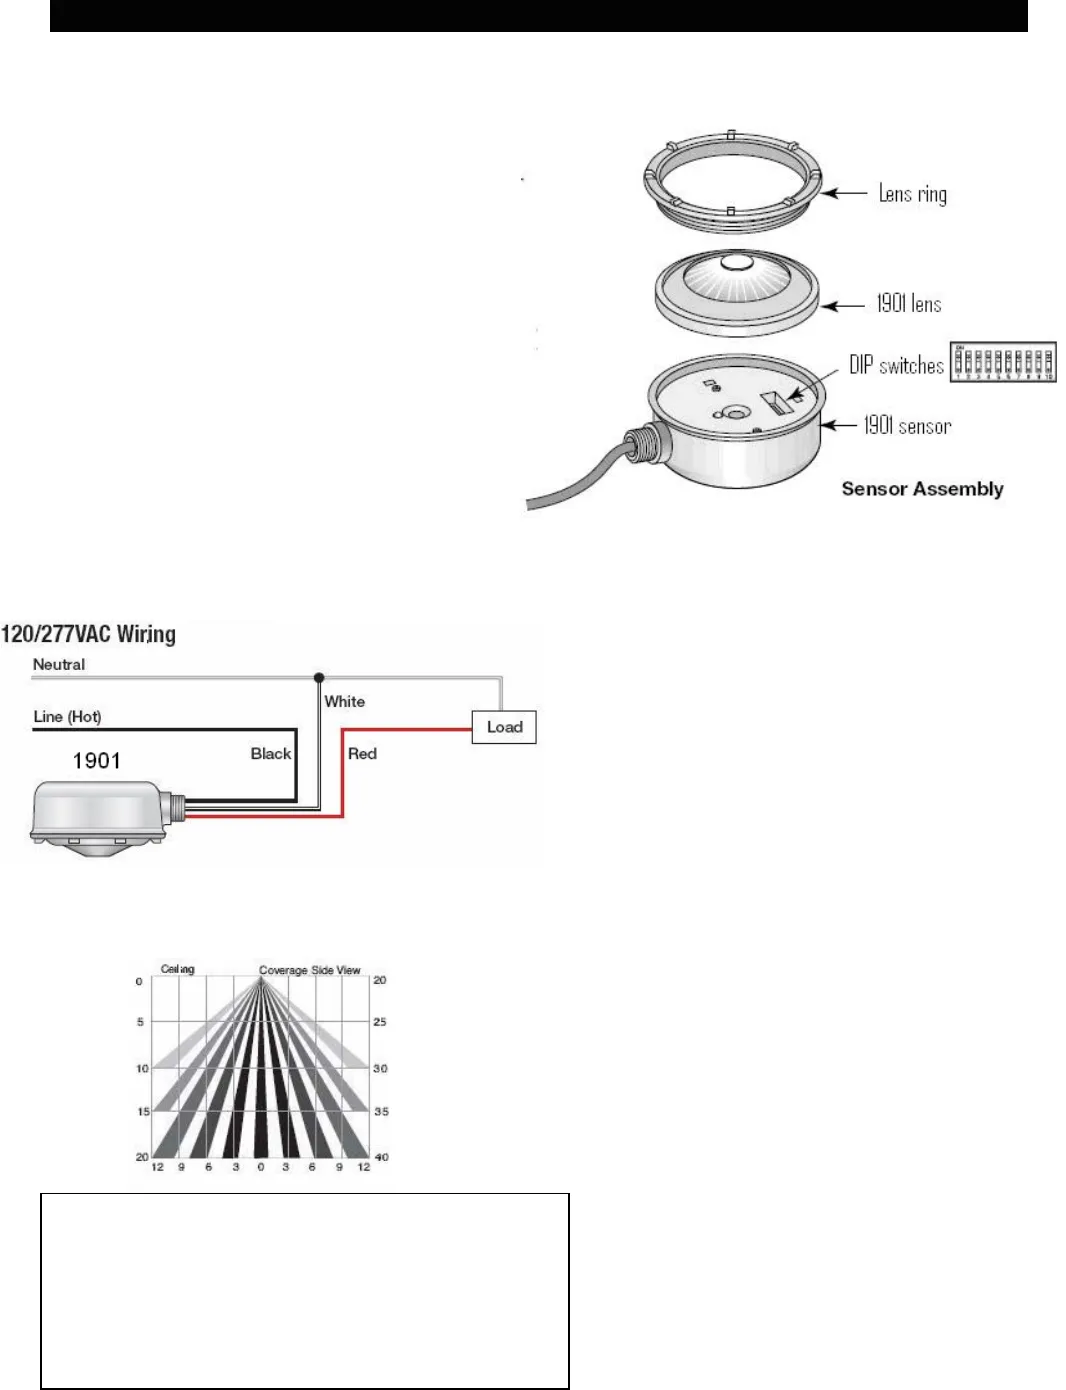
3) Thread the ½ NPT arm into junction box or into
light fixture housing.
4) Connect the line voltage, neutral and load wires
to the sensor leads as shown in wiring
Diagram.
5) With lens off, temporarily cover sensor with
towel or aluminum foil. Apply power and the
sensor will turn ON for up to 2 minutes and
automatically turn OFF. Remove towel or
aluminum foil and wave hand in front of sensor.
Determine if the ON time is adequate for
application and/or make any final adjustments to DIP switches.
6) Attach the Lens as shown in the sensor assembly drawing.
Specifications:
Voltage: 120 / 277 VAC @ 60 Hz
Load: 120 VAC / 0- 800W ballast
277 VAC / 0-1200W ballast
Time Delay: 15 seconds – 30 minutes
Coverage:
1901000005: 24’ dia at up to 20’
1901000007: 24’ dia at 20’ - 40’
Weight: 0.28 lbs [130 grams]
Temperature:
Min: -40 °F [-40 °C]
Max: 131 °F [55 °C]
Electrical Connection:
½” conduit connection
13 ½” 18 AWG wire
Wire temperature 105 deg C max *
*Some incandescent fixtures may require
higher temperature wires. Remote mounting
or adding fiberglass sleeves over the wires
may be required.
Approval Standards: IP65
cULus Wet location – Indoor Use Only
PIR Sensitivity (Switches 1 – 2)
Low Bay
Sensor
High Bay
Sensor
• All installation must comply with local and National
Electrical Codes.
• The manufacturer assumes no responsibility for
improper installation or application.
• Turn off electricity at the breaker or fuse box before
installation.


