RevA
MFD-50 Lift Series Installation
6/7/2005
Figure B
4.) Determine the microphone location and signal pathway and drill a hole in the top plate large enough
to accommodate all the required cabling. Removing the connector on the microphone cable will
allow for a smaller hole.
Optional: For a more seamless appearance, have the mill worker attach a matching piece of wood
or veneer from the table to the top plate. Another wood surface may be attached in the same
manner to the plate in the “down” position as well. ½” is the maximum recommended cover
thickness. If you will be performing this modification, do not permanently attach the wood to the
plate until instructed to do so.
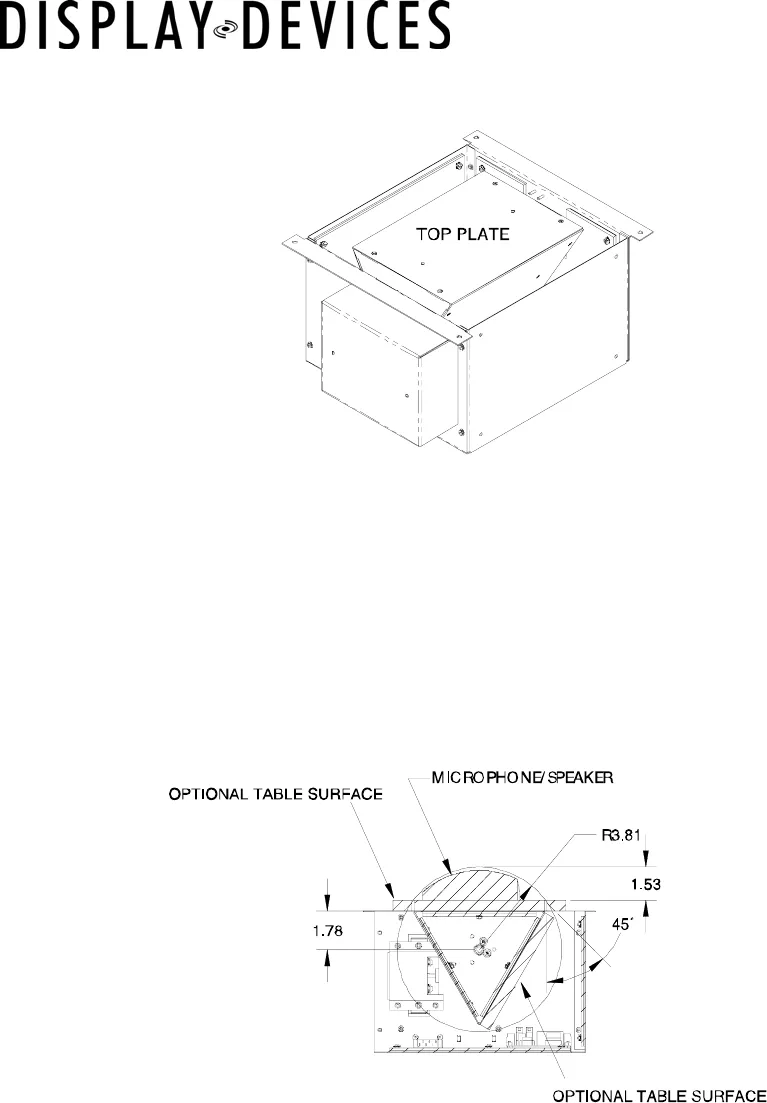
Figure C
5.) Run the necessary wiring from the microphone/speaker through the newly-drilled hole(s), through
the triangular pivot, and out the side of the unit.
6.) Use Velcro, double-stick tape, or a similar product to attach the microphone/speaker to the top plate
or wood surface. Depending on the equipment you are using, it might be easier to connect the
wiring before attaching the microphone or speaker. Then, reattach the top plate to the assembly.
If you are adding the wood cover, make sure there is enough clearance to allow the device to rotate
fully. Once you have verified this, attach the wood to the plate.


