29
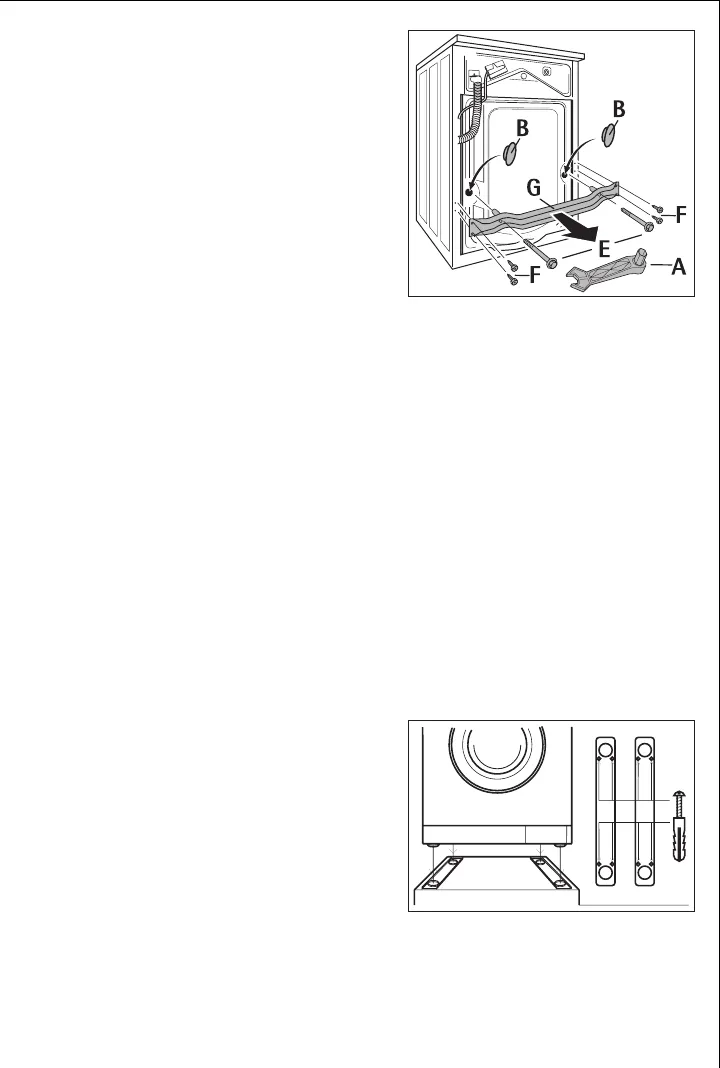
5. Unscrew and remove two screws E
using special spanner A.
6. Unscrew and remove four screws F
using special spanner A.
7. Remove transit bar G.
8. Screw in the four screws F again.
9. Seal the two big holes using sealing
caps B.
Important! Press all sealing caps B
(2 off) and C (1 off ) in firmly, so
that they snap into place. (Splash
protection).
Where to install
Important! The appliance must not be used in a room where there is a
danger of frost. Frost damage or impaired operation! Frost damage is
not covered by the warranty.
• The surface on which the appliance is to be installed must be firm
and level. Do not install the appliance on carpets or on soft floor cov-
erings.
• The surface on which the appliance is to be installed must be clean
and dry and free from coverings that move, so that the appliance
does not slide.
• If the location in which the appliance is to be installed is fitted with
small-format tiles, put a rubber mat (available in the shops) under
the appliance.
If the appliance is to stand on a
plinth:
In order for the appliance to be se-
cure on the plinth, fixing plates*)
must be mounted, into which the
appliance is inserted.
If the appliance is to stand on floors that vibrate, e. g. floors of
wooden joists with deal boards:
If possible, install the appliance in one corner of the room.
1. Screw a water-resistant wooden board (at least 15 mm thick) onto at
least 2 of the floor joists.


