2
1D
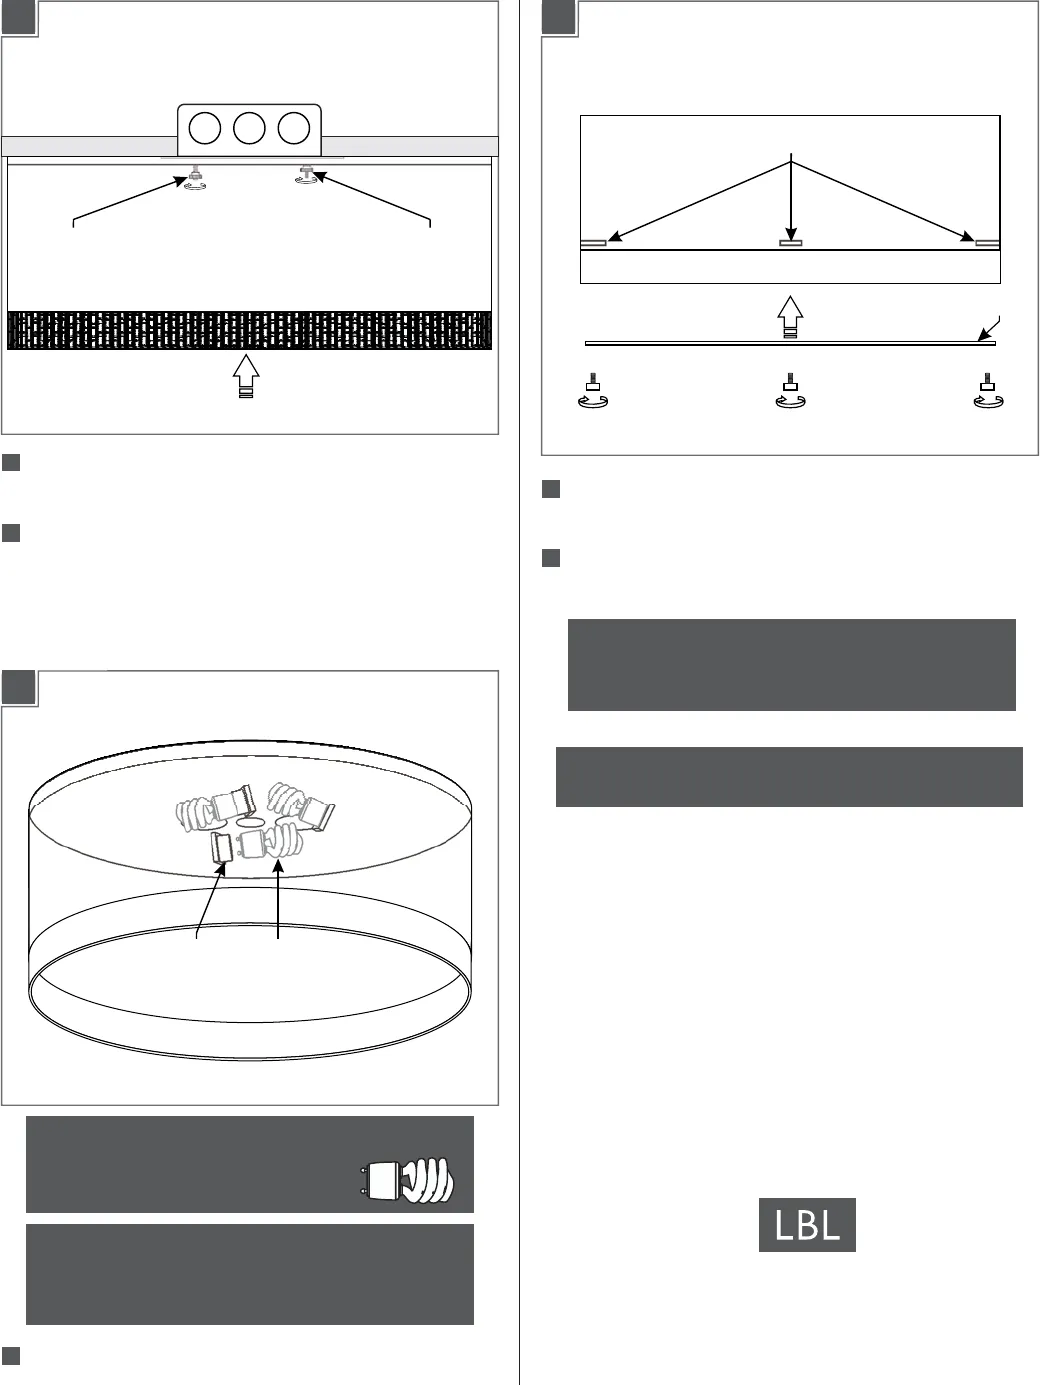
Place all wires and wire nut connections inside the
electrical box.
Mount the fixture to the ceiling by installing it onto
the crossbar and securing it tightly with the knurled
nuts.
6
KNURLED NUT KNURLED NUT
7
2A
Push the lamp pins into the large portion of the socket
slots and rotate it clockwise to lock it in place.
CAUTION: To reduce the risk of a burn or electric
shock during re-lamping, disconnect the power to
the fixture.
1
Install the Lamp and Diffuser
2B
2
Install the diffuser and align the holes to the pegs on
the shade.
Secure the diffuse by reinstalling and tightening the
three thumb screws.
2
3
NOTE: To re-lamp, reverse the section 2 instructions
to remove the diffuser and gain access to the lamps
and sockets.
PEGS
DIFFUSER
7400 Linder Ave, Skokie, IL 60077
800.323.3226 - 847.626.6300
www.lbllighting.com
© 2012 LBL Lighting.All rights reserved.The "LBL Lighting" graphic is a
registered trademark of LBL Lighting. LBL Lighting reserves the right to
change specifications for product improvements without notification.
A Generation Brands Company
SAVETHESE INSTRUCTIONS!
Use Volt, Type Gu24 BaseMAX 27120 Watt
Self Ballasted Spiral Compact
Fluorescent Lamps.
LAMPSOCKET
Statement of Warranty
LBL Lighting warrants all products manufactured to
be free from defects in material and workmanship
under normal use for 3 years after the date of
original purchase. This warranty only applies when
components, including power supplies, have been
provided by LBL Lighting.
Upon confirmation of a defect or failure, at our
discretion we will repair or replace the item or will
refund your purchase price if repair or replacement is
not possible or practical. Our warranty covers only
the product itself; we will assume no liability for
labor costs, installation costs, or other losses.


