E-9
Menu Screen Names and Functions
When a computer on which the “PLUS TOOLBOX” dedicated software is installed is connected to the
Captureboard, the “PLUS TOOLBOX” main menu appears.
②
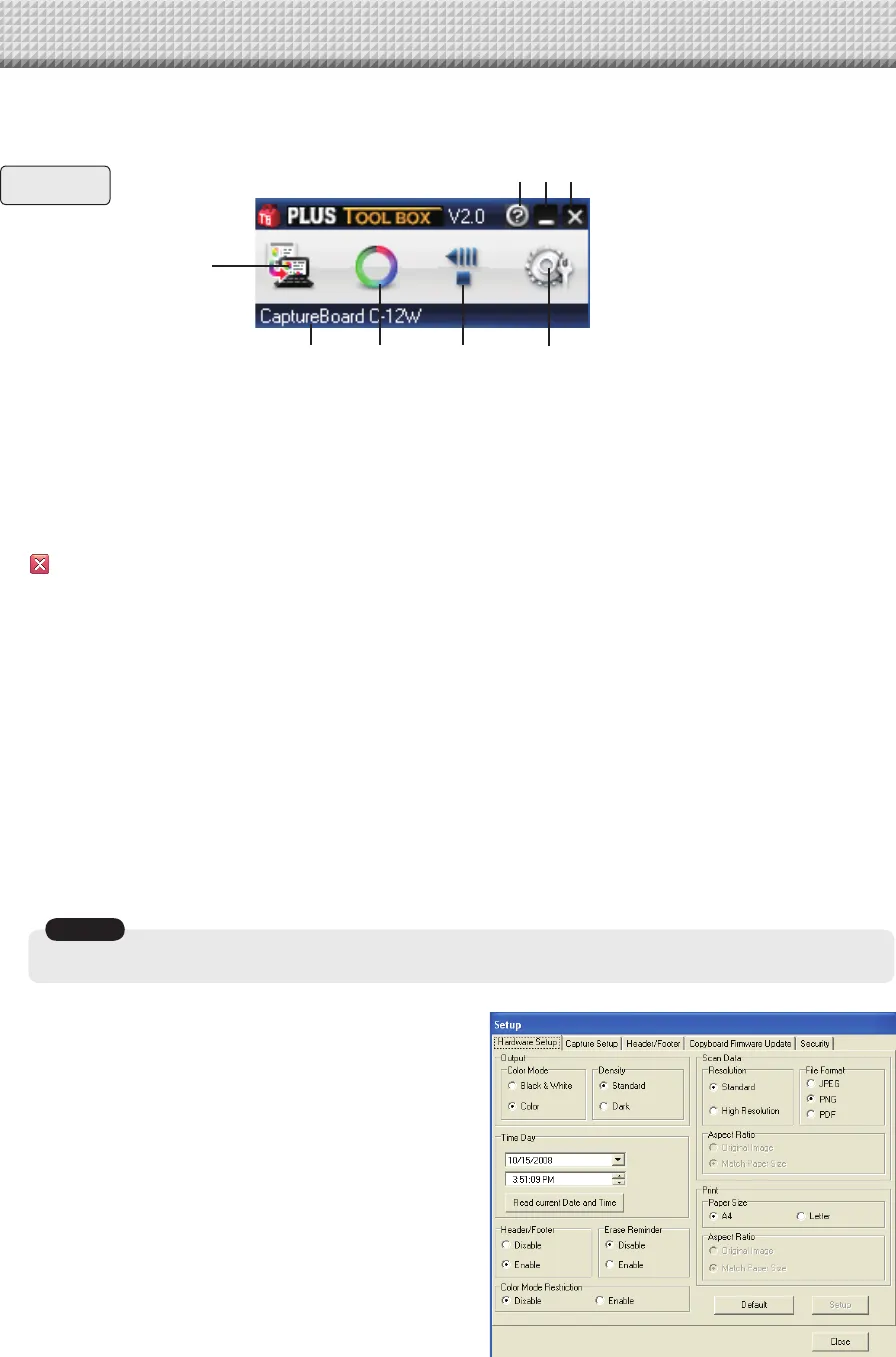
Main menu
Menu
①
Scan button
Displays the projection image superimposed screen.
Yes: Starts the capture of the image (projected by the projector) that is displayed on the personal
computer screen, and the hand drawn image of the sheet surface.
No: Starts the capture of only the hand written and drawn image of the sheet surface. There will not
be superimposing with the image projected by the projector.
(Close): Closes the projection image superimposed screen.
②
Mark button
Switches the display of the positioning
○
marks of the projection image.
Each click switches between “Display” and “Hide”.
The default setting is “Display”.
③
Feed/Stop button
Scrolls the sheet one page to the left. When pressed while scrolling, the sheet returns to the start position.
Hardware Setup:
Set the Captureboard’s operating environment
here. See page E-20.
④
Setup button
Click this to display the settings screen.
The settings screen consists of the “Hardware Setup”,
“Capture Setup”, “Header/footer”, “Copyboard
Firmware Update” and “Security” tabs.
Click a tab to switch to the corresponding screen.
Notice
• To set the “Security” settings, contact you nearest PLUS Vision sales office, dealer or store.


